Thank you for using the English version of the JTL-Guide!
We are currently still building up the English documentation; not all sections have been translated yet. Please note that there may still be German screenshots or links to German pages even on pages that have already been translated. This guide mostly addresses English speaking users in Germany.
We are currently still building up the English documentation; not all sections have been translated yet. Please note that there may still be German screenshots or links to German pages even on pages that have already been translated. This guide mostly addresses English speaking users in Germany.
Creating an FTP export schedule
Your task/initial situation
You would like to receive regular and automated reports from the JTL-Fulfillment Network, for example to import them into another system. To do this, configure an export schedule.
Prerequisites
Creating an FTP export schedule
- Log in to the Fulfillment Portal with your access data (Go to FFN Portal).
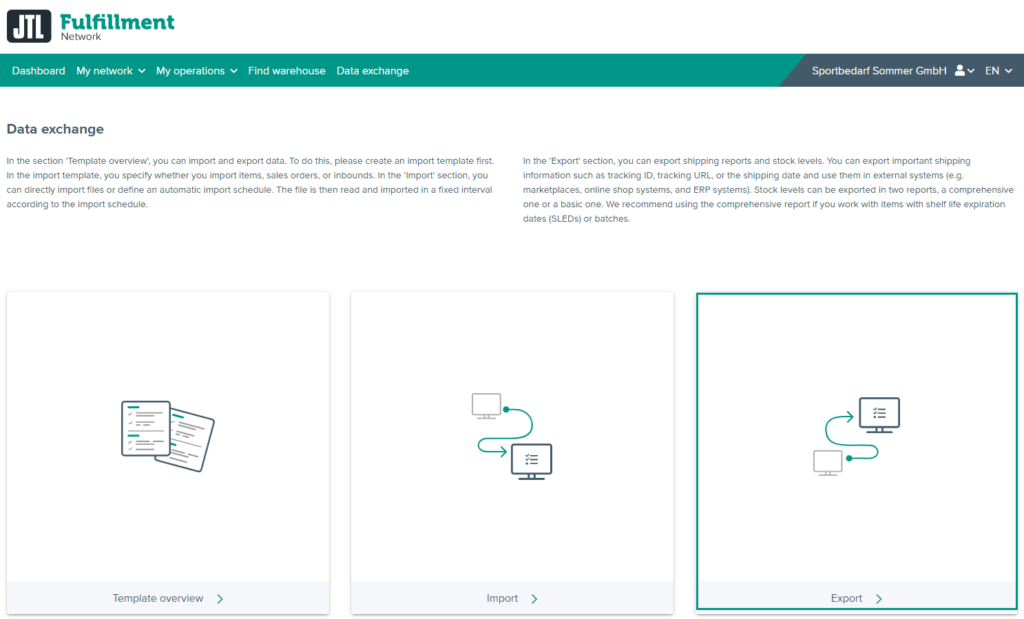
- Click on the menu item Data exchange. The page Data exchange opens.
- Click on Export. A page with reports and export schedules opens.
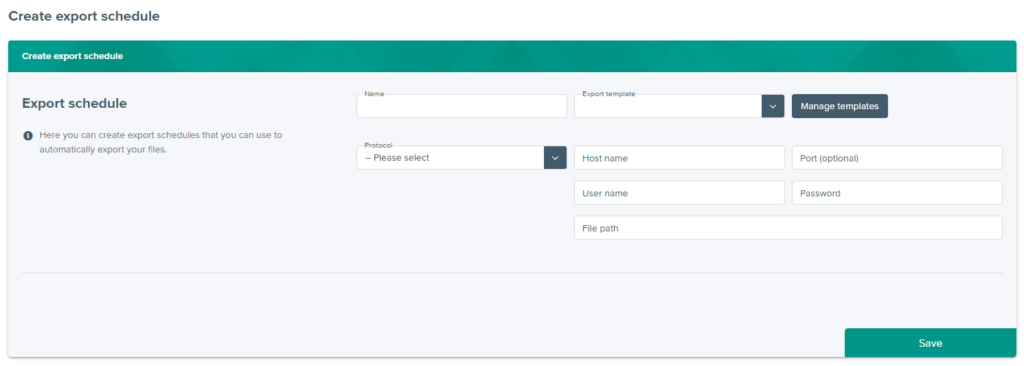
- Click on Create export schedule. The page Create export schedule opens.
- Give the export schedule a name.
- Under Export template, select which template should be used for the export. Via the Manage templates button, you can open a list of all existing templates and can edit them if necessary.
- Under Protocol, select which protocol is to be used to reach your server.
- Enter the address/port of your server into Host name and Port.
- Into File path, enter the folder and file name under which the export is to be stored.
- Into User name and Password, enter the access data of the user you created for the export schedule.
- Click on Save to finish the creation of the export schedule.
Related topics


