We are currently still building up the English documentation; not all sections have been translated yet. Please note that there may still be German screenshots or links to German pages even on pages that have already been translated. This guide mostly addresses English speaking users in Germany.
Remote Desktop Hosting
What is Remote Desktop Hosting (RDP)?
With JTL-Wawi Hosting (as opposed to JTL-Shop Hosting), both JTL-Wawi and the JTL-Wawi database are installed on one of JTL’s high-performance servers. All workstations in your company establish an online connection to our servers via Remote Desktop Protocol (RDP). This approach allows for the highest possible flexibility. You can access your data from anywhere. The requirement for this is an internet connection (DSL 6000 or more recommended) and an end device on which an RDP client can be installed (e.g. Windows or Linux computer, Mac, Android tablet, etc.).
Procedure
- Apply for JTL-Wawi Hosting via the following link.
- Select one of the JTL-Wawi Hosting options and click Zur Bestellung (Go to order). Complete the ordering process.
The processing of your hosting request usually takes two workdays.
- Transferring the database or creating a new one
In the application form, you have the option to choose between a database transfer or creating a new one.
Carrying out a data transfer
The data transfer can be broken down into the following steps:
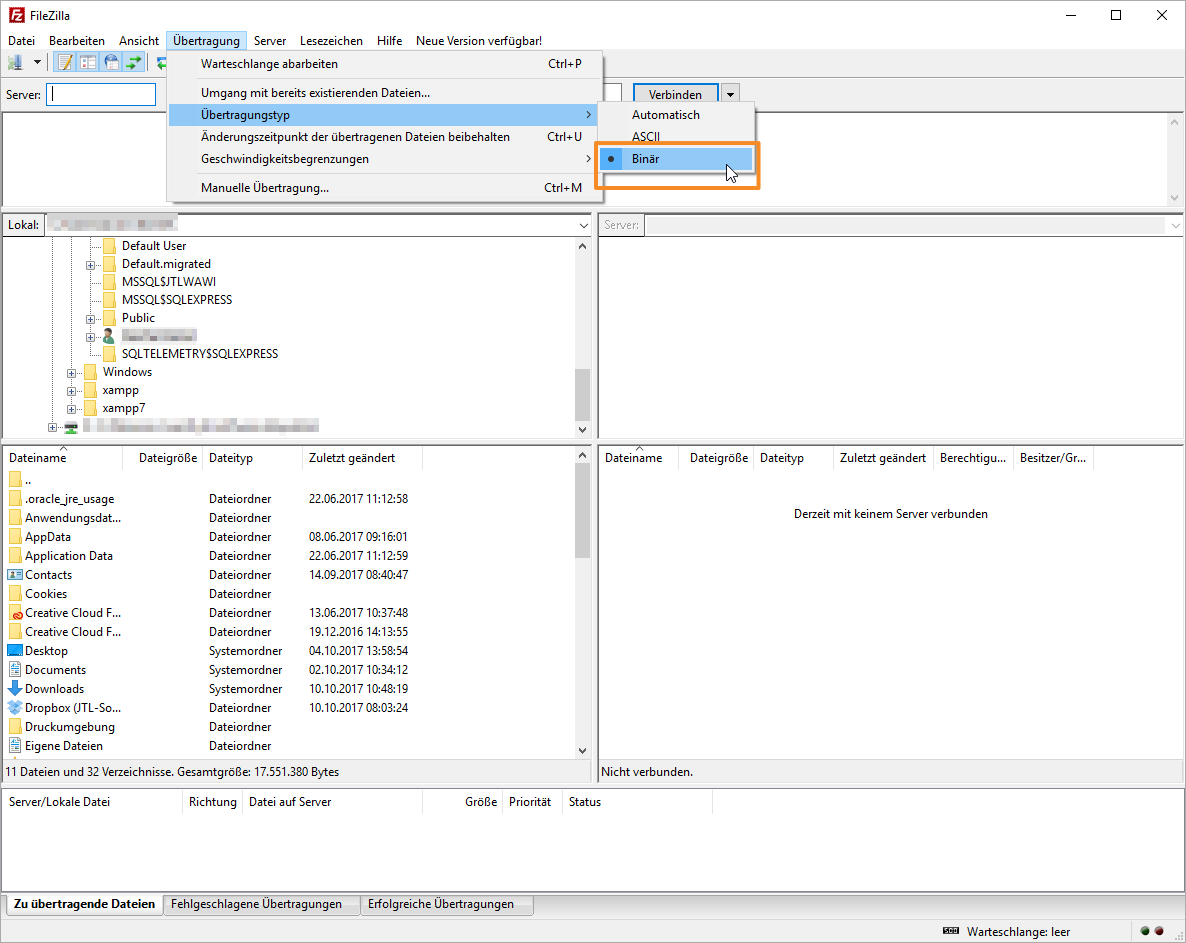
- First set the transfer type to Binary under Transfers > Default transfer types > Binary.
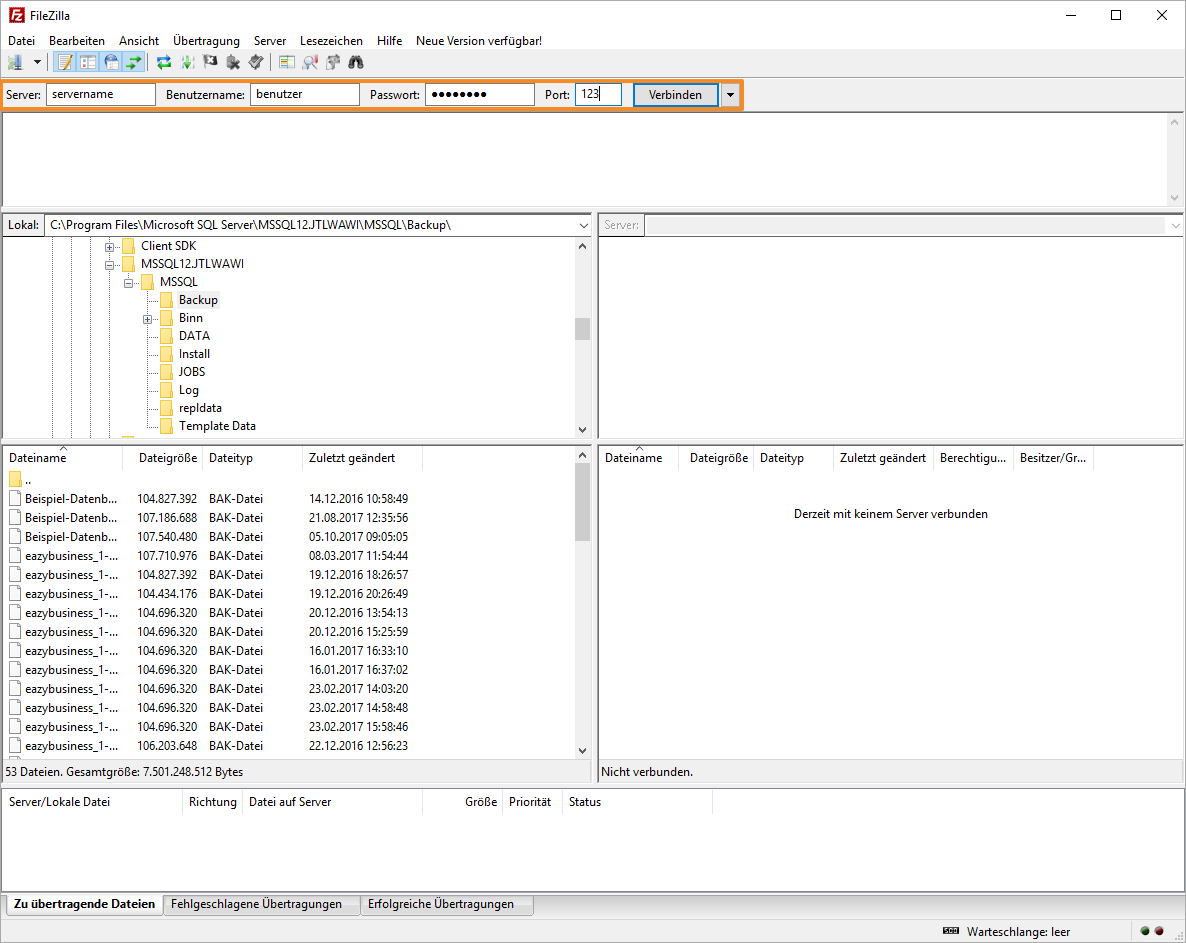
- Now log in to your online storage space (web space) with your access data.
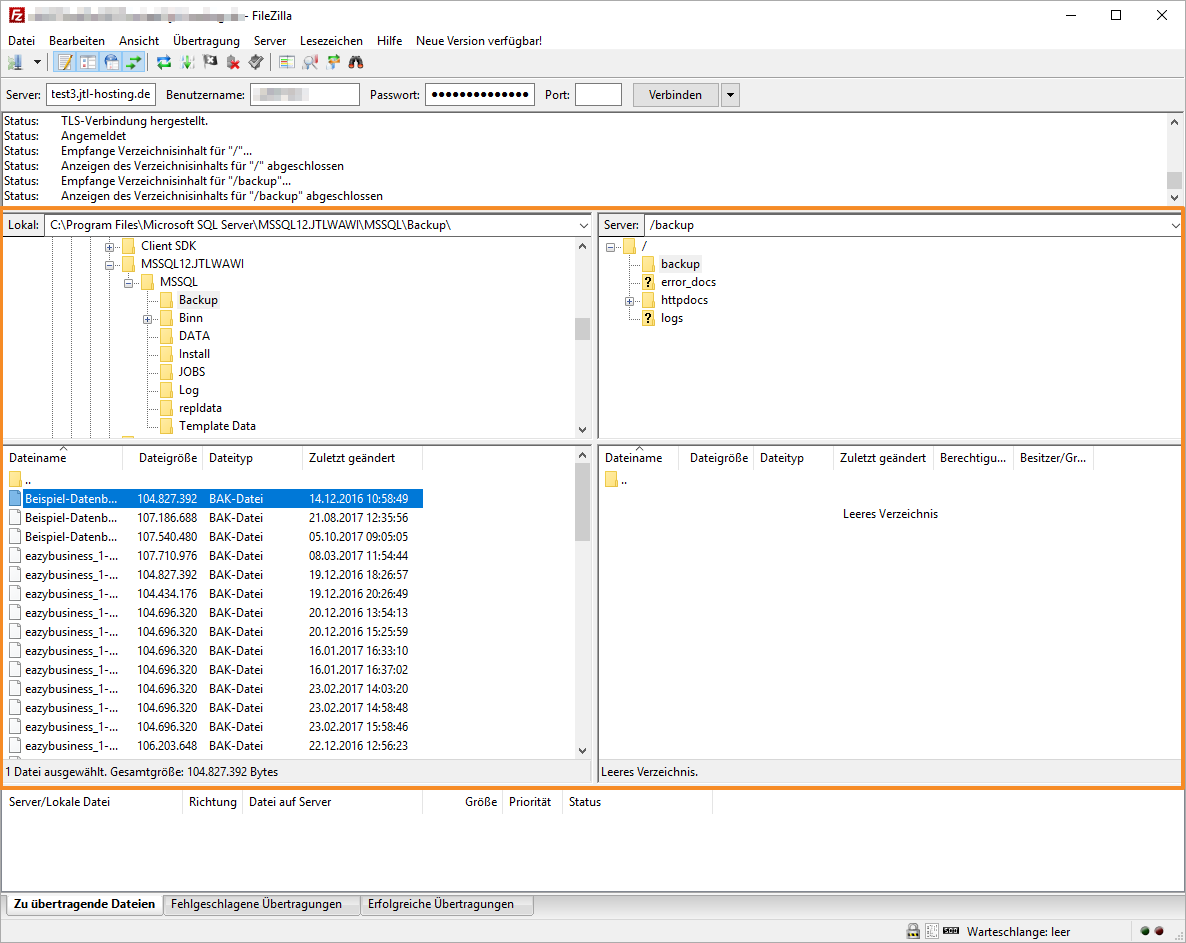
Once you are connected, your online storage space is on the right and your folder structure is on the left.
- On the left-hand side, change to the directory in which your backup is stored. This is usually the directory: C:\Program Files\Microsoft SQL Server\MSSQL12.JTLWAWI\MSSQL\Backup\. The number in the path may change depending on the version of the Microsoft SQL Server used. On the right-hand side, select the directory in which the backup is to be saved.
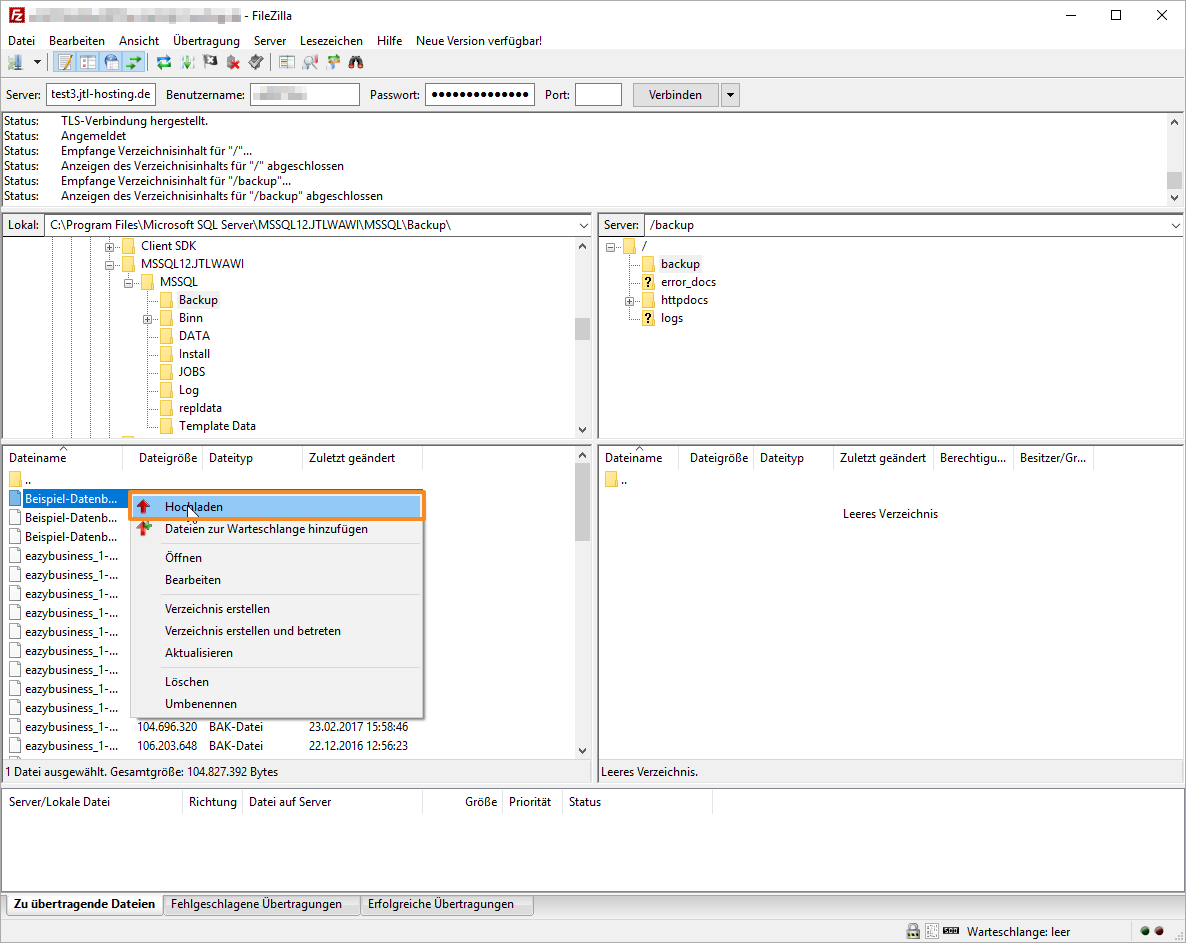
- Now right-click on the backup file and select Upload from the context menu. After the database has been uploaded, we will need your FTP access data. As soon as we have completed the data transfer, you will receive a confirmation of the successful database transfer.
Connecting to JTL-Wawi Hosting
The last step in using your JTL-Wawi Hosting is to set up the connection. This is highly dependent on which device and which operating system you are using. For each system, there can be different solutions. In the following, we will show you how to connect using a Windows computer without installing additional software.
- As soon as your JTL-Wawi Hosting has been set up, you will receive an email containing your access data.
The following user data is included in the email with the access data.
- Open the Remote Desktop Connection program from the Windows Start menu.
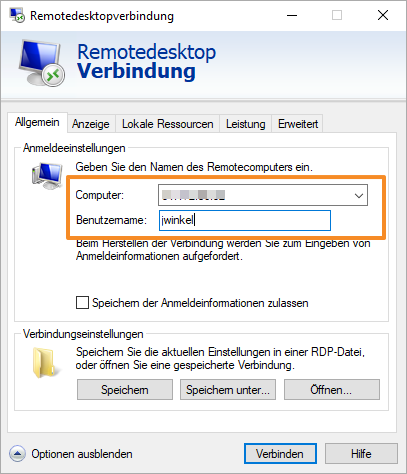
- Click on the button Optionen einblenden (Show Options). The login settings for the Remote Desktop Connection open.
- Under Computer, enter the IP address that was sent to you via email. Under Benutzername (Username), enter the username that was sent to you. Then click on Verbinden (Connect).
- Enter your password in the following window. A connection to your JTL-Wawi hosting will then be established.
You can now work on the connected computer as usual and start JTL-Wawi, for example.
