We are currently still building up the English documentation; not all sections have been translated yet. Please note that there may still be German screenshots or links to German pages even on pages that have already been translated. This guide mostly addresses English speaking users in Germany.
Detailed description: Sales quotation management
On this page, you will find a detailed description of the functions in the sales quotation management. You can access this area in JTL-Wawi via Sales > Sales quotations.
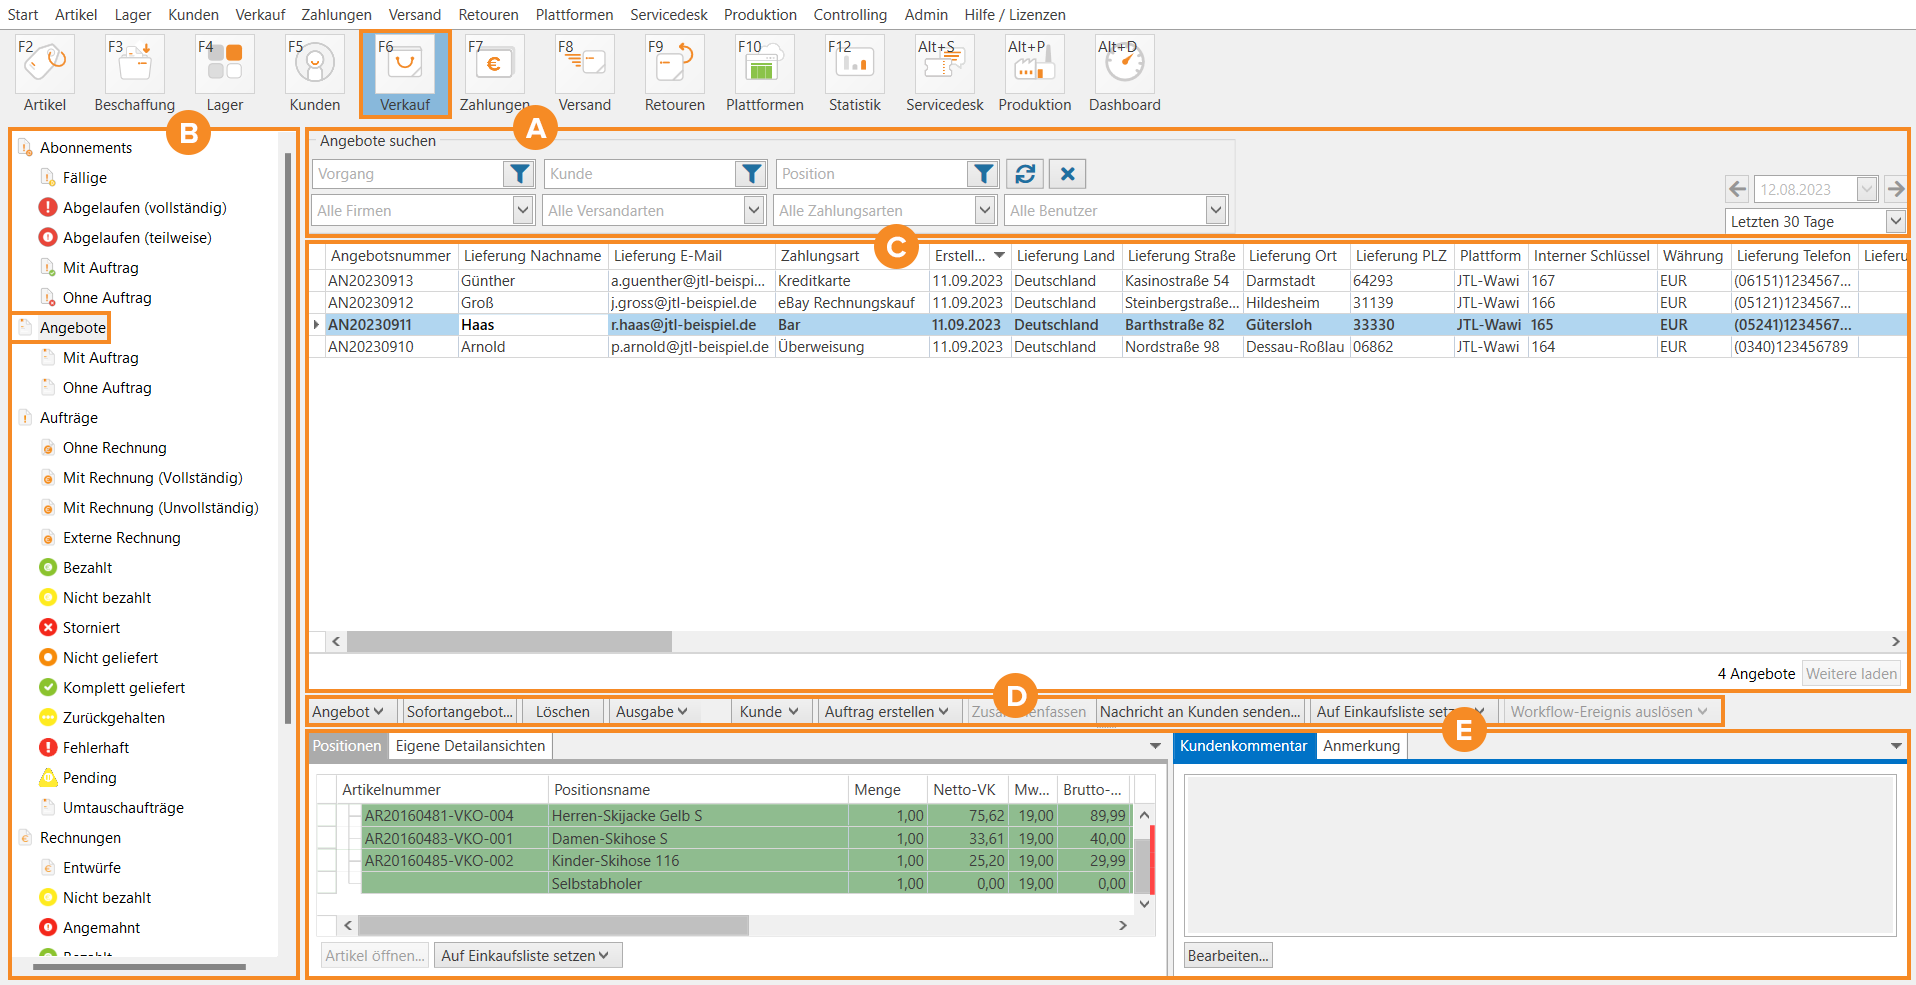
Pane A: Search & filter functions
Via the search and filter functions, you can filter the sales quotations and call up the desired sales quotation directly. The search and filter functions always relate to the folder that you have opened. So if you select the Sales quotations folder, all sales quotations in JTL-Wawi will be searched.
The filters are made up of three areas: search fields, drop-down menus and dates.
Search fields
With the help of the search fields Transaction, Customer and Line item, you can search individual fields in JTL-Wawi. Each search field has its own settings. Use these settings to specify which database fields are to be searched.
Transaction: In this search field, you can search for the Sales quotation ID to call up a sales quotation directly. In addition, you can activate the fields Note, Customer comment, Sales order ID and Exact search for the search.
Customer: In this search field, you can search for the Customer ID to call up a customer directly. In addition, you can use the fields First and last name, Shipping address, Billing address and Exact search for the search.
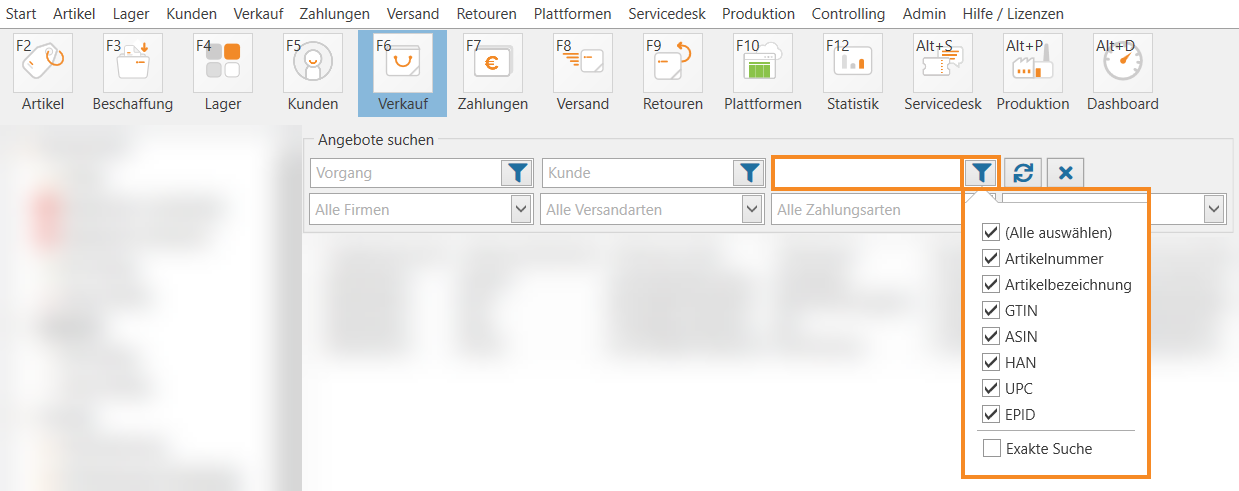
Line item: In this search field, you can search for information relating to the line items included in a sales order. By default, the fields SKU, Item name, GTIN and ASIN are activated. In addition, you can activate the MPN, UPC, EPID and Exact search fields for the search.
Drop-down menus
With the help of the drop-down menus under the search fields, you can filter your search results.
Companies: If you have stored several companies, you can filter all sales quotations by a specific company. To do this, click on the drop-down menu and select the desired company.
Shipping methods: Click on this drop-down menu to filter the sales quotations by the different shipping methods.
Payment methods: Click on this drop-down menu to filter the sales quotations by the different payment methods.
Users: Click on this drop-down menu to filter the sales quotations by the different users.
Dates
On the right-hand side, you will find the date fields. Use the drop-down menu to specify how many days are to be taken into account retroactively in the search. If you select the filters Year, Month or Day from the drop-down menu, you can then specify a specific period in the calendar above.
Pane B: Folder structure
The Sales quotations folder has the W/o sales order and With sales order subfolders.
With sales order: In this subfolder, you will find the sales quotations for which a sales order exists.
W/o sales order: In this subfolder, you will find the sales quotations for which no sales order exists.
Pane C: Sales quotation list
In the sales quotations overview, you will see all existing sales quotations and the most important information about them. You can change the order of your desired columns via drag & drop. Right-click on the column header to configure the displayed columns.
Right-click on any column header and set conditional formatting. For more information on this topic, click here: Setting individual colours in tables.
Pane D: Toolbar
Sales quotation
You can use the Sales quotation button to choose from a variety of options for the selected sales quotation. Click on the arrow on the button to see all options.
Open: Opens the sales quotation and allows editing.
Duplicate: Duplicates the existing sales quotation. You can select whether the sales quotation is to be duplicated and created as a Sales quotation, Sales order or Subscription.
Change user: Opens the Changing user dialogue box. In the drop-down menu you can select another editor for the sales quotation.
Delete: Deletes the selected sales quotation.
Update tax code: Starts a synchronisation and updates possible changes to the tax code.
Manual quotation
The Sales quotation dialogue box opens via the Manual quotation button. Here you can enter the details for your sales quotation and close the dialogue box by clicking Save. You have created a new sales quotation.
Delete
To delete a sales quotation, select one or more quotation(s) from the overview and click Delete. Please note that deletion creates gaps in the number range.
Output
Output methods
The arrow on the Output button gives you access to the various output methods. To do this, first select the document you want to output. Choose between:
Sales quotation: Outputs the sales quotation information.
Labels: Outputs the label information.
Output methods for sales quotations
You can choose between the following output methods for each individual document:
Print: Outputs your document via the printer that was created for the corresponding document type via Start > Printer.
Fax: Faxes the document to the fax number stored in the sales quotation. You can specify the fax machine to be used via Start > Printer in the Fax column.
Email: Sends the document via email to the email address that was stored in the sales quotation.
Save: Saves the document as a PDF. Default location is your Windows desktop.
Export: Exports the data to a predefined format. Read more on the topic here.
Preview: Creates a preview of the document.
Advanced: Opens the advanced output settings.
Output methods for labels
Billing address: You can choose whether you want to Print the labels with the billing address, create a Preview or make Advanced settings for label printing.
Shipping address: You can choose whether you want to Print the labels with the shipping address, create a Preview or make Advanced settings for label printing.
Customer
Via the arrow on the Customer button, you can access functions that are related to the customer of the sales quotation.
Open: Select this option to open the customer master data of the customer of the sales quotation.
View all messages: Select this option to view all messages you have sent to the customer. Select the desired message and click Open to see the details.
Copy billing address to clipboard: Select this option to copy the customer’s billing address to the clipboard. You can then paste it elsewhere, for example using the keyboard shortcut CTRL + V, even outside of JTL-Wawi.
Copy shipping address to clipboard: Select this option to copy the customer’s shipping address to the clipboard. You can then paste it elsewhere, for example using the keyboard shortcut CTRL + V, even outside of JTL-Wawi.
Create sales order
Click on this button to create a sales order for the existing sales quotation. Choose between the options: Create sales order, Create and open sales order, Create and output sales order.
Customer statistics: Use this option to view the customer’s statistics. Read more on the topic here.
Combine
With this button you can combine several sales quotations. To do this, select all the sales quotations you want to combine with the Ctrl key and then click on this button. Sales quotations can only be combined if the shipping address and billing address are the same for both sales quotations.
Send message to customer
With this button you can send an email directly to the customer that is stored in the selected sales quotation.
Add to purchase list
Click on this button and select whether you want to add the shortage, i.e. the missing quantity, to the shopping list. The Adding items to the purchase list dialogue box opens. You can add additional items to the purchase list by entering the SKU or by clicking Add.
Trigger workflow event
With this button you can trigger manual workflow events for the selected sales quotation. Read more on the topic here.
Pane E: Sales quotation line items
Line items
The line item list provides you with an overview of all line items that are part of the selected sales quotation. Here you can view information such as SKU, Item name, Quantity, Net sales price, VAT, Gross sales price, In stock, Available, Awaiting delivery, Purchase list and Note. Right-click on a column header to configure the line item list and to deactivate information columns or to add additional columns.
Custom overviews
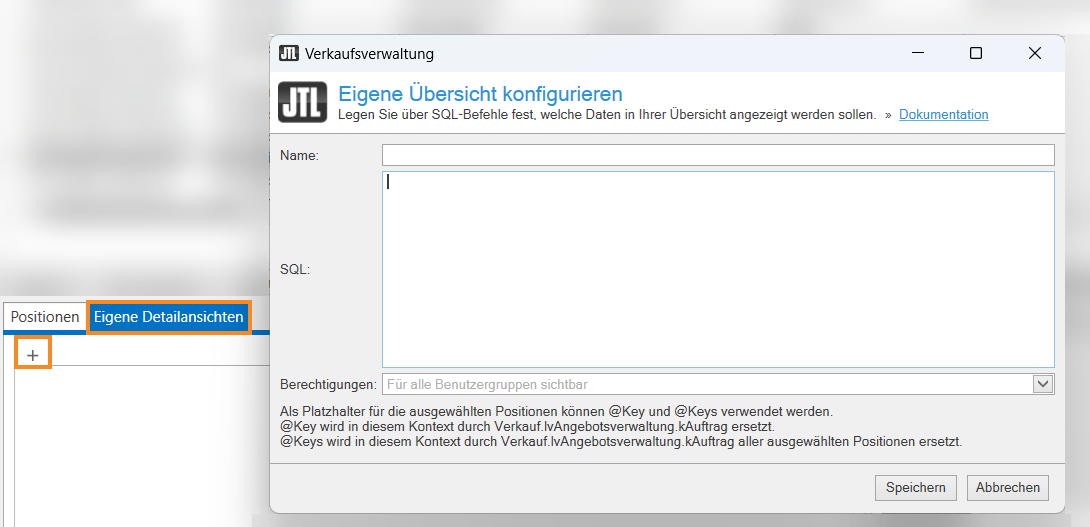
In the Custom overviews tab, you can use SQL commands to specify which information is to be displayed in your overview. To do this, click the Plus button in the tab. The Configuring custom overviews dialogue box opens. Enables you to make the appropriate settings. For more information on this topic, please go here.


