We are currently still building up the English documentation; not all sections have been translated yet. Please note that there may still be German screenshots or links to German pages even on pages that have already been translated. This guide mostly addresses English speaking users in Germany.
Dialogue box: Information
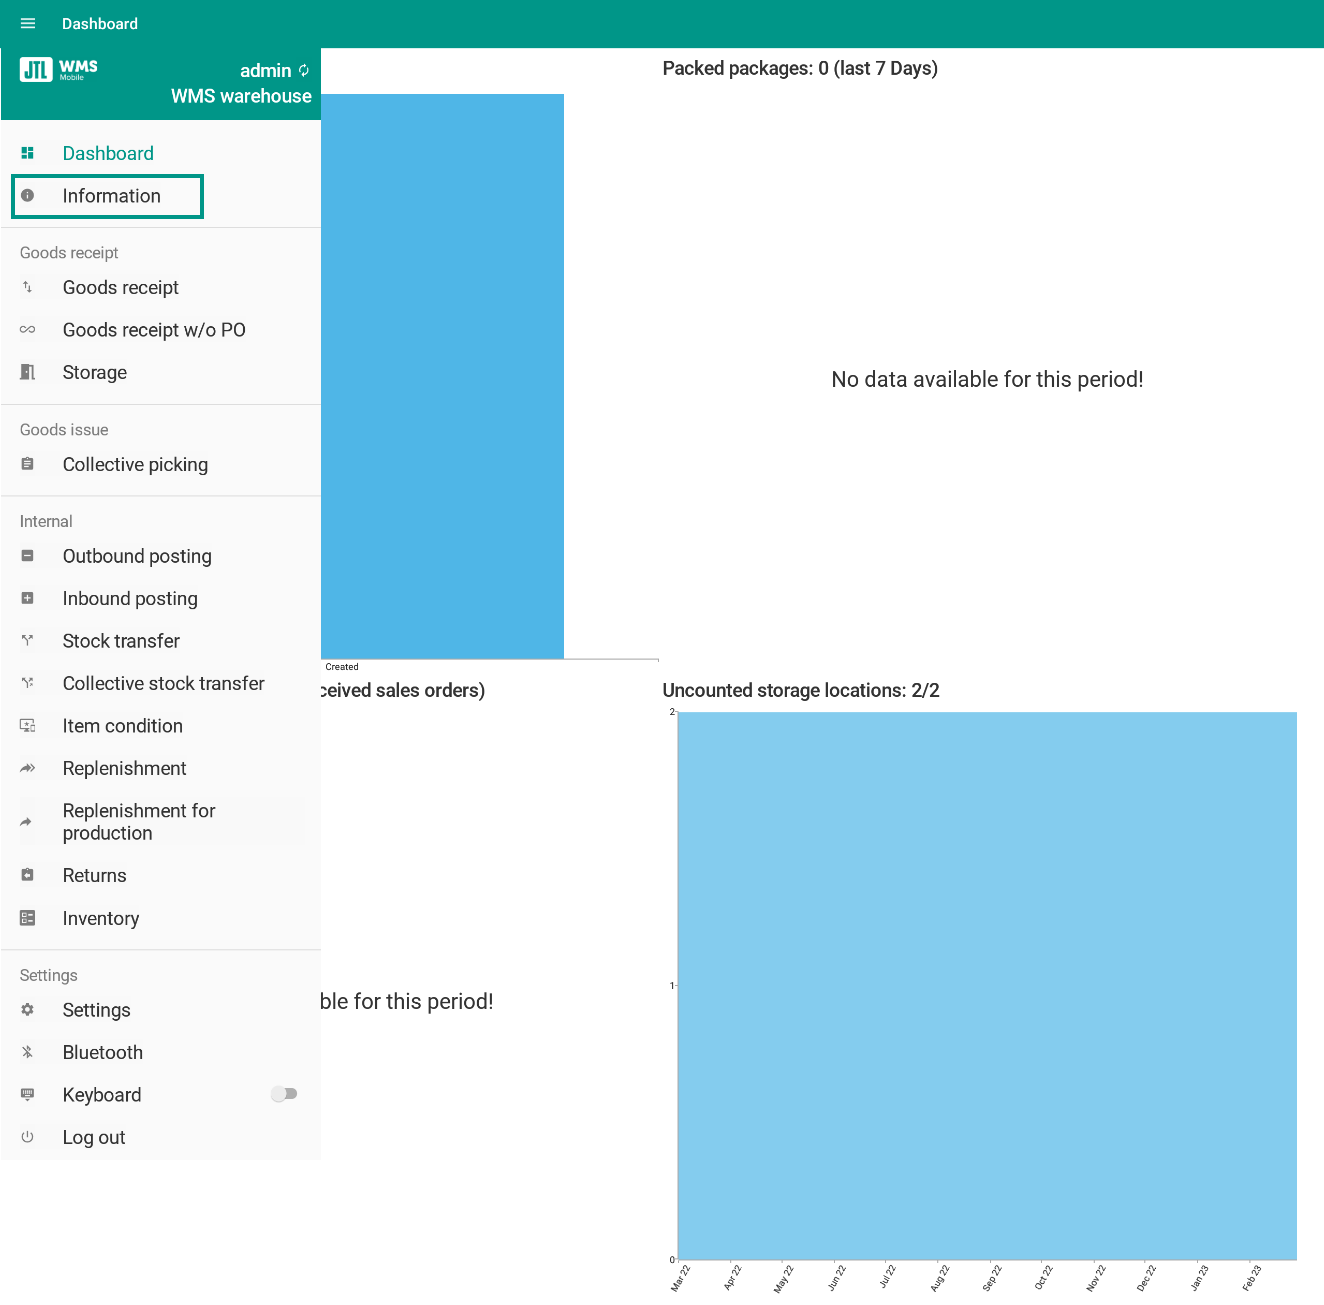
On this page, you can find a detailed description of the functions in the Information dialogue box. You can access the dialogue box in JTL-WMS Mobile App by clicking on the hamburger menu to open the menu bar and selecting the Information menu item.
Filters
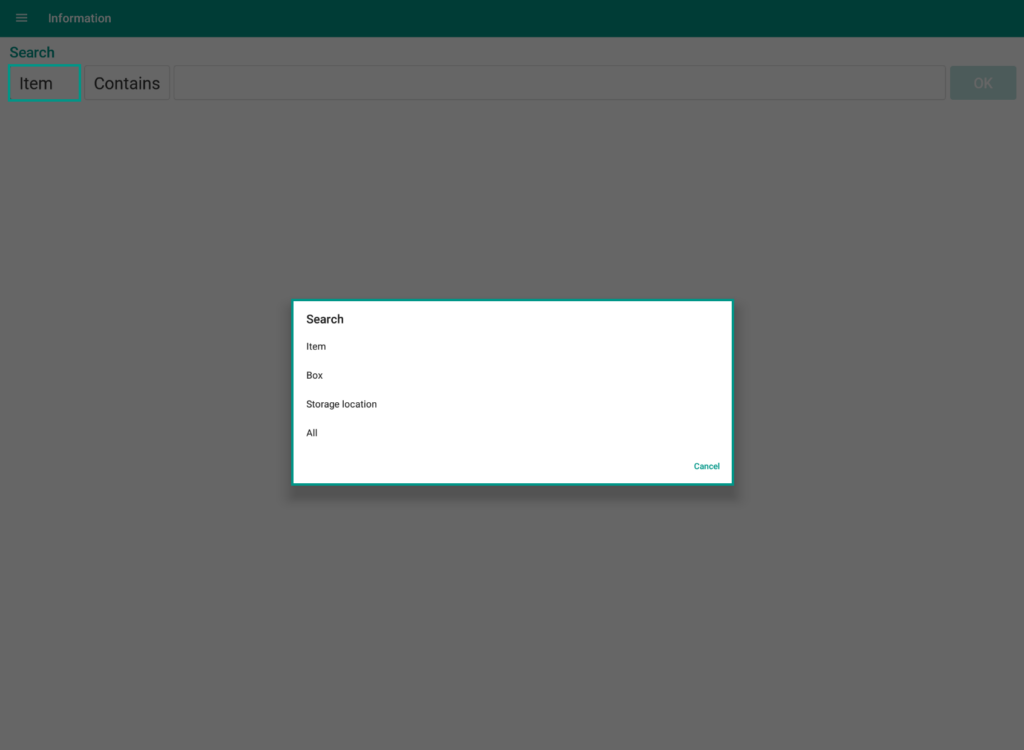
Filter or search for items, shipping boxes or storage locations. By clicking on a search result, an overview with more detailed information opens.
Filter area 1: In the first drop-down menu, you can select whether you are looking for an Item, a Box, Storage location or All.
- Item: If you select this filter, the results will be filtered according to all identifiers specified in the warehouse options. For more information on the warehouse options, please go here.
- Box: If you select this filter, the results will be filtered by box ID.
- Storage location: If you select this filter, the results will be filtered by storage location.
- All: If you select this filter, the results are filtered by item, box and storage location.
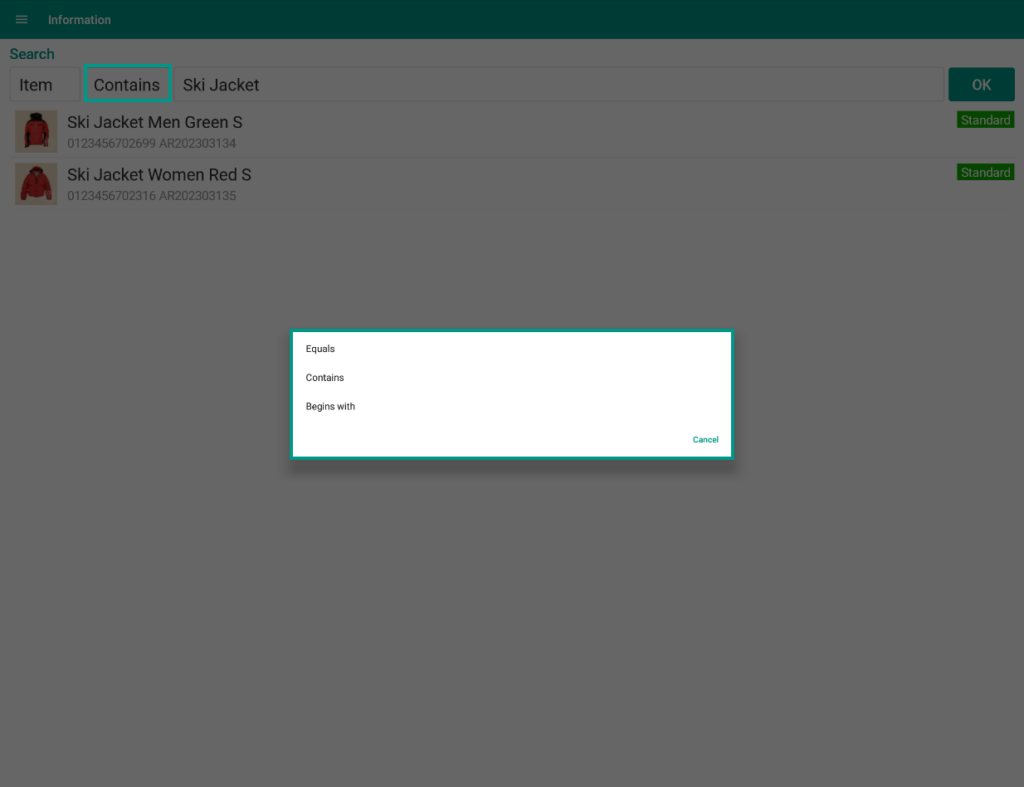
Filter area 2: In the second drop-down menu, you can select whether to filter by Equals, Contains, or Begins with.
- Equals: If you select this filter, only results that exactly match your input are displayed.
- Contains: If you select this filter, all results that contain your input are displayed.
- Begins with: If you select this filter, all results that begin with your input are displayed.
Input field: Enter the term you want to search for here.
OK: If you click OK, the filter process starts.
Information tab
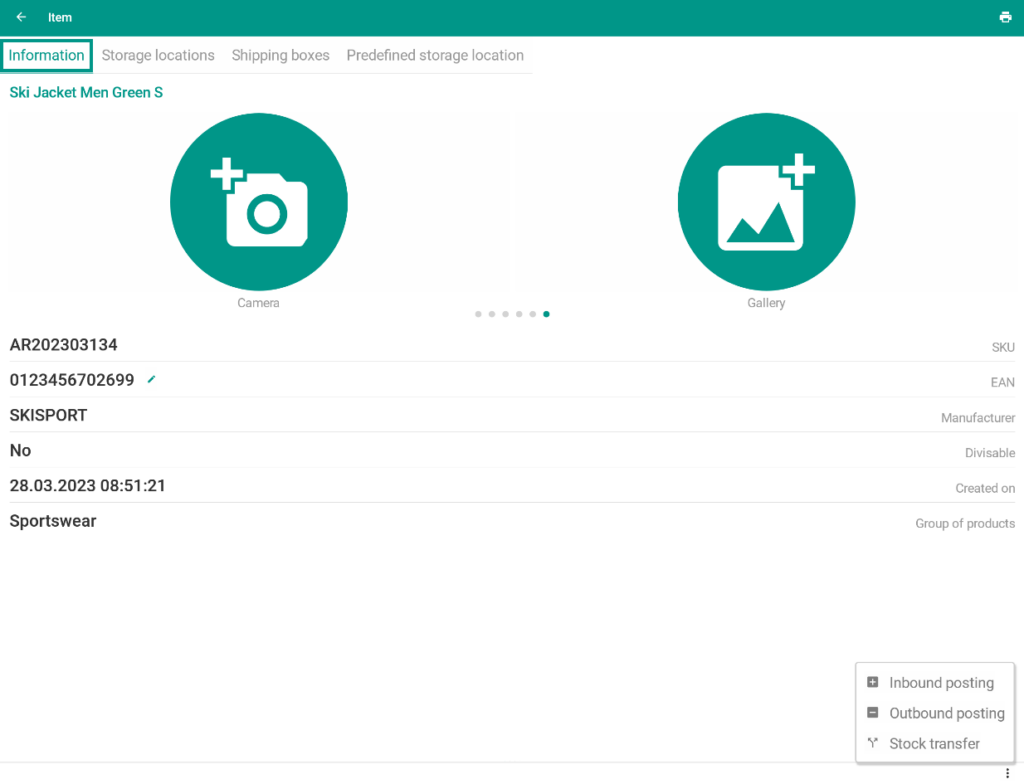
In the Information tab, you will find an overview with the item name, an image and other item information.
Item image: If you have already assigned images to the item, you can move to the last image by swiping right. Here you can add another image to the item via the camera of the device or a gallery. If no images have been added to the item yet, the option to add an image will be displayed directly.
SKU: Here you can see the SKU. By clicking on the SKU, you can copy it to the clipboard.
EAN: Here you can see the EAN of the item. By clicking on the EAN, you can copy it to the clipboard. By clicking on the pencil icon, you can open a dialogue box, in which you can change the EAN.
Manufacturer: Here you can see the manufacturer of the item you entered in the item master data.
Divisible: Here you can see whether the item is divisible. This information is important, for example, if you use BOMs.
Created on: Here you can see when the item was created.
Group of products: Here you can see which group of products the item is assigned to.
Posting window: Click on the button with the three dots if you want to perform an Inbound posting, Outbound posting, or Stock transfer. Clicking on one of the menu items opens the respective dialogue box.
Storage locations tab
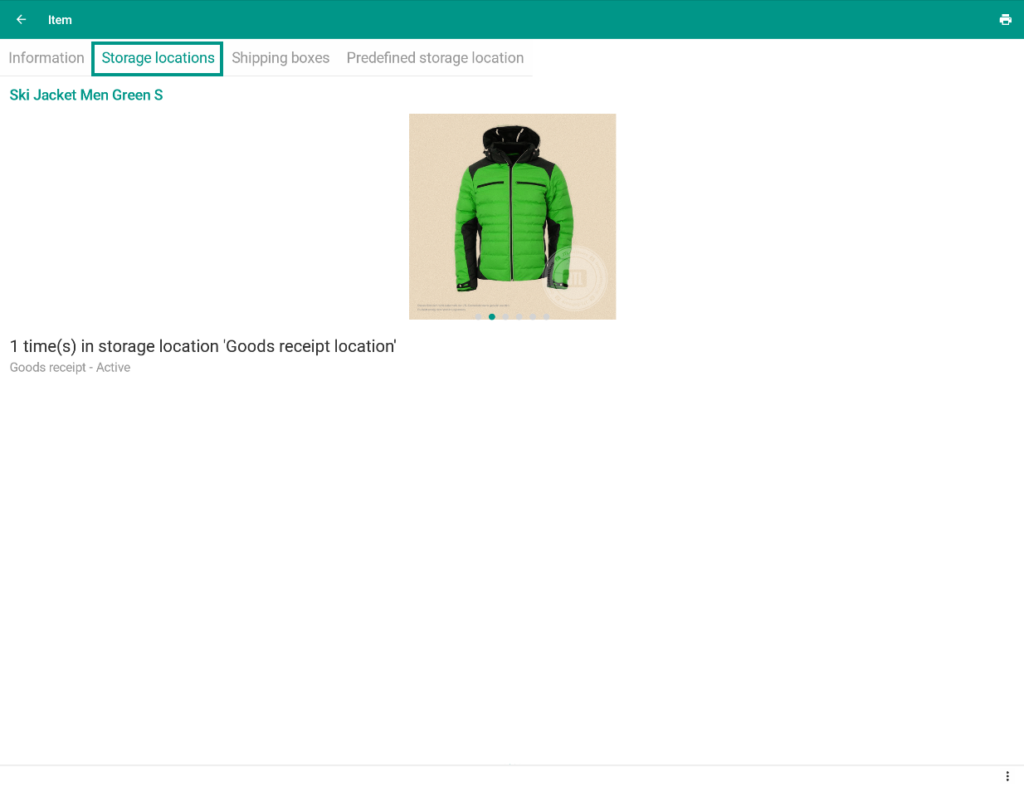
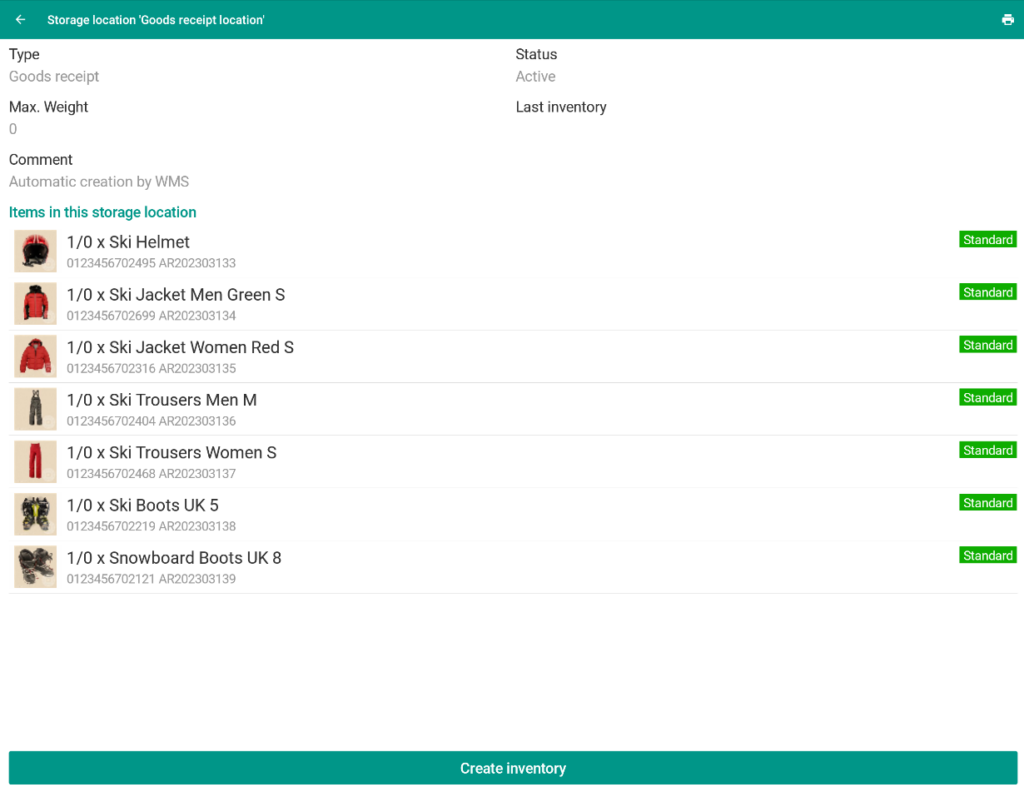
Here you can see in which storage locations the item is currently stored in, as well as the current quantity per storage location. In addition, you can see the type and status of the respective storage location. Clicking on a storage location opens the storage location dialogue box.
Type: Here you can see the type of the storage location.
Status: Here you can see whether the storage location is active or inactive. For example, the storage location may be inactive due to an inventory.
Max. Weight: Here you can see the permissible maximum total load of the storage location.
Last inventory: Here you can see the date when the last inventory took place at this storage location.
Create inventory: By clicking on the button, you can create an inventory for this storage location.
Shipping boxes tab
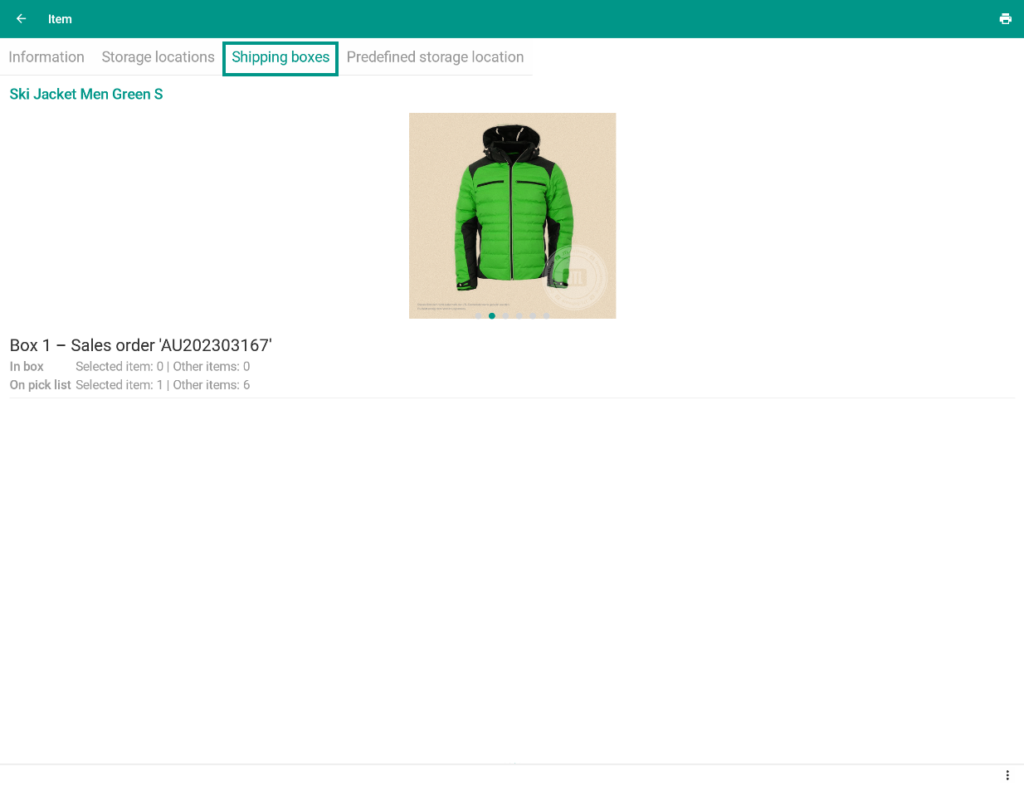
Here you can see in which shipping boxes the item is currently located and the quantity of the item that is currently on its way to a shipping box. Clicking on the shipping box opens the shipping box dialogue box.
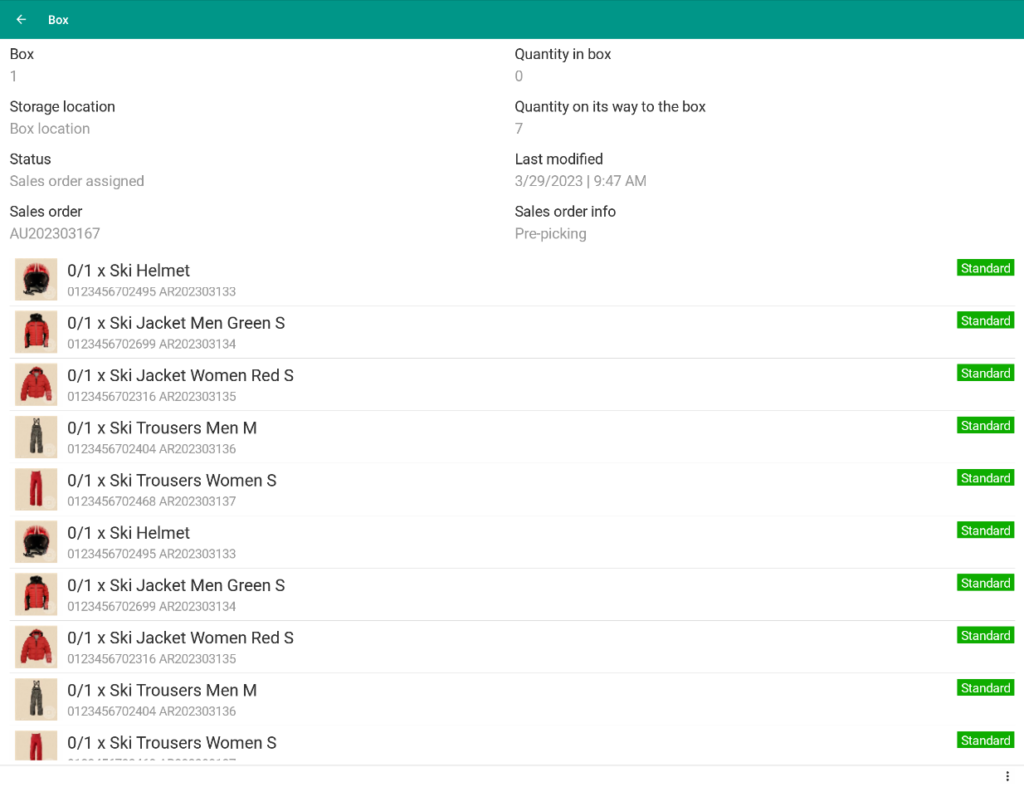
Box: Here you can see the box ID.
Quantity in box: Here you can see the number of items that are in the shipping box.
Storage location: Here you can see the storage location, where the shipping box is located.
Quantity on its way to the box: Here you can see how many items are still on a pick list that are on their way to this shipping box.
Status: Here you can see whether the shipping box has been completely filled and can be packed, or whether items for the sales order are still missing in the shipping box.
Last modified: Here you can see the date when the last change of the shipping box took place.
Sales order: Here you can see the sales order ID assigned to this shipping box.
Sales order info: Here you can see additional information such as comments that were stored for this sales order.
Item list: Here you can see a list of items that are in this shipping box. Click on an item to switch to the Information tab of this item.
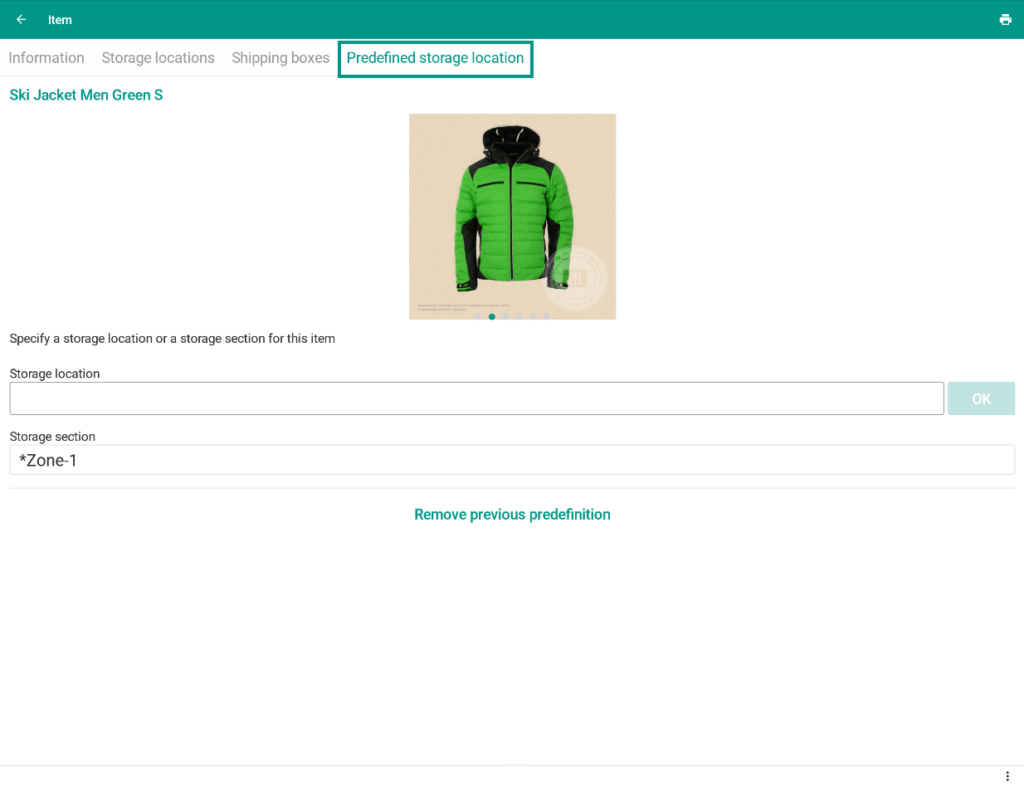
Predefined storage location tab
Here you can specify a predefined storage location or storage section for the item.
Storage location: In the input field, enter the storage location where this item is to be stored.
Storage section: In the drop-down menu, select a storage section in which the item is to be stored.
Remove previous predefinition: Click on this button if you want to delete the specifications made regarding storage location/storage section.
