We are currently still building up the English documentation; not all sections have been translated yet. Please note that there may still be German screenshots or links to German pages even on pages that have already been translated. This guide mostly addresses English speaking users in Germany.
Customising item badges
Your task/initial situation
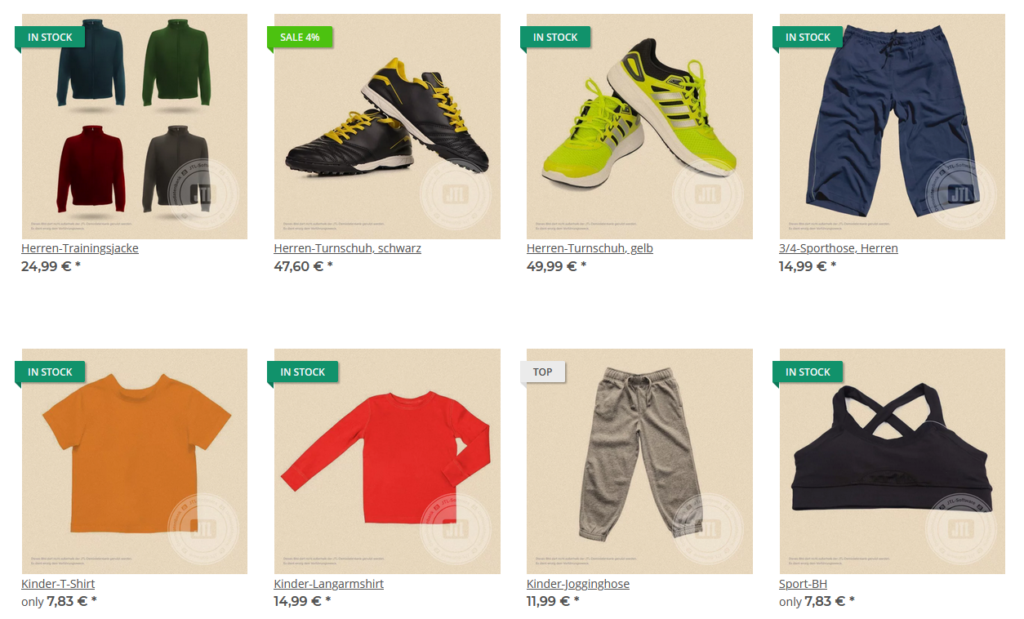
JTL-Shop offers the following item badges:
Example of the item badges “In stock” and “Top item”
Customising item badges
Item badges serve as additional eye-catchers on the start page. The image of the item is emphasised more by placing an additional graphic over part of the main image, comparable to a kind of “sticker”.
How to change the item badges:
- Log in to the back end of JTL-Shop with your admin access data.
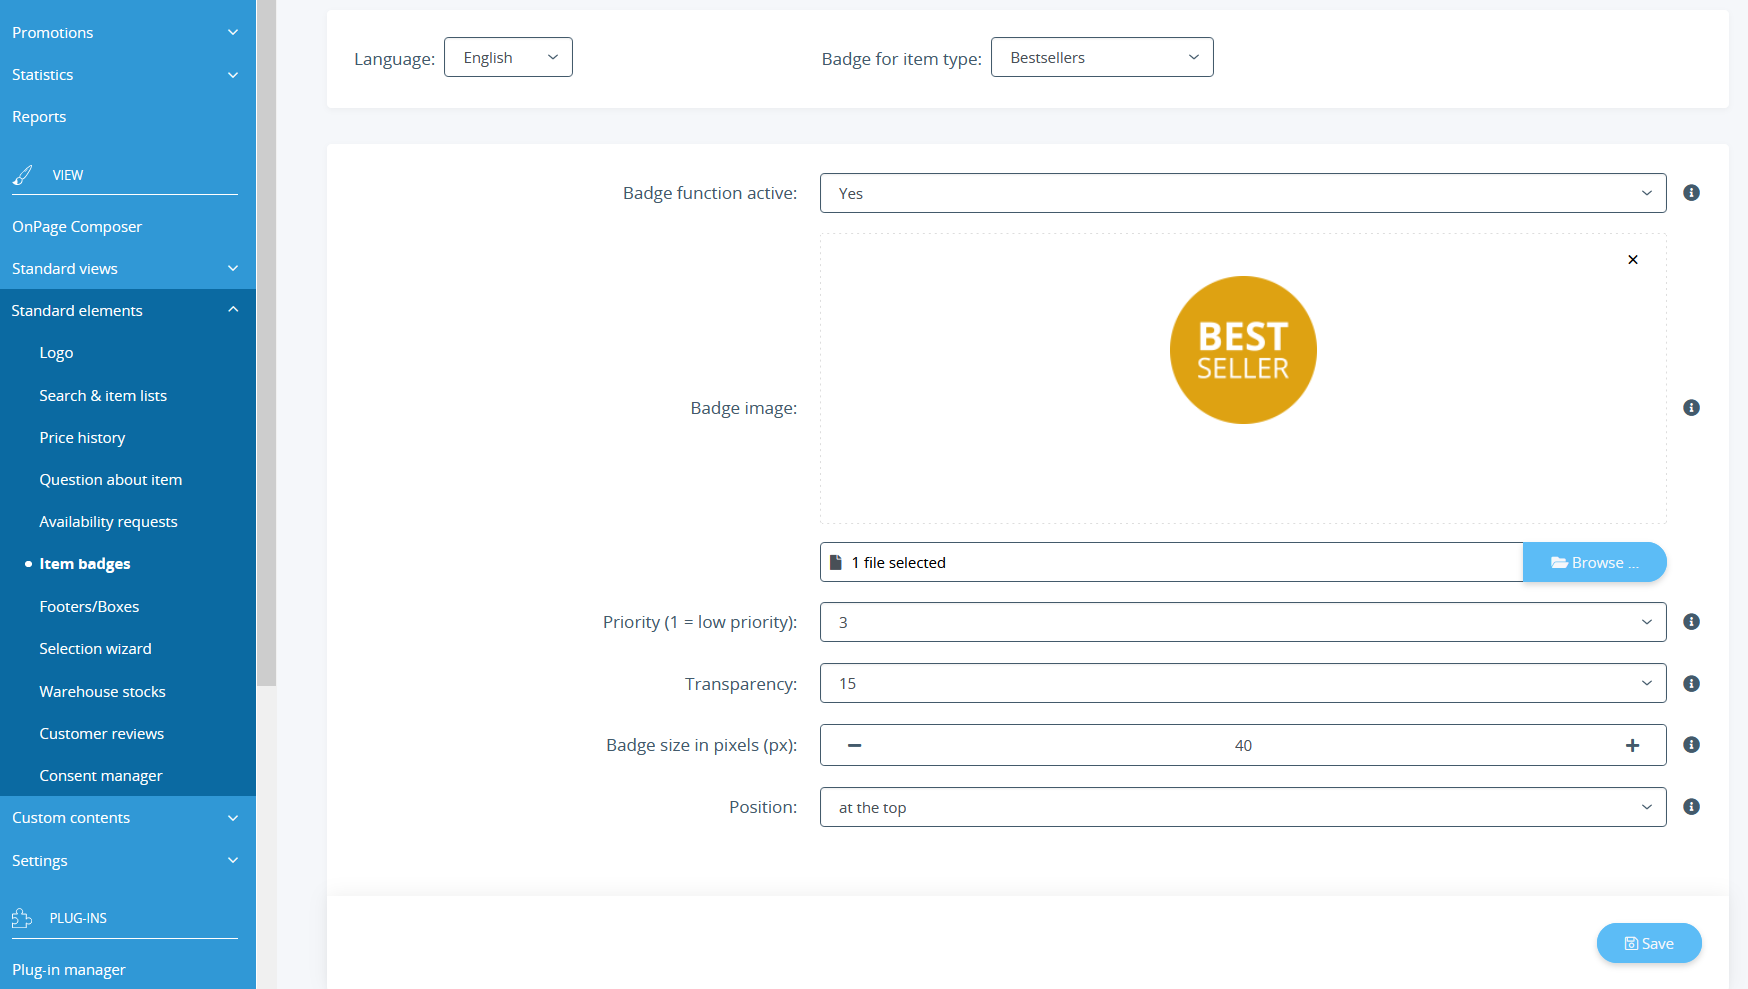
- Navigate to the menu item View > Standard elements > Item badges.
Here you can set, for example, which image file is to be used as a badge and which badge is to be displayed in each case. The setting options differ depending on the template used. Go to help pages for Item badges for special items.
- Select a language and the item type for which you want to upload a new badge.
- Under Badge image, click Browse and select the desired image.
- Click Save to apply the settings.
Adapting item badges for the NOVA template
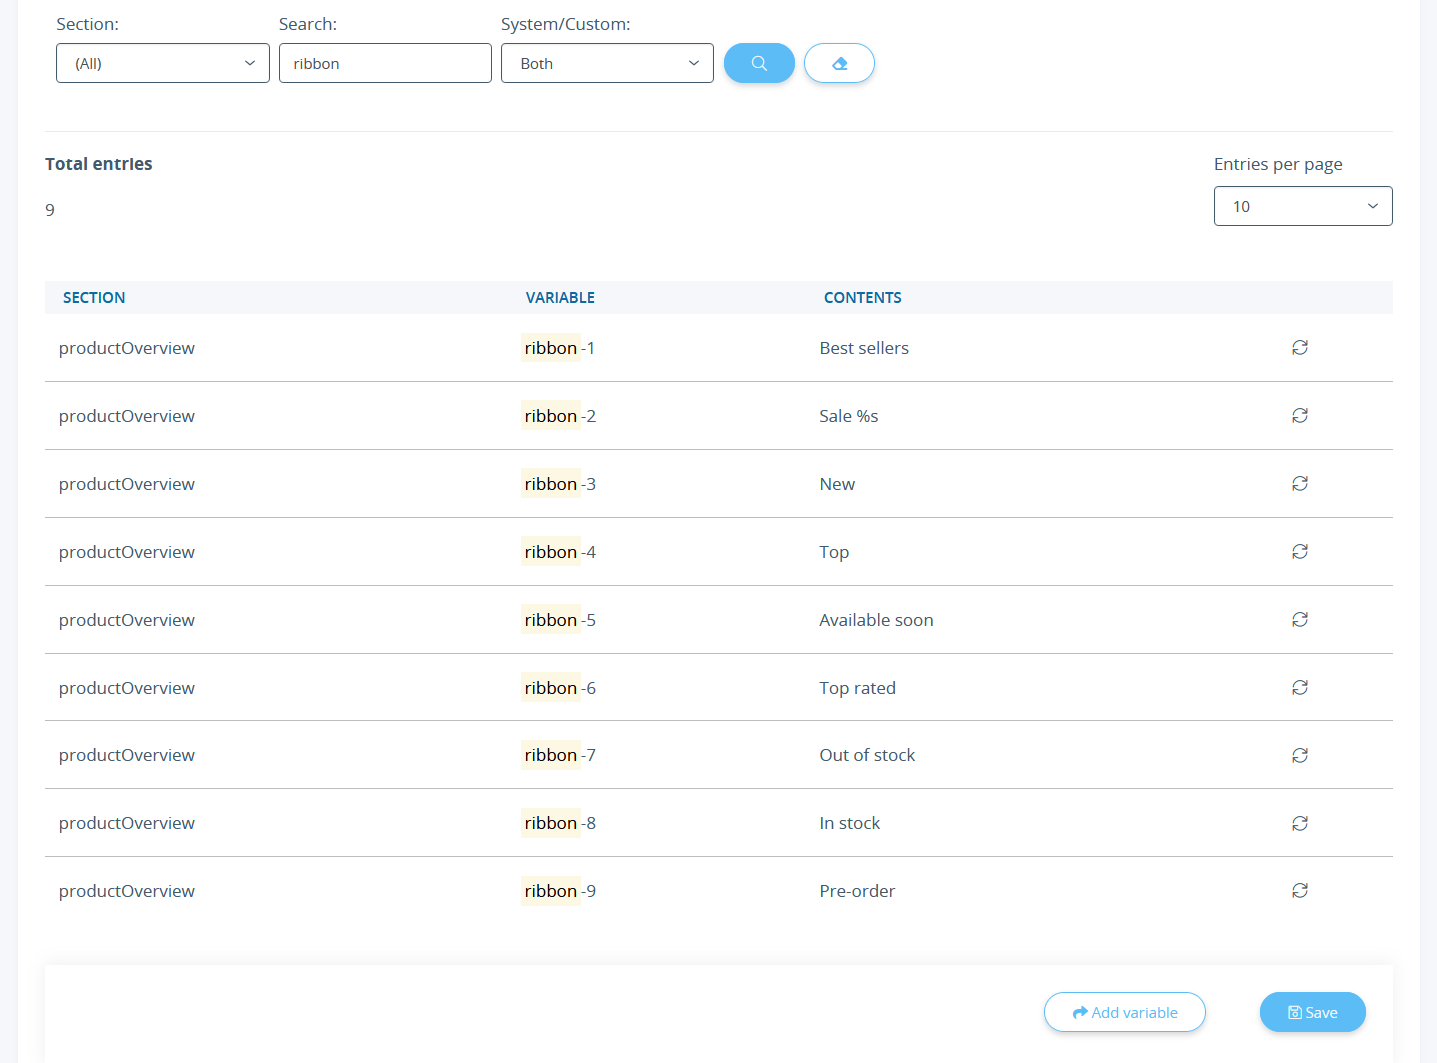
You can change the texts of badges in the language variables.
- To open the settings of the language variables, go to Administration > Language variables.
- Enter the term ribbon into the search input fieldand click on the magnifying glass button.
A search in the language administration for ribbon should return 9 hits. In the list in the content area, you can also see directly which digit belongs to which badge.
If you want to change the appearance of the badge, e.g. the background and font colour of the bestseller badge (ribbon-1), you must use CSS commands.
Example of CSS commands:
.ribbon-1 {
    background-color: red;
    color: #FFF;
}
.ribbon-1::before {
   border-right-color: red;
}
You can add CSS commands in the file custom.css or in a child template.


