We are currently still building up the English documentation; not all sections have been translated yet. Please note that there may still be German screenshots or links to German pages even on pages that have already been translated. This guide mostly addresses English speaking users in Germany.
Video
Upload Module
In this video we explain how to offer upload items in JTL-Shop.
Offering upload items with the Upload Module
Your task/initial situation
Step 1: Purchasing a licence for the Upload Module
The Upload Module is a fee-based extension for JTL-Shop. You will need a licence key to be able to use the Module.
- Go to the product page of the Upload Module in the JTL-Store.
- Carry out the purchase process. If you already have a JTL-Customer account, log in with your access data to complete the purchase.
- After purchase, you will receive an email with the licence key for the Upload Module.
Step 2: Setting up the Upload Module in JTL-Wawi
You must enter the licence key for your JTL-Shop in JTL-Wawi. You will then be able to use the Upload Module in JTL-Wawi and offer files in JTL-Shop.
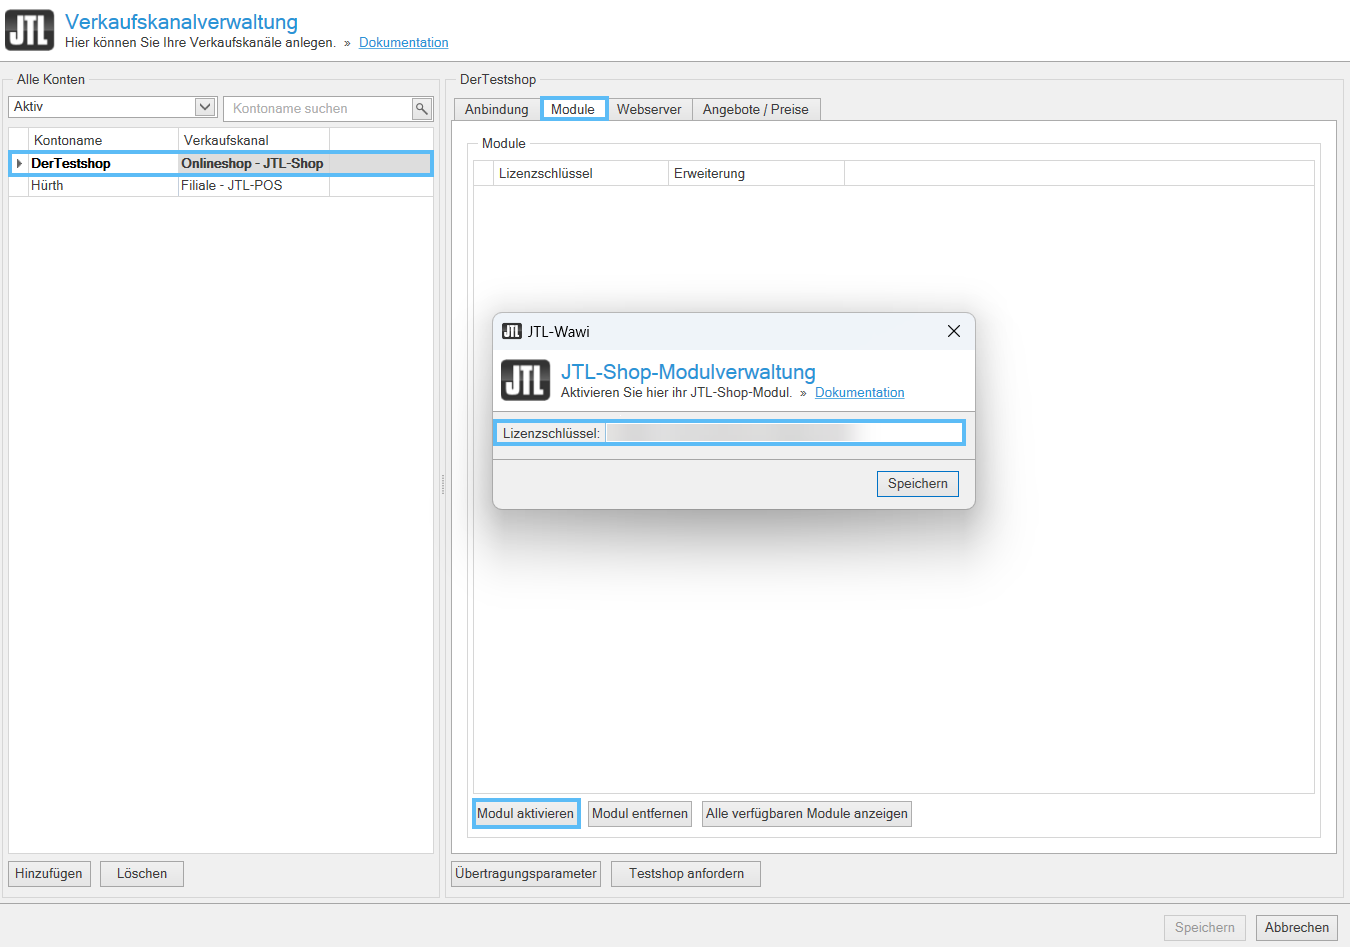
- Open JTL-Wawi and click on Platforms > Sales channels in the menu. The Sales channel management dialogue box opens.
- Select the online shop for which you want to use the Upload Module and switch to the Modules tab.
- Click Activate module. The JTL-Shop Module management dialogue box opens.
- Enter your licence key and click Save.
The Upload Module is now active and listed in the overview.
Step 3: Creating upload items
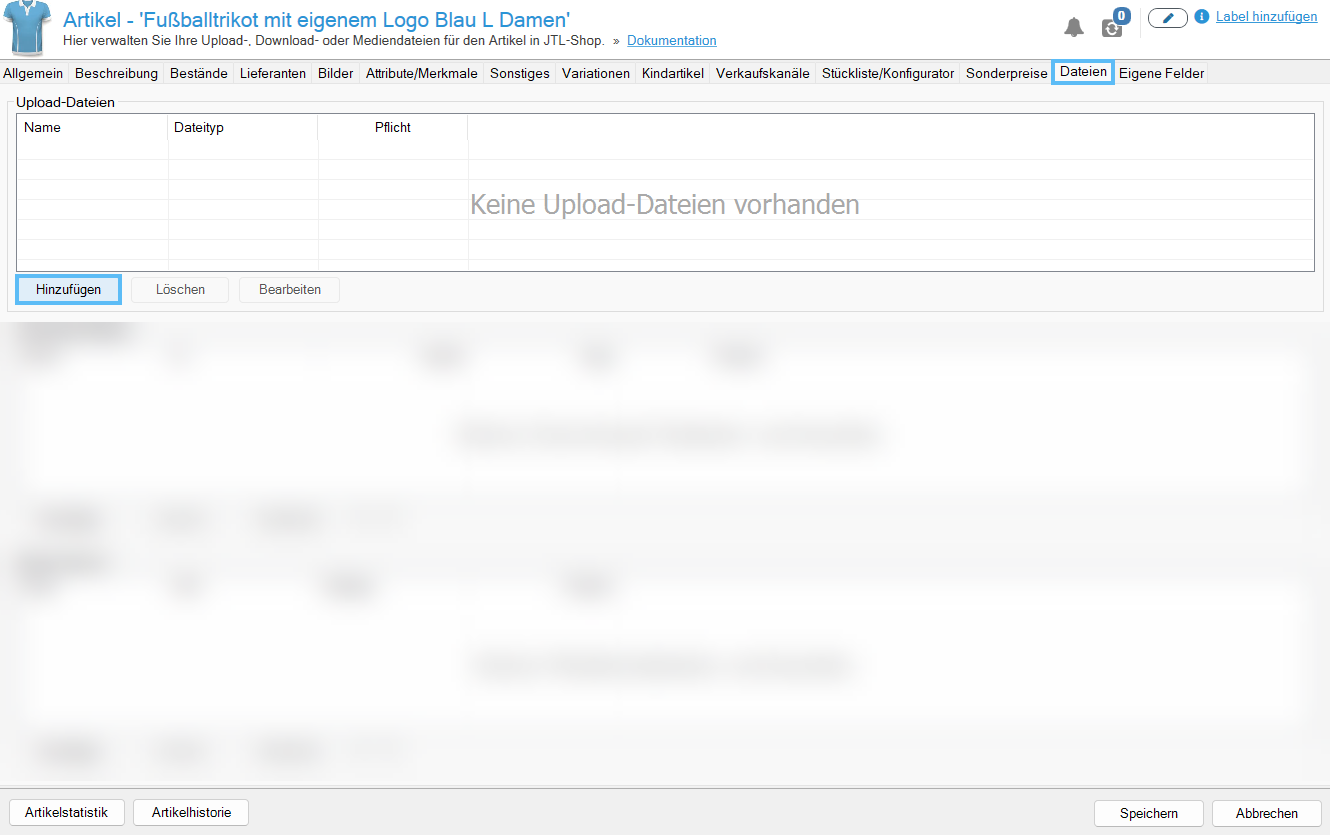
- Go to the item management of JTL-Wawi and double-click on the item you want to make an upload item. The item master data will open.
- Switch to the tab Files.
- Click Add.
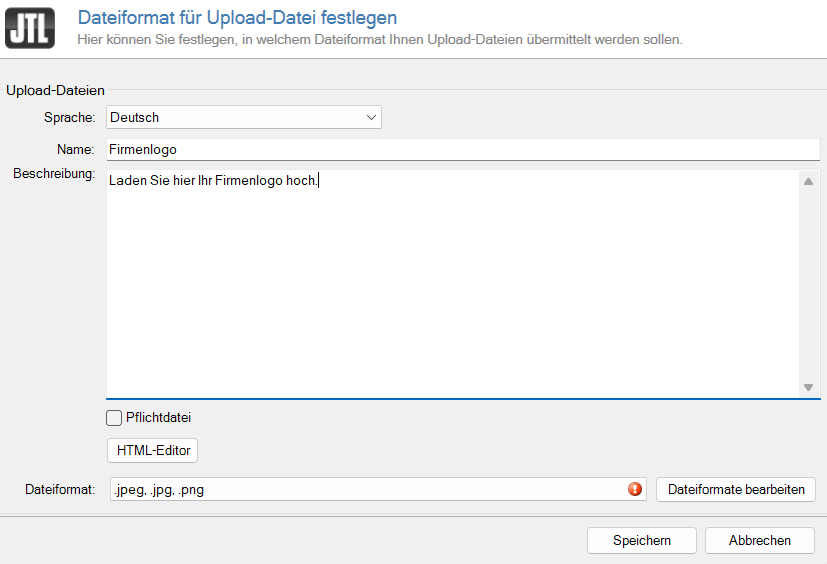
- Select a Language and enter a name for the upload file in the Name field.
- Activate the Mandatory file check box if you want order completion to only be possible if a file has been uploaded.
- Click on the File format drop-down menu and use the corresponding check boxes to select which file types are to be accepted for this item.
- Close the dialogue box by clicking Save and close the item master data. The item is now an upload item.
Upload Module in JTL-Shop
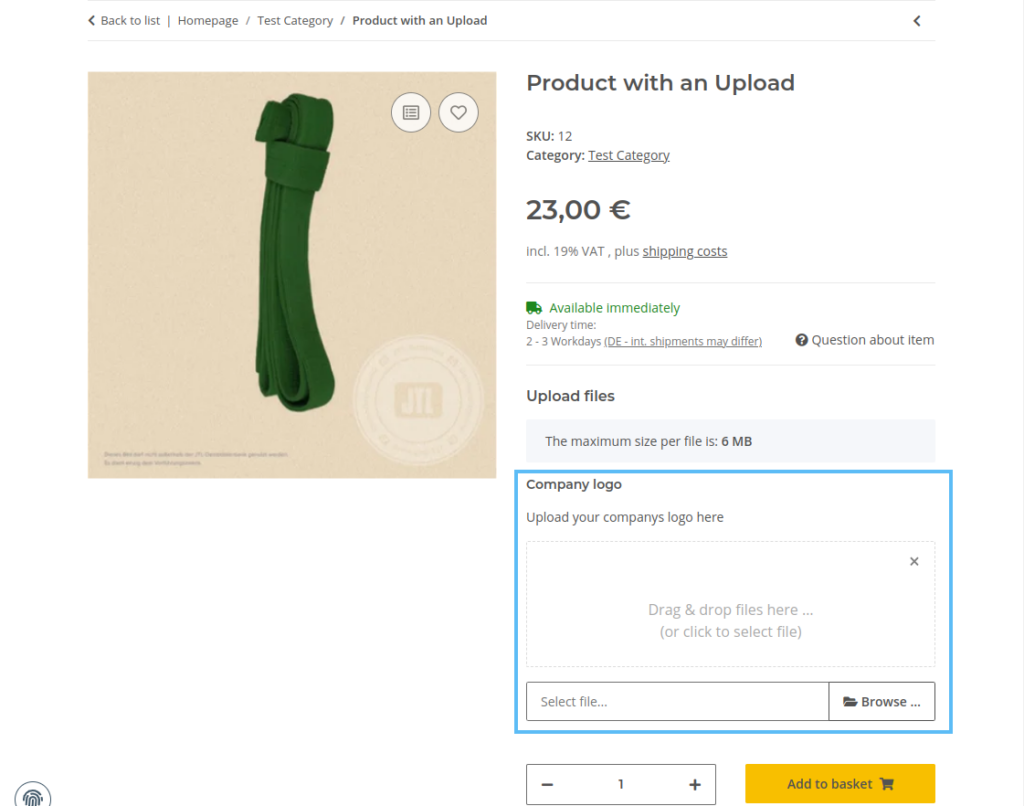
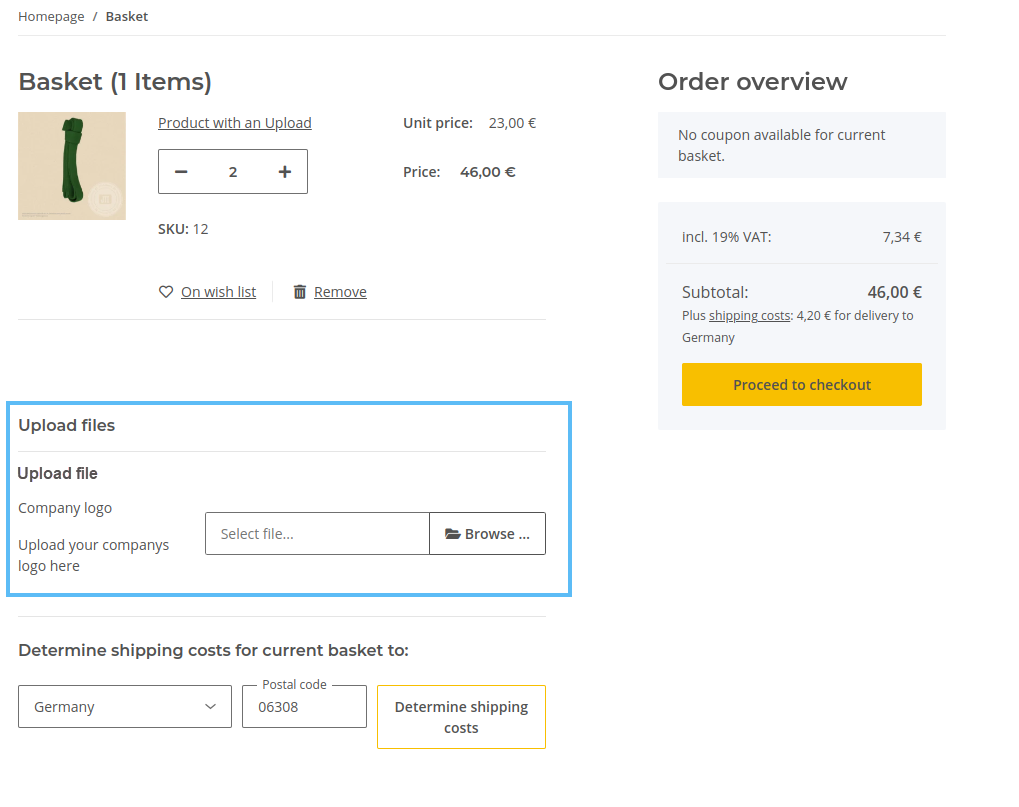
You do not need to make any settings in the back end of JTL-Shop to offer upload items. You make all the settings in JTL-Wawi. Your customers can add the requested files for items without variations on the item detail page or in the shopping basket in the Upload files area.
For items with variations, the upload field is not displayed on the item detail page, but only in the shopping basket.
Upload files in sales orders in JTL-Wawi
If your customers have created an upload item and this sales order has been imported into JTL-Wawi during a synchronisation, you can view the upload file directly in JTL-Wawi.
- Click on the Sales icon to go to the sales channel management in JTL-Wawi.
- Double-click on the sales order that contains an upload item. The sales order master data opens.
- In the sales order master data, go to the Attachments tab. There you can view the upload files of your customers and download them if necessary.
Video
Upload Module
In this video we explain how to offer upload items in JTL-Shop.
Related topics

