We are currently still building up the English documentation; not all sections have been translated yet. Please note that there may still be German screenshots or links to German pages even on pages that have already been translated. This guide mostly addresses English speaking users in Germany.
Carrying out the basic configuration
Your task/initial situation
JTL-Shop access data
After you requested your JTL-Shop, you receive an email with the access data to the Customer Centre where you can find your licence key as well as all downloads and updates related to your purchased products and your hostings with us.
- Log in to the Customer Centre with your access data.
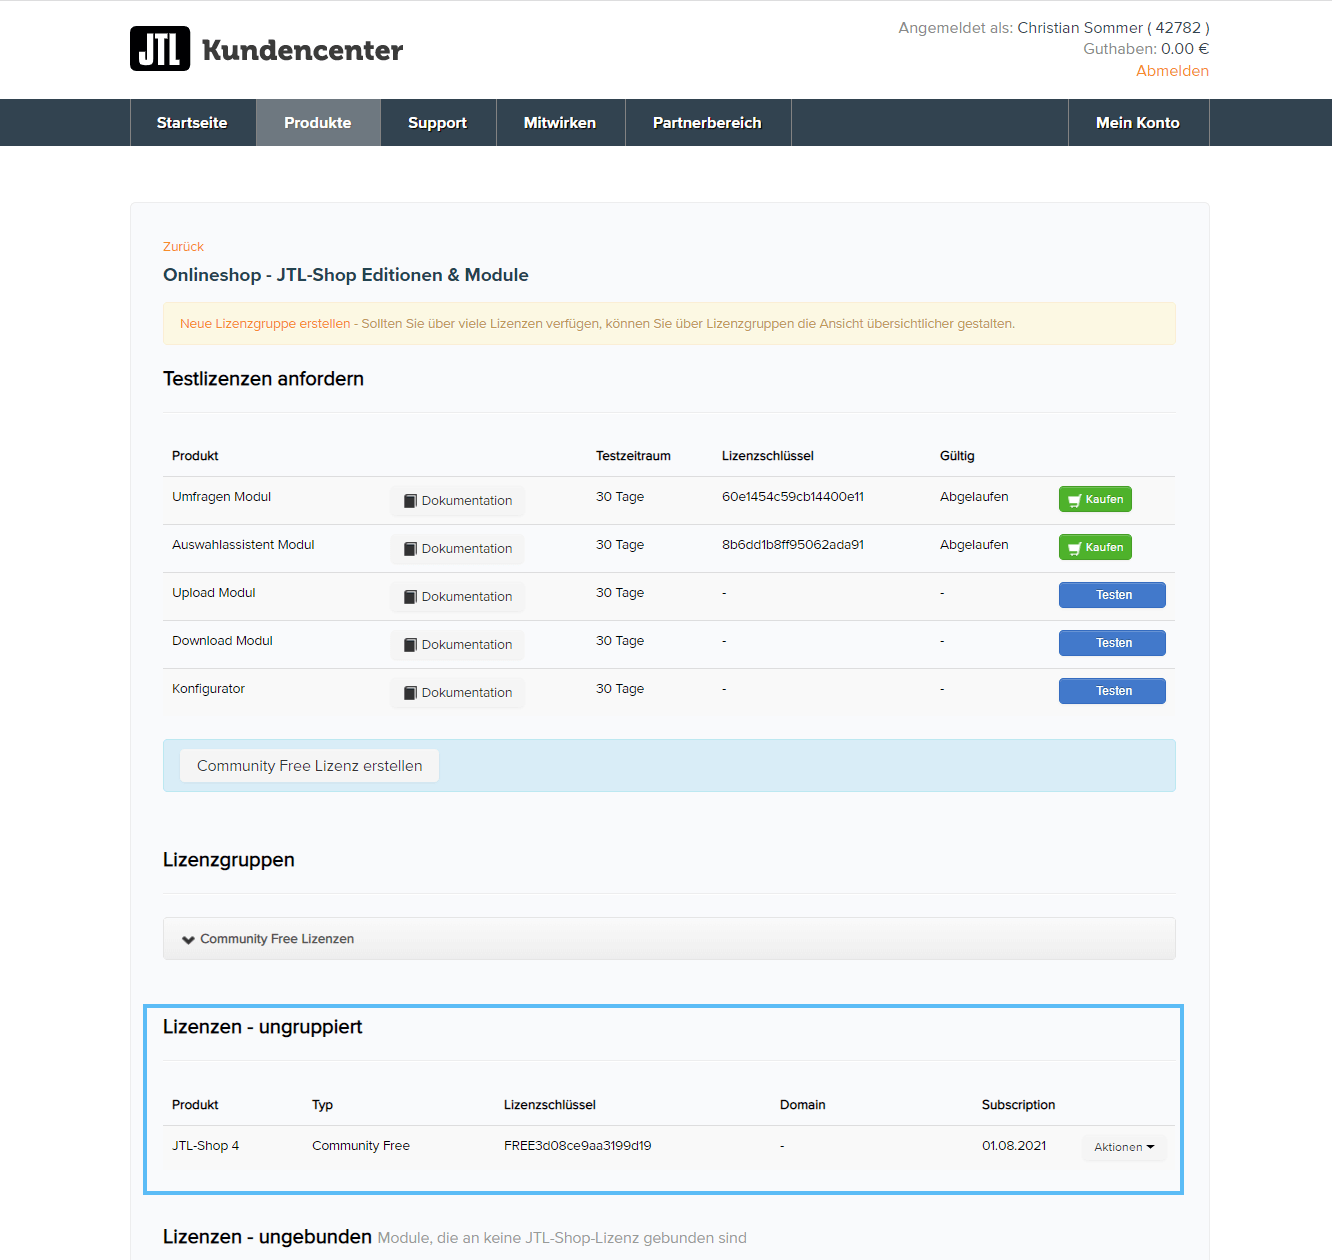
- On the start page under Lösungen von JTL (Solutions by JTL), click Onlineshops: x Lizenzen (Online shops: x licences).
You will usually find your licence key under Lizenzen – ungruppiert > Lizenzschlüssel (Licences – ungrouped > Licence key).
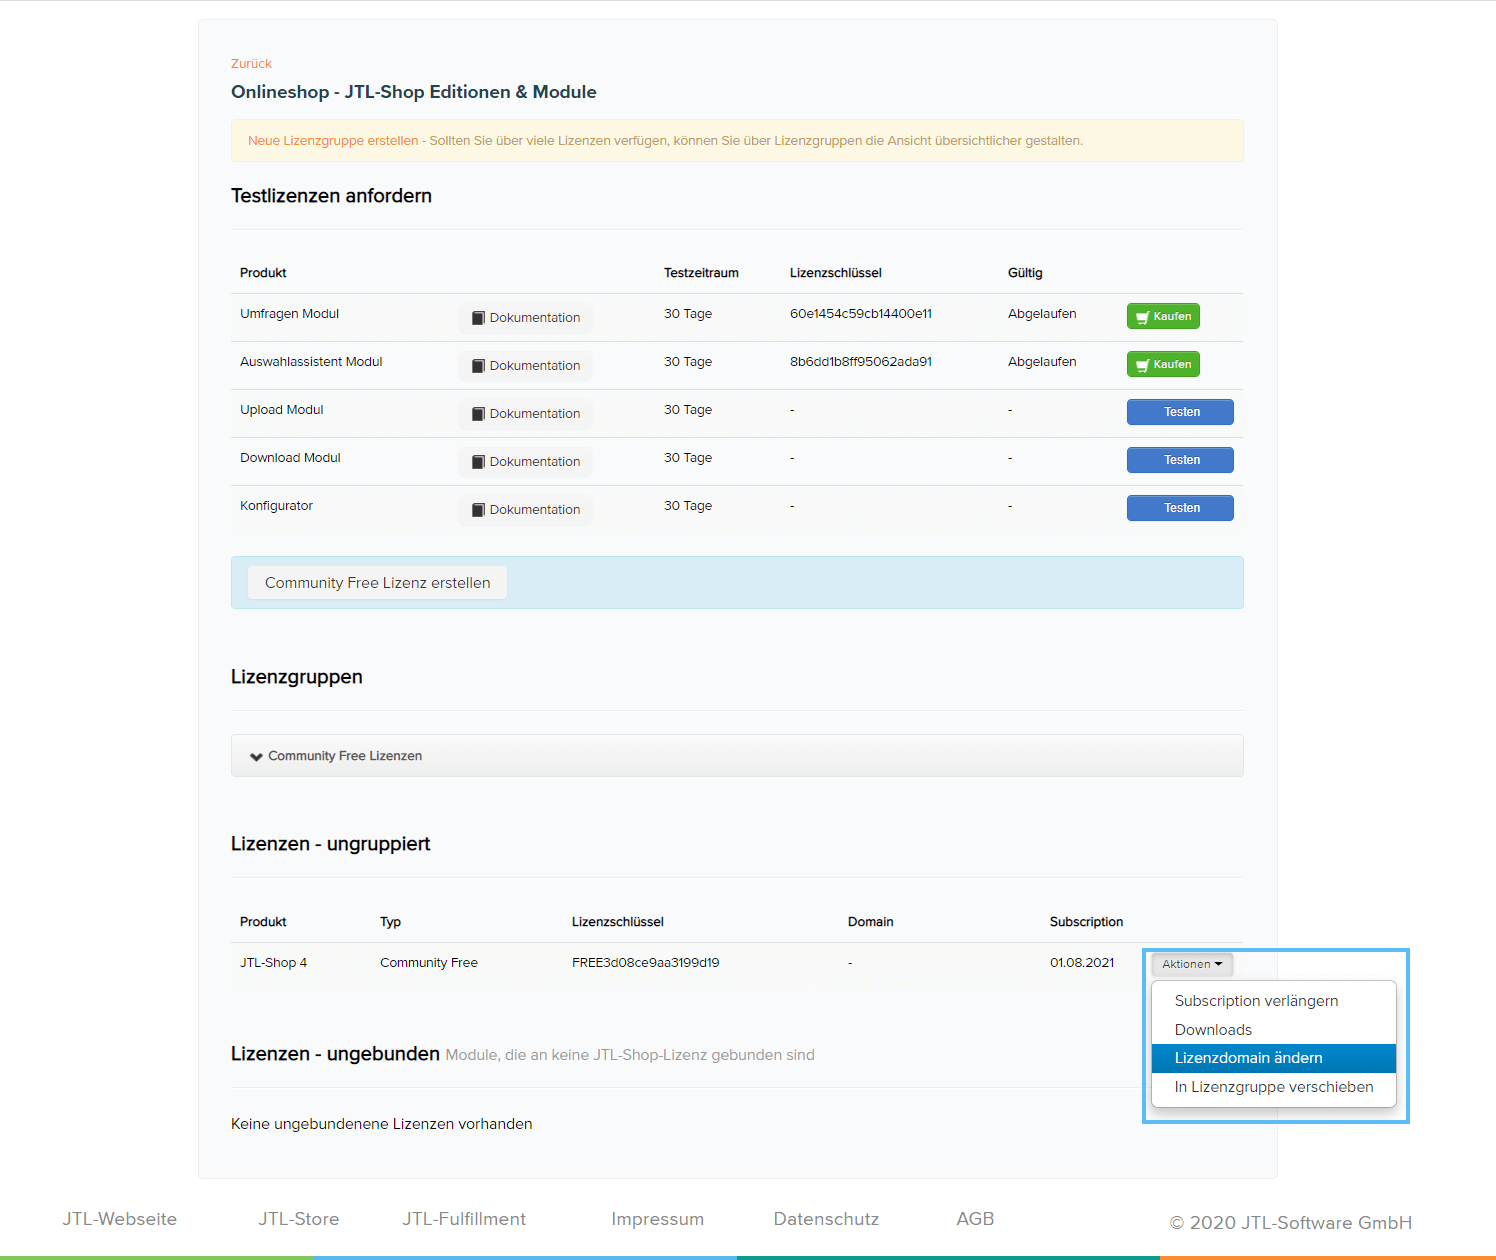
Via the button Aktionen (Actions), you can create a licence domain or change it. A licence domain links your domain to the licence of JTL-Shop.
For more information on the topic “Initial installation of JTL-Shop”, please go here.
First data synchronisation with JTL-Wawi
You need JTL-Wawi to send your categories and items to the shop. If JTL-Wawi is not installed yet, you should do this now (Installation help pages for JTL-Wawi). Of course, if JTL-Wawi is already in use, you do not have to install it again.
Activating the online shop
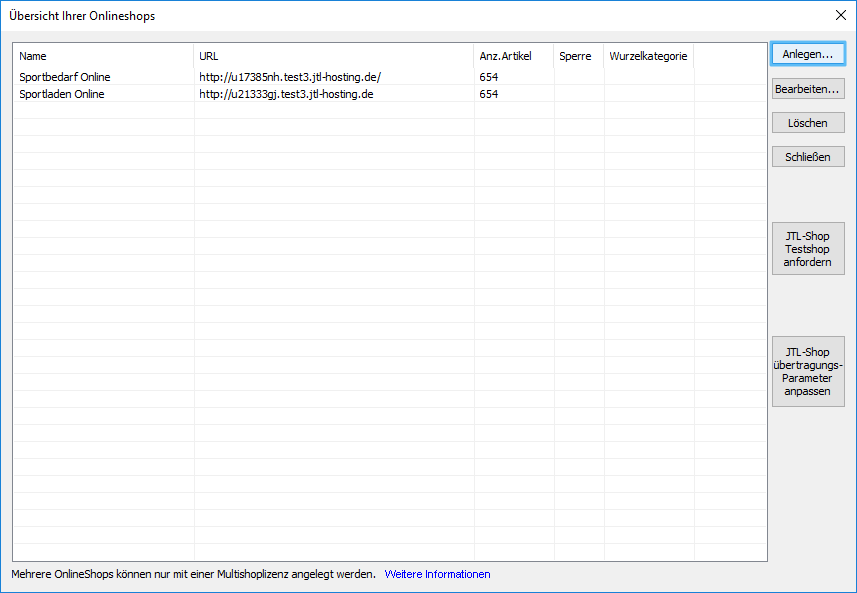
Open the dialogue Overview of your online shops via Online shop > Online shop connection.
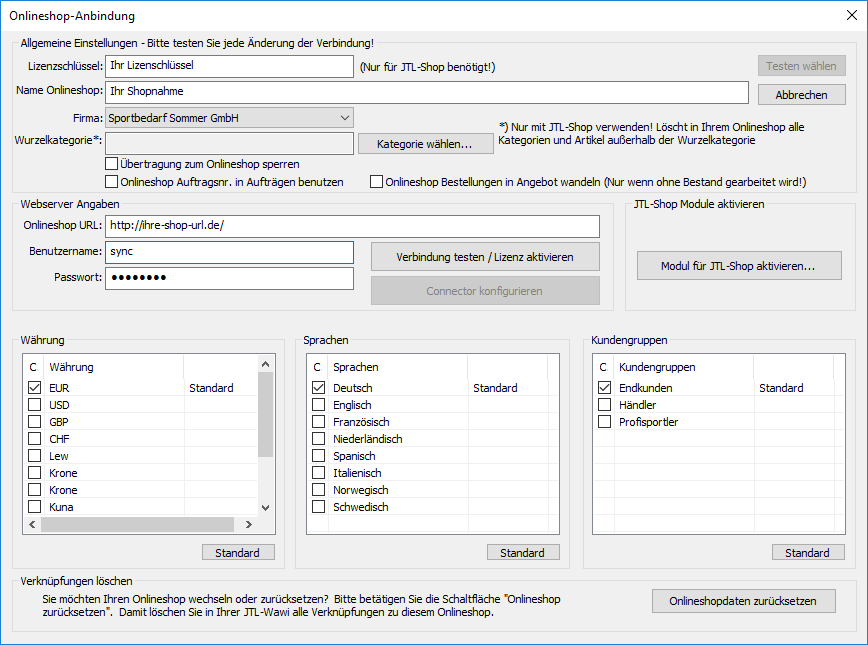
Click Create to open the window Online shop connection. Here you can enter your access data for JTL-Shop.
Changing important settings in JTL-Wawi
The online shop settings include important configuration parameters requires to synchronise JTL-Wawi with JTL-Shop. There you enter the access data for JTL-Shop that you received via the JTL-Customer Centre.
- Enter your access data for the online shop connection.
Also enter the licence key for JTL-Shop. Select the correct Currency, Languages and Customer groups that you want to be available in your shop. Also mark a currency, language, and customer group as default by clicking on the respective line and selecting the Default button.
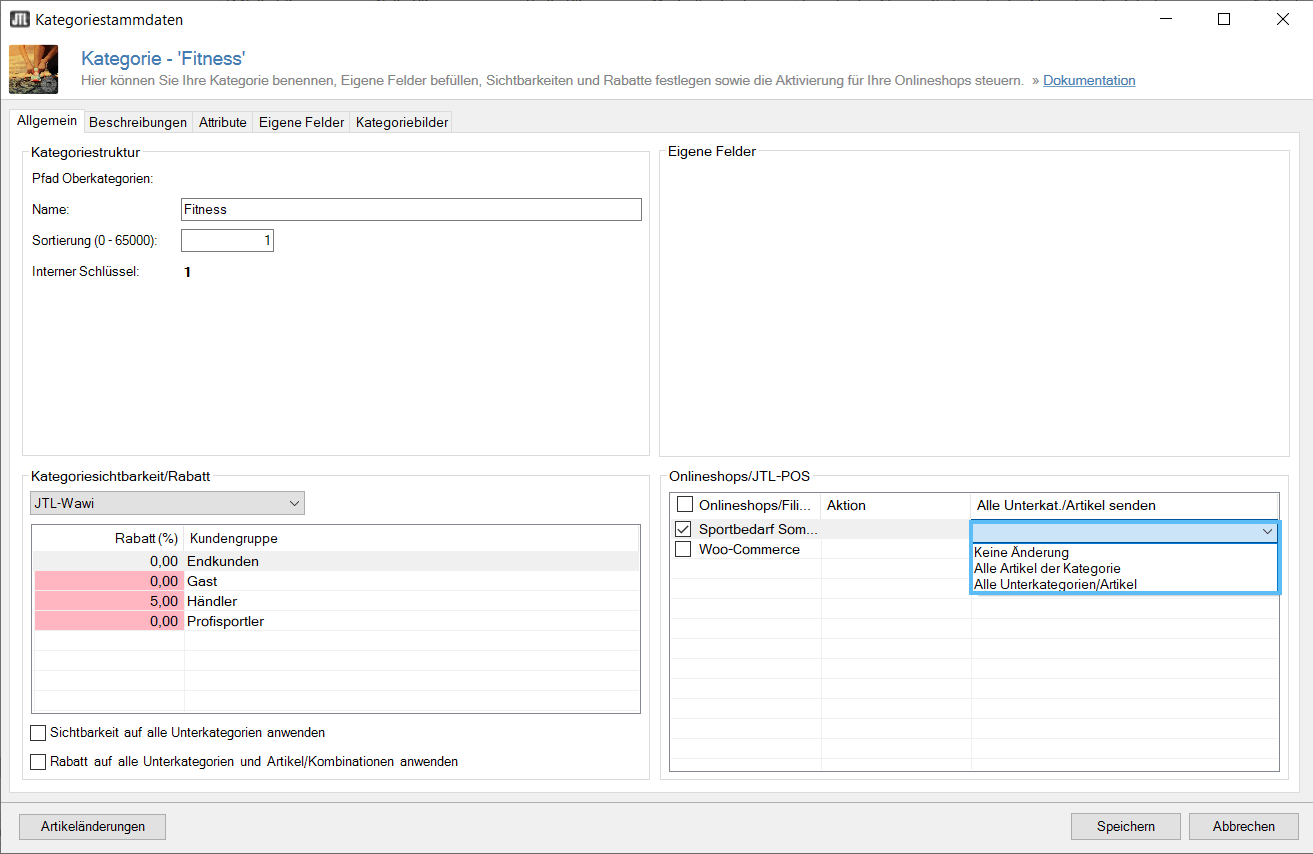
- In JTL-Wawi, go to the item management and double-click on a category to open its category master data. In the pane Online shops, select one or more online shops by simply checking the respective shops and then click Save.
- Once the category has been activated for the online shop, you can select an action for subcategories and the items in the category. To select an action, double-click on the field below All subcat./items. Click Save to apply your changes.
The following actions are available:
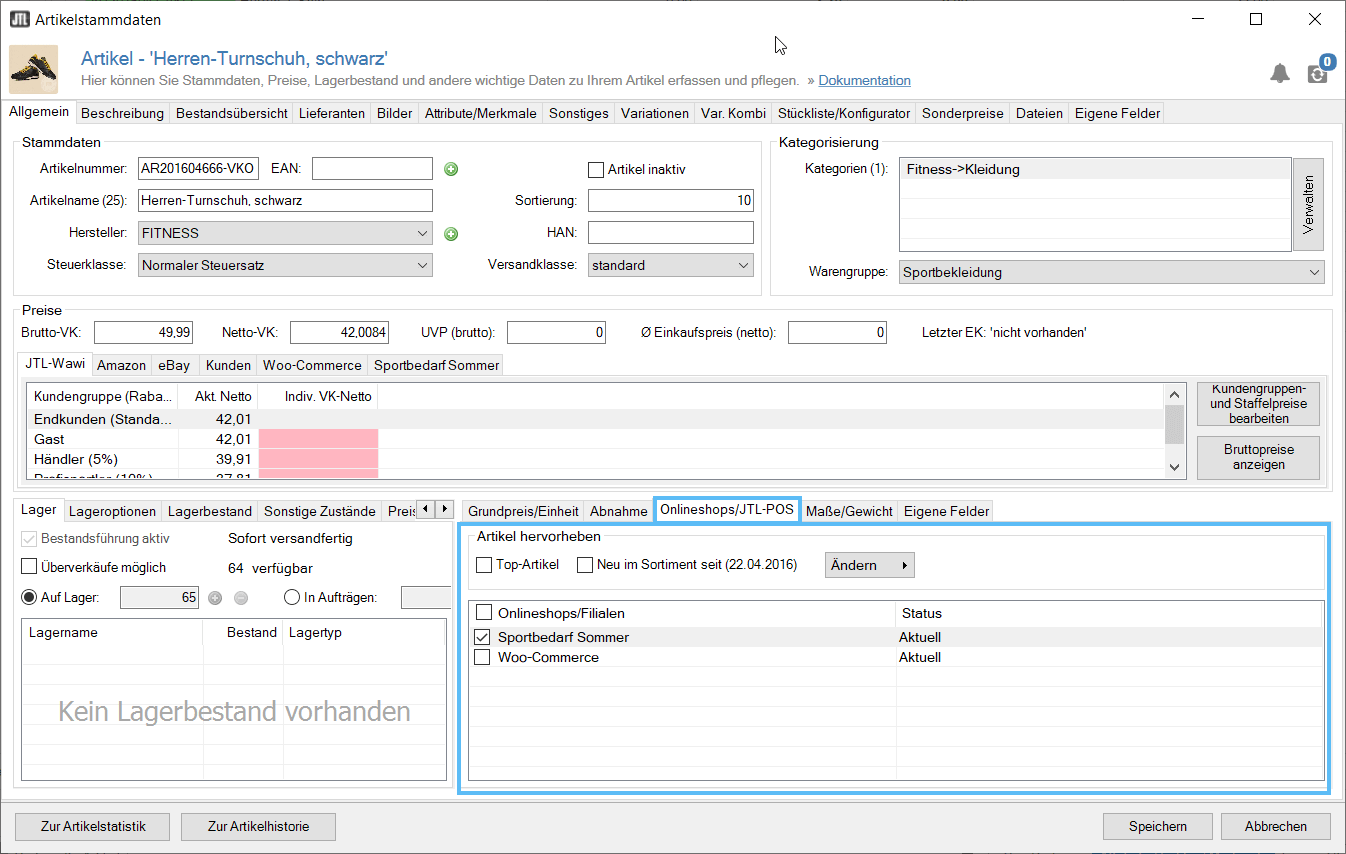
- Create a new item or edit an existing one in your categories and activate these items for the online shop as well. If you have several online shops, the item can be activated for any number of them.
Check the desired online shop. Enter a stock level for the item (via goods receipts). Items without stock and empty categories are normally hidden by the online shop in accordance with the standard settings.
- Start a synchronisation with the online shop to send the settings, categories, and items to the shop. Go to Online shop > Online shop synchronisation to open the dialogue Online shop synchronisation. Start the synchronisation by clicking Start.
If this is the first time you do a synchronisation and have added category and item images, also check the box Send all images again.
