We are currently still building up the English documentation; not all sections have been translated yet. Please note that there may still be German screenshots or links to German pages even on pages that have already been translated. This guide mostly addresses English speaking users in Germany.
Sending newsletters from JTL-Shop
Your task/initial situation
Configuring newsletters in JTL-Shop
With the newsletter module of JTL-Shop, you can keep your customers informed about current information via email. For example, you can draw subscribers’ attention to promotions, special offers, and new products, or create a newsletter as regular advertising.
- In the back end of JTL-Shop, go to Promotions > Newsletter.
- Switch to the Settings tab. Here you define how newsletters are to be sent from JTL-Shop.
- Konfigurieren Sie die Newsletter-Einstellungen wie gewünscht. Zur Beschreibung der Seite Newsletter-Einstellungen.
- Click Save to save the settings.
Sending newsletters
To send a newsletter from JTL-Shop, you have to go through several steps.
Step 1: Creating/Editing the newsletter template
Each newsletter is sent via a template. You have two options for this. You can either create a template from scratch or you use one of the standard templates. In the following we use one of the standard templates. If you create the template yourself from scratch, all fields that are pre-filled in the standard template are empty.
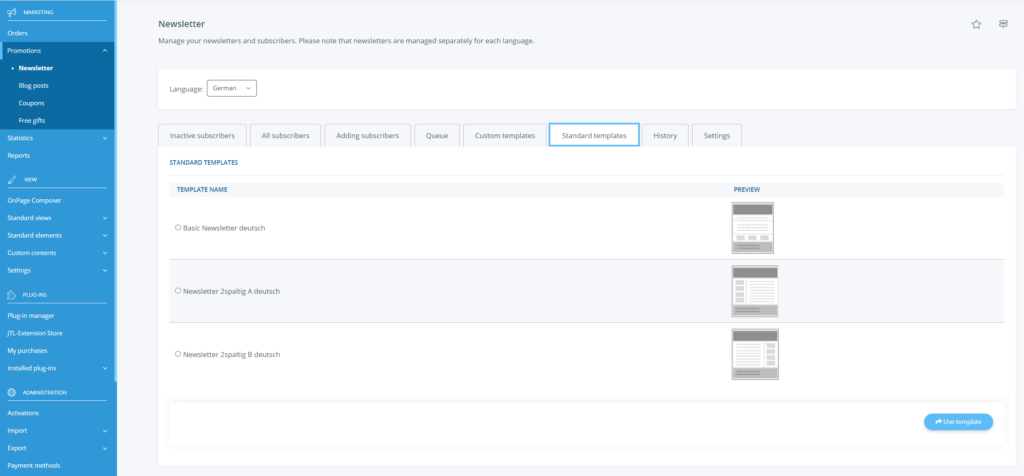
- Switch to the Standard templates tab. Here you will find all the standard templates available for the language currently selected.
Language: Use the drop-down menu to change the language of the newsletter templates. All languages maintained in JTL-Shop are available to you.
- Select one of the templates and click Use template. The page Custom templates opens.
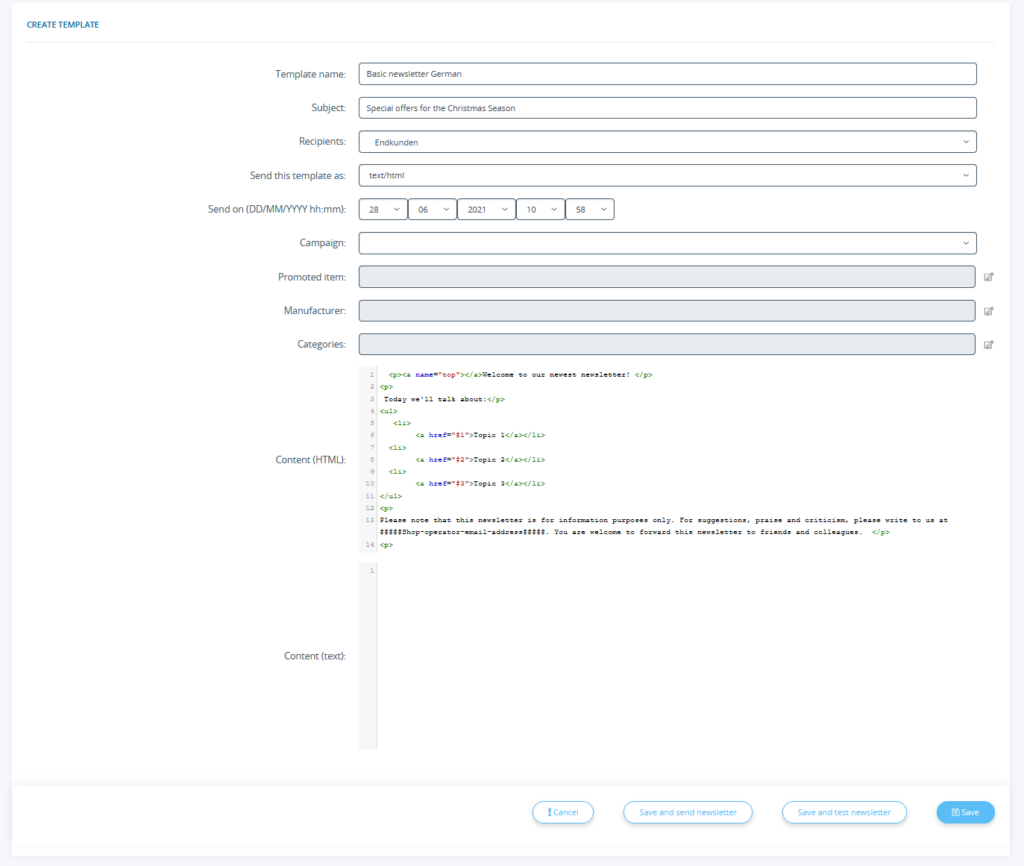
- Enter a name for the newsletter template and determine the subject as well as the text of the newsletter.
- Legen Sie außerdem fest, mit welchen Objekten der Newsletter verknüpft sein soll, und an wen der Newsletter geht. Zur Beschreibung aller Optionen der Seite.
- You can also add a banner and set the date on which the newsletter will be sent. Then save the template.
You can choose from the following options:
HTML
Advantages
Disadvantages:
Text
Advantages:
Disadvantages:
Step 2: Testing the newsletter
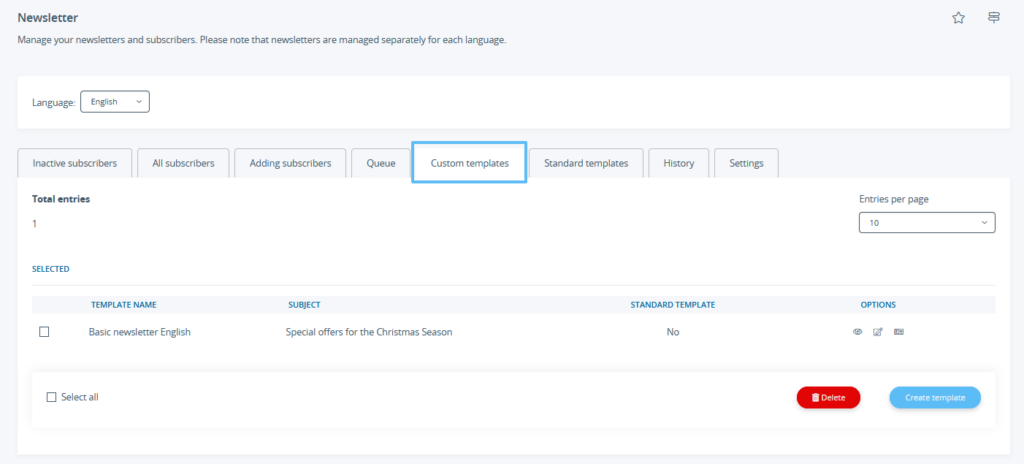
Once you have saved the template, you will find it in the Custom templates tab.
Preview
You can view a preview of the newsletter.
- Click on the preview icon to see what your newsletter will look like.
On the preview page you can see the preview of both the HTML and the text newsletter.
- Click on the Back button to return to the template overview.
Testing the newsletter dispatch
You can test how the finished newsletter will look to the customer by having a test email sent to yourself.
- In the Custom templates tab, click Prepare for sending next to the newsletter template you want to test.
- Click on the Save and test newsletter button. A test newsletter will now be sent to the address stored in the newsletter settings.
Step 3: Sending the newsletter
If you are satisfied with all the settings, you can send the newsletter. Dispatch then starts from the time entered in the template under Send on.
- In the Custom templates tab, click Prepare for sending next to the newsletter template you want to send.
- Check all entries again, then click on Save and send newsletter. The newsletter is now added to the newsletter queue.
Viewing the newsletter
The Queue tab contains all the newsletters that you want to send or that are currently being sent. In the table, in addition to the set information and data you created in Create template, you will also find important information about the number of recipients who are in the customer group and how many newsletters have already been sent. By selecting the newsletters in the queue and using the Delete button, you can remove individual newsletters from the queue.
To ensure that the newsletters are sent securely, they are sent to smaller groups of recipients successively. This division prevents congestion on the mail server when dispatching to many subscribers.
Der Newsletterversand wird nicht durch ein festgesetztes Zeitintervall wie z. B. “Alle X-Minuten” gestartet. Es wird die gleiche Methode wie beim Aufgabenplaner, durch Seitenaufrufe in Relation mit der Aufrufzeit, verwendet.
Also note the email sending method used. With the “php-mail” sending method, you will not receive an error message in the event of non-delivery and the number of emails that can be sent is subject to a daily limit. To avoid this, we recommend that you use SMTP sending.
Viewing and editing the subscriber list
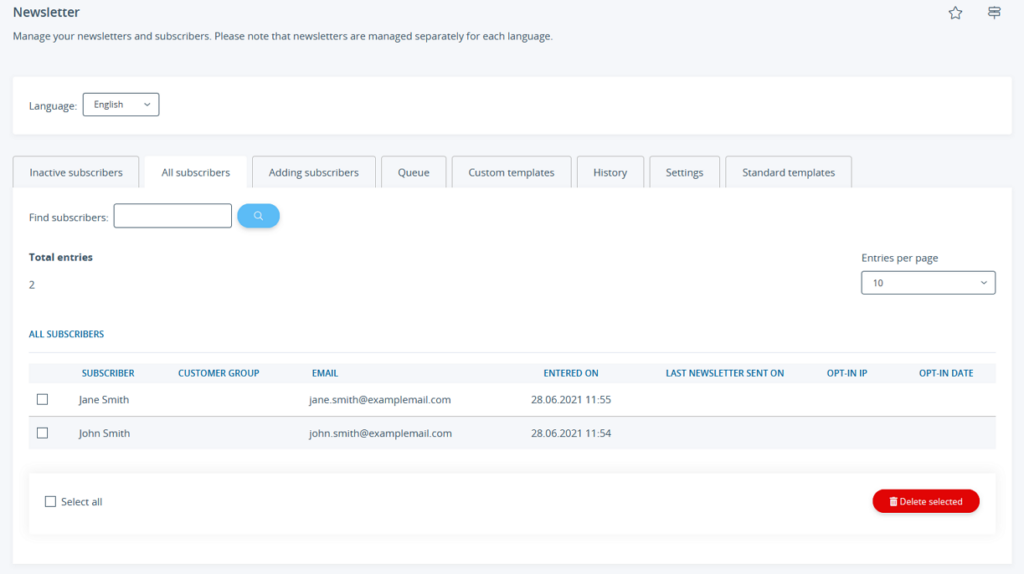
You can view a list of all newsletter subscribers.
- To do this, switch to the All subscribers tab.
All confirmed subscribers are listed here.
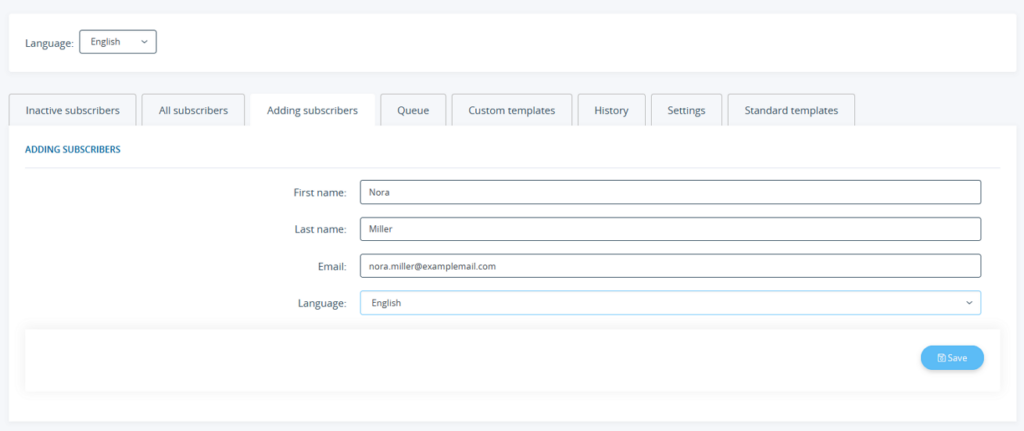
Adding subscribers
You can add subscribers yourself.
- To do this, switch to the Adding subscribers tab.
- Enter all the details of the newsletter recipient and click Save.
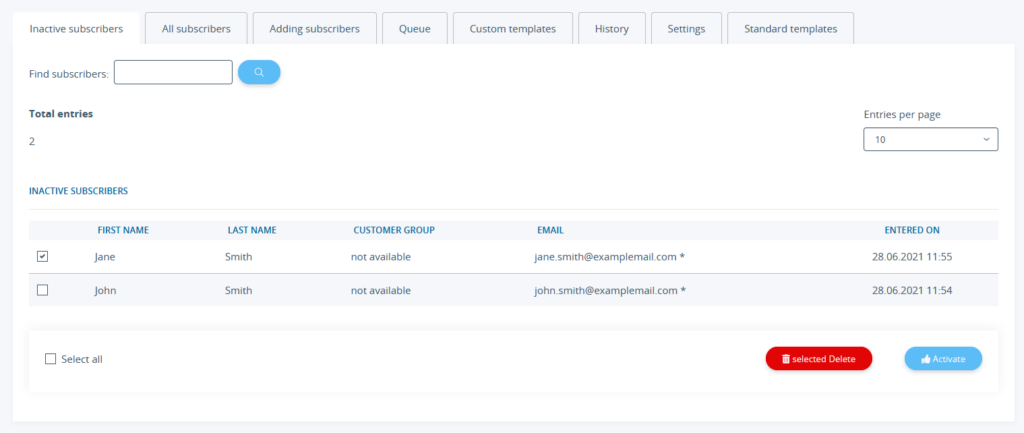
Manually activating unconfirmed subscribers
Normally, subscribers have to confirm their email addresses themselves. However, you can also do this manually in the back end of JTL-Shop so that these subscribers receive the newsletters.
- Switch to the Inactive subscribers tab. Here you can see all the subscribers you have entered yourself or who have registered for the newsletter via the front end but have not yet confirmed their email address.
- Select the subscribers you want to activate and click Activate.
Deleting subscribers
Normally, newsletter recipients can unsubscribe from your newsletters themselves on the special Newsletter page. You should also include the link to this page in every newsletter. However, you can also remove newsletter recipients yourself.
- To do this, switch to the All subscribers tab.
- In the Find subscribers field, enter the name of the recipient you want to delete and click Search.
- Mark the subscriber to be deleted via the check box in front of their name.
- Click Delete selected.
Viewing sent newsletters
The newsletter history contains all newsletters that have been sent so far. If you use the same template and change it, the newsletters in your history will not change with it.
- Switch to the History tab.
Newsletter in the online shop
There are two ways to subscribe to the newsletter.
Registration form in the online shop
The special page Newsletter is usually located in the link group Information. You can edit link groups and page content via the JTL-Shop CMS.
Subscribers can also unsubscribe from the newsletter using this form.
Newsletter subscription via check box
You can also set up a check box in various places with which your customer can register for the newsletter.
