We are currently still building up the English documentation; not all sections have been translated yet. Please note that there may still be German screenshots or links to German pages even on pages that have already been translated. This guide mostly addresses English speaking users in Germany.
Customising email templates
Your task/initial situation
Opening the template overview
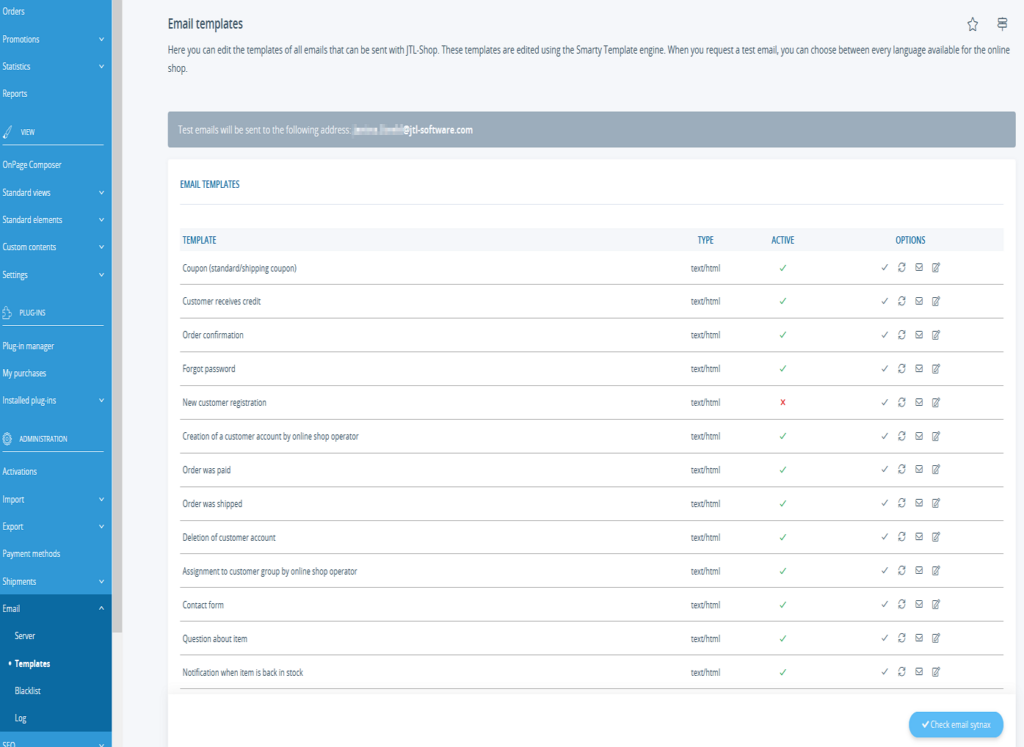
- In the back end of JTL-Shop, go to Email > Templates to open the overview of the Email templates.
Here you can see all emails that can be sent automatically by JTL-Shop. Via Request test email (letter icon), you can send a test email for every template to yourself.
Adjusting a template
Terms and conditions, cancellation policy, and legal notice
To display the terms and conditions, cancellation policy, and legal notice in your JTL-Shop 5, you must insert the following placeholders into your template. We recommend using the footer because it allows you to activate the contents in all emails.
You still need to activate the contents, e.g. the attachment of the terms and conditions, in the respective email template.
[AKZ][LEGAL_DATA]Making the general settings
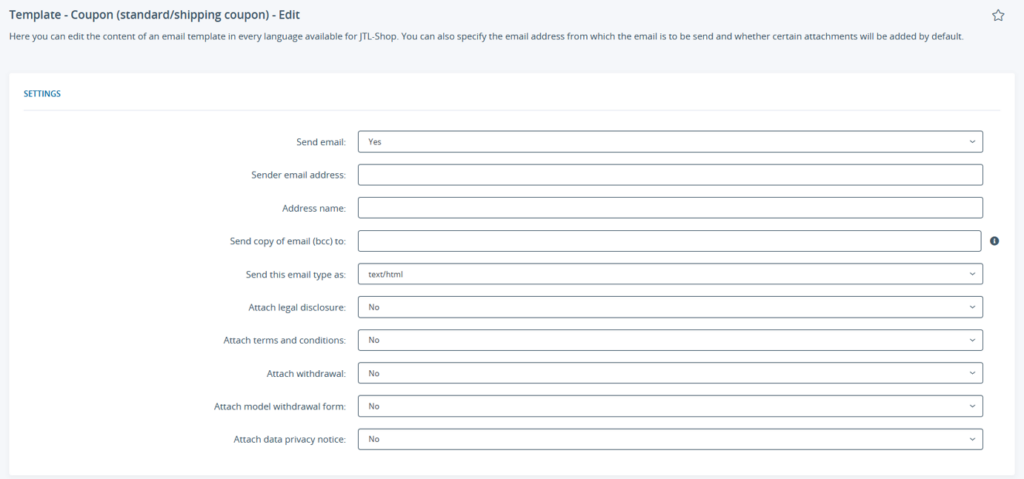
- Click the Edit button at the end of the template line. The page Editing the template opens.
- First, use the Send email setting to decide whether this type of email should be sent automatically by JTL-Shop.
- Then specify the email address from which this type of email is to be sent, the sender name and to whom a copy is to be sent. You can enter several recipients separated by a semicolon. If you leave these fields blank, the master email address will be used. Further reading: Setting up emails.
- You can also decide which documents should be automatically attached to the email. You can have your legal disclosure, the terms and conditions, the withdrawal policy, a sample withdrawal form and/or your data privacy notice attached to an email. These are added as text directly after the email text. To have the text displayed, the placeholder [LEGAL_DATA] must exist in the email template as the footer.
Send this email type as: Set here the format in which the email is to be sent. You can have the email sent in both HTML and text format (Text/HTML). In this case, both templates are used (email type: Multipart MIME) and your client’s email client decides which version to display. Alternatively, you can also send text-only emails(Text). In this case, only the text email is always displayed. If you choose the Text option, you do not need to maintain the Content (HTML) field below.
Creating the email content
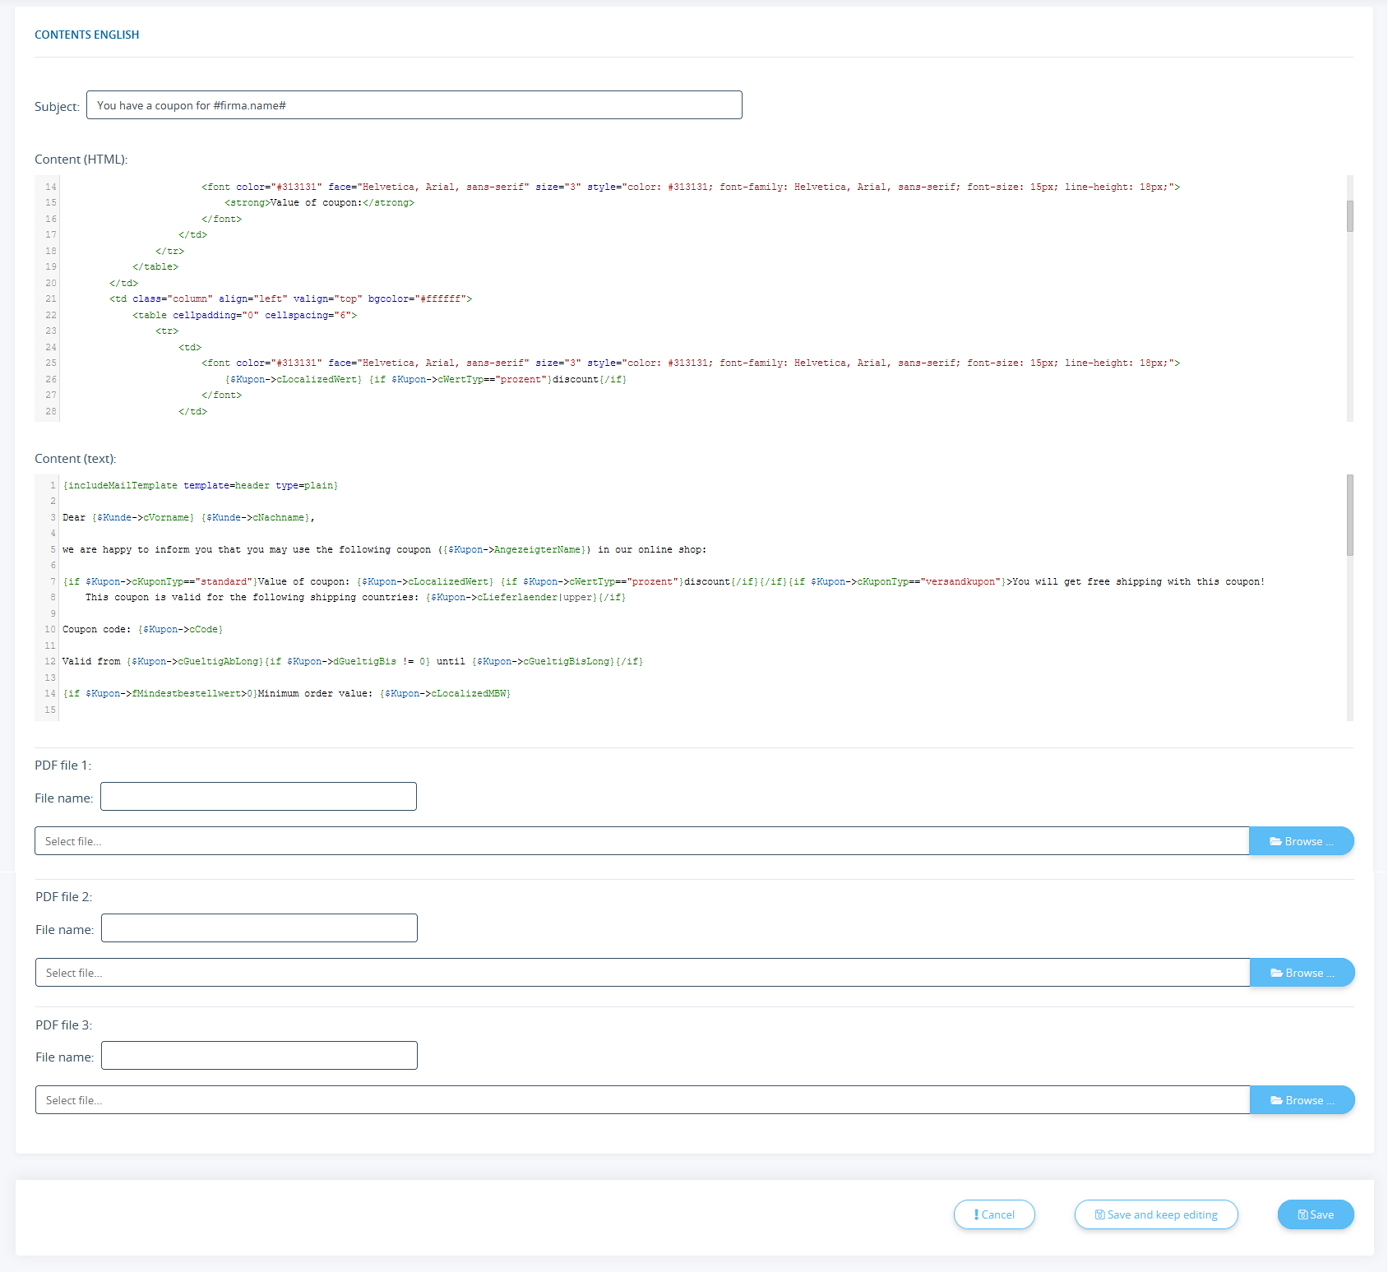
For each language you maintain for JTL-Shop, you have the option to create a template. You can use the placeholders for this. A list of possible variables can be found under Variables for email templates.
- Under Subject, specify what the subject of the email should be.
- Use the fields under Content (HTML) and Content (Text) respectively to create the content of your email. You can usually use the existing drafts and adapt them to your needs.
- Under PDF file 1–3, you can also specify attachments for the email type that are always sent along. This is useful, for example, if you always want to attach your current catalogue to a certain type of email.
- Click on Save to save the edited email template. JTL Shop will use the new variant you have created from now on.


