We are currently still building up the English documentation; not all sections have been translated yet. Please note that there may still be German screenshots or links to German pages even on pages that have already been translated. This guide mostly addresses English speaking users in Germany.
Creating and editing product groups
Your task/initial situation
General information on product groups
In JTL-Wawi, product groups are used to categorize items into general groups that are independent of the item category. For example, one item can belong to the category “Food supplements” and another to the category “Soft drinks”. Both items, however, can belong to the product group “Food” and are therefore linked.
You can later use the product groups to configure different functions. One possible application are the return reasons in the Returns area. These can be filtered by specific product groups. Product groups can also be used to configure the PackingBench/WMS output for documents.
Every item can only be assigned to a single product group. It is therefore important to pick useful product groups with careful consideration. When creating a product group, it can be helpful to first look at the type of item, e.g. food, clothing, furniture, tools, etc.
Creating product groups
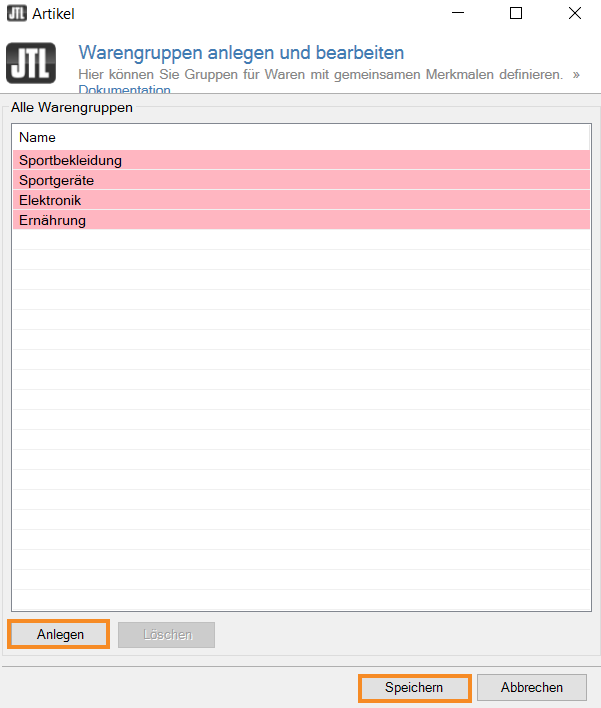
- In the toolbar, click Item > Product groups. The dialogue box Creating and editing product groups opens.
- Click on Create to add a new product group.
- Double-click on the product group you have just created and enter a name. Then press ENTER on your keyboard.
- Click Save to close the dialogue box.
Deleting product groups
You can delete existing product groups in the dialogue box Creating and editing product groups.
- Select the product group you want to delete and click Delete.
- Close the dialogue box by clicking Save. The product group has been deleted.
Assigning product groups
Once you have created a product group, you can assign items to it. Every item can only be assigned to a single product group.
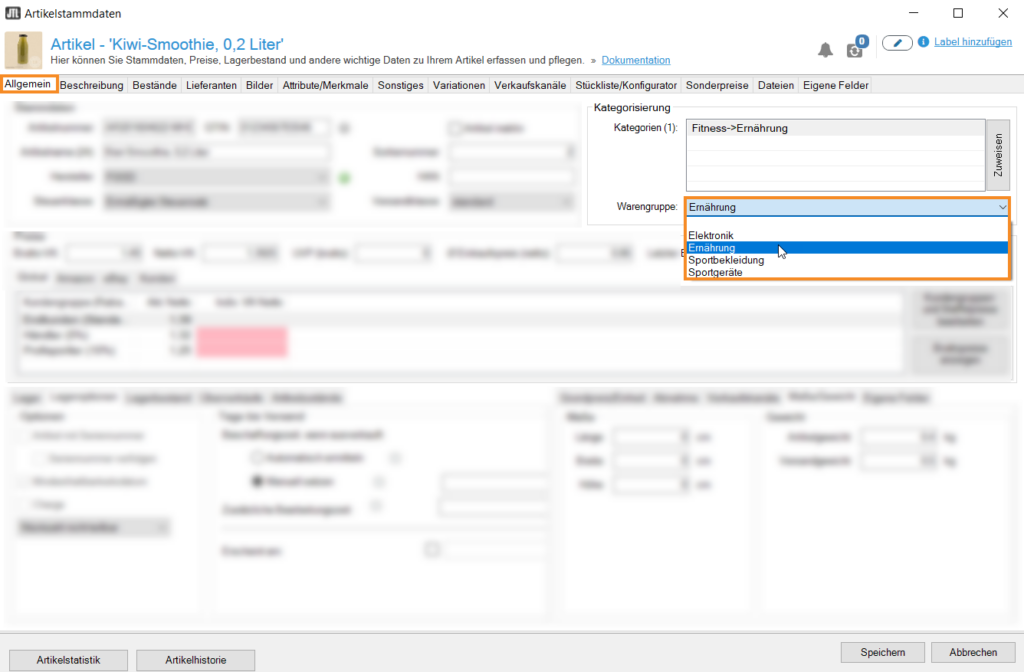
- Click on the Items icon to go to the item management and navigate to the item you want to assign to a product group.
- Open the item master data by double-clicking on the item.
- In the pane Categorisation, select a product group from the drop-down menu Product group.
- Close the item master data by clicking Save.
Related topics

