Thank you for using the English version of the JTL-Guide!
We are currently still building up the English documentation; not all sections have been translated yet. Please note that there may still be German screenshots or links to German pages even on pages that have already been translated. This guide mostly addresses English speaking users in Germany.
We are currently still building up the English documentation; not all sections have been translated yet. Please note that there may still be German screenshots or links to German pages even on pages that have already been translated. This guide mostly addresses English speaking users in Germany.
Transferring items from the replenishment area to the picking area
General information
Your warehouse has a replenishment area and a picking area. If you have made the appropriate settings in the replenishment configuration in JTL-Wawi, you will be shown items in the Internal > Replenishment area in JTL-WMS Mobile, whose quantity has fallen below the minimum quantity in the picking area.
Configuring the replenishment and picking area
Requirements
Process
In order to use the Replenishment feature in JTL-WMS Mobile, you must configure a replenishment and a picking area in your warehouse settings. Read below how to set them up.
- Start JTL-Wawi and select Menu: Warehouses > Warehouse.
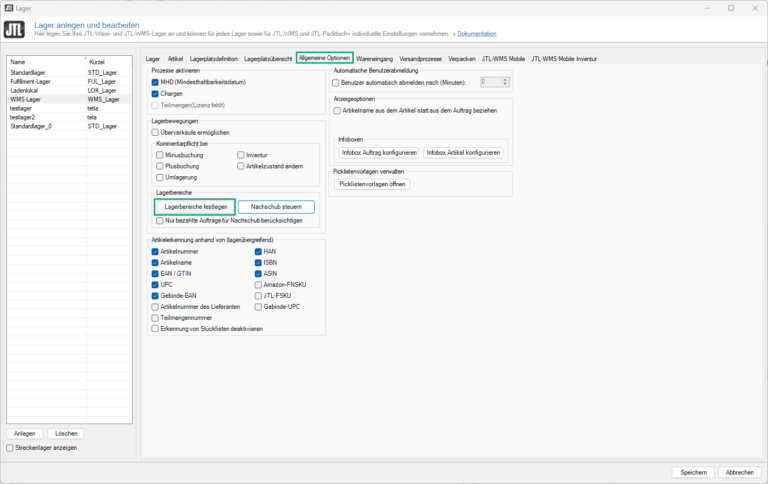
- Select WMS warehouse > Tab: General options > Pane: Storage sections > Button: Define storage sections and open the Storage sections dialogue box. For more information on the Storage sections dialogue box, please go here.
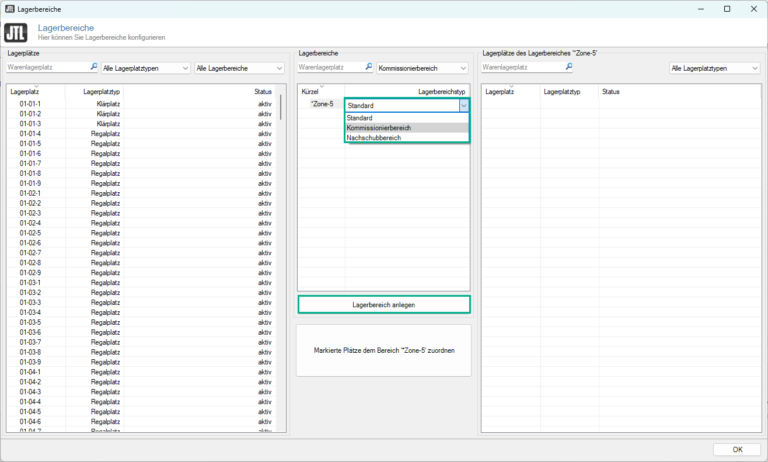
- Click New storage section.
- In the Storage section type column, double-click on your storage section type and select Picking area in the drop-down menu.
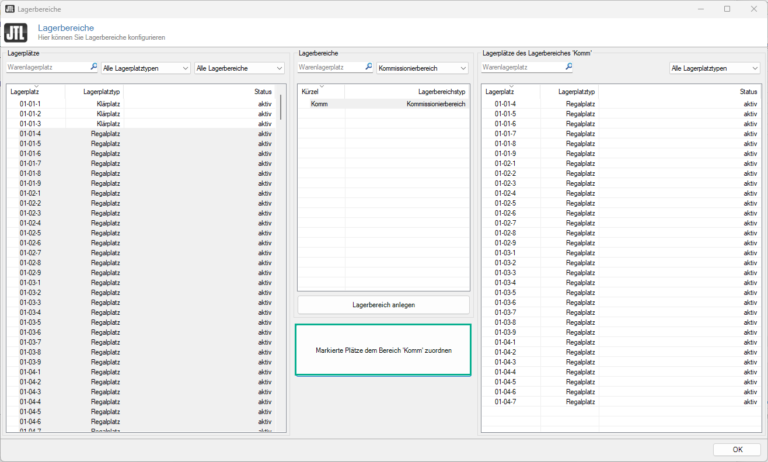
- Select your created storage section in the list to assign storage locations.
- In the Storage locations pane, select the storage location(s) you wish to assign to this storage section. For multiple selection, hold down CTRL.
- Click Assign highlighted storage locations to section. Your selected storage locations should now be listed in the Storage locations of storage section pane of the storage section.
- Repeat steps 3-7 to configure a replenishment area as well.
Note: Unassigned storage locations are still active but are not taken into account when replenishment is calculated.
You have successfully configured two defined storage sections.
Manage replenishment
Requirements
Process
- Start JTL-Wawi and select Menu: Warehouses > Warehouse.
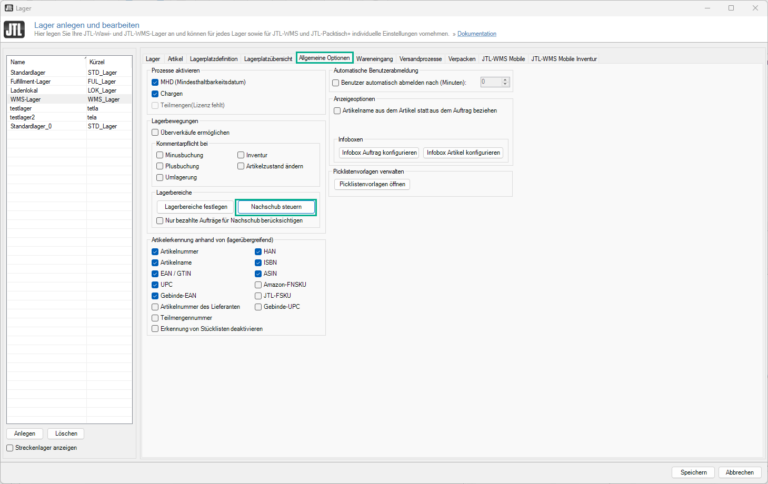
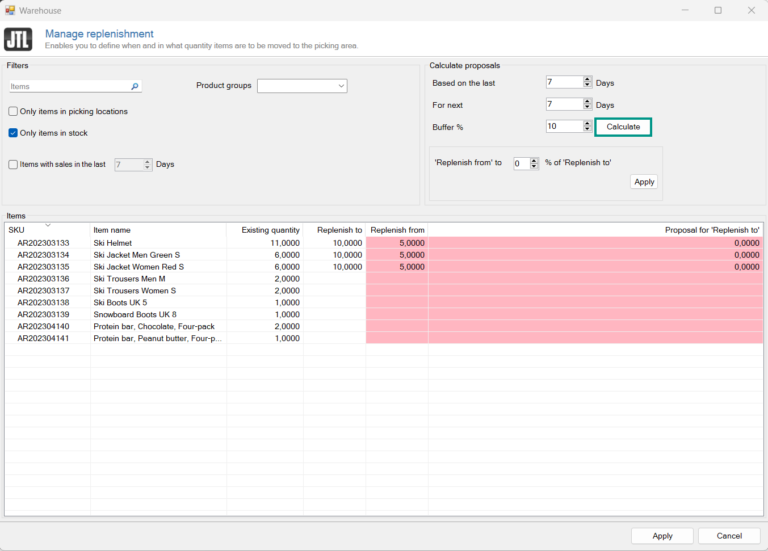
- Select WMS warehouse > Tab: General options > Pane: Storage sections > Button: Manage replenishment and open the Manage replenishment dialogue box. For more information on the Manage replenishment dialogue box, please go here.
- In the Calculate proposals pane, make your settings and then click Calculate. Alternatively, you can also enter the values manually. First, double-click the item in the Proposal for ‘Replenish to’ column and enter a value here. Then click Apply.Double-click in the Replenish from column and enter your value there.
- Click Apply to save your changes.
Replenish item
Your task/initial situation
Your warehouse is divided into a replenishment area and a picking area. In the replenishment configuration, you have specified the minimum quantity in the picking area for certain items. In JTL-WMS Mobile in the Internal > Replenishment area, you can view the items, whose quantity has fallen below the minimum quantity in the picking area. You now want to transfer these items to the picking area.
Step 1: Collecting items in the replenishment area
- Start JTL-WMS Mobile App.
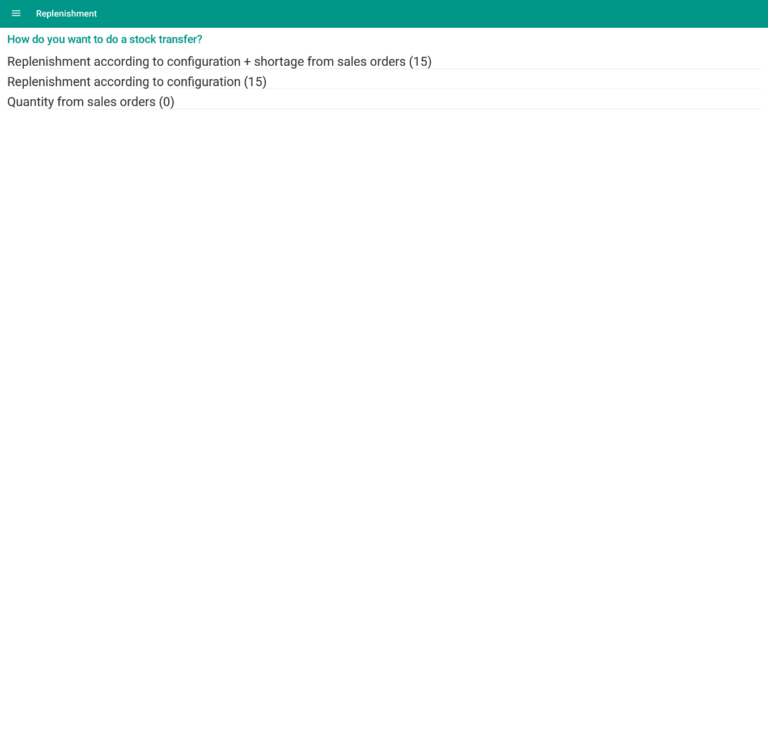
- Open the hamburger menu and click Replenishment.
- Here you can choose whether you only want to consider the replenishment according to the configuration, the required replenishment based on sales orders or both. In this example, we select Replenishment according to configuration + shortage from sales orders.
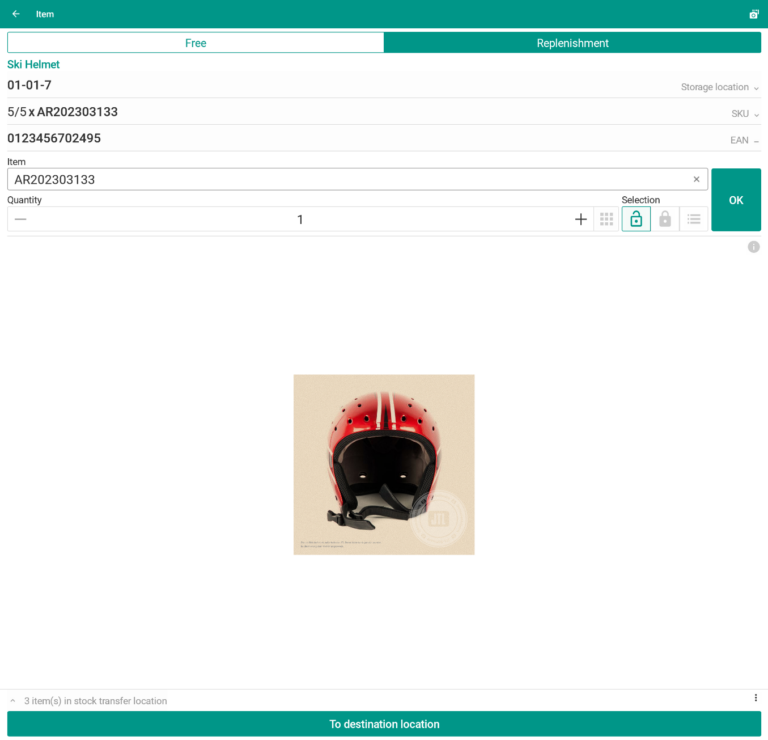
- The Item dialogue box opens and you will see one of the items that is to be transferred.
- Go to the storage location of the item you want to transfer.
- Enter the number of items you want to transfer and tap OK. After tapping OK, you will receive a message in the upper part of the window that the item has been successfully posted to the stock transfer trolley. The next item is displayed directly in the view.
- Place the items on your stock transfer trolley.
- Go to the storage location of the next item you want to transfer and scan it as well.
- Repeat the process until you have collected all items that you want to transfer to the picking area.
Transferring additional items: During the transfer of the replenishment items, you notice that you would like to transfer additional items that are not displayed as replenishment items. Click Free to enter the free stock transfer mode and enter more items for stock transfer.
Scan the storage location of an item you want to transfer, record the item in the desired quantity and put it on the stock transfer trolley. Then click Replenishment to proceed with the stock transfer of the replenishment items.
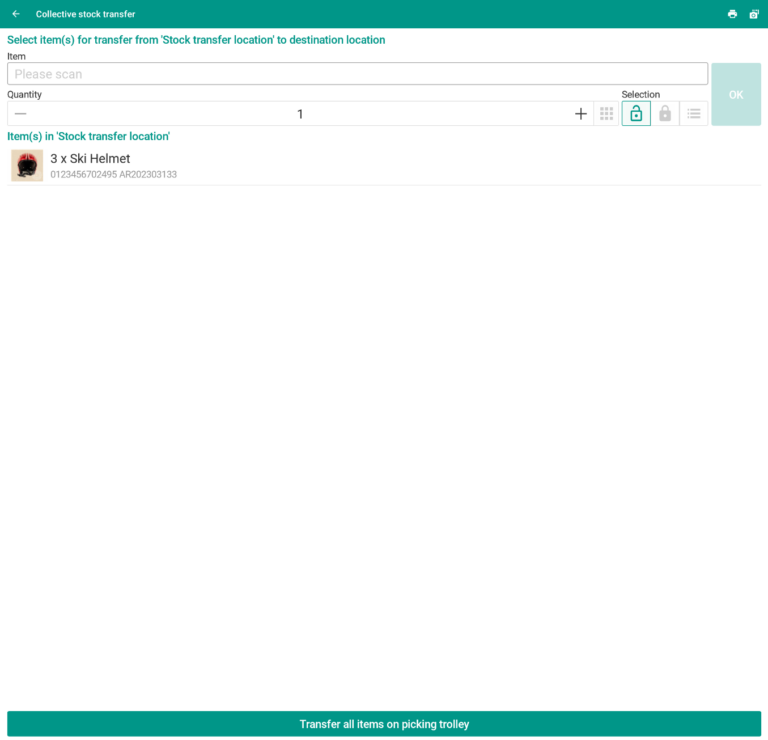
- Once you have collected all the items that you want to transfer, click on To destination location. Then carry out a collective stock transfer as usual. Go here to learn how to do this.
You do not have to transfer all items that are displayed in the Replenishment area at once. You decide which items you want to transfer and can transfer the remaining items at a later point in time.
