We are currently still building up the English documentation; not all sections have been translated yet. Please note that there may still be German screenshots or links to German pages even on pages that have already been translated. This guide mostly addresses English speaking users in Germany.
Setting up Google Shopping for JTL-Shop
Your task/initial situation
General procedure
To do this, proceed as follows:
This procedure offers you the highest possible efficiency when listing your products on Google Shopping.
General information
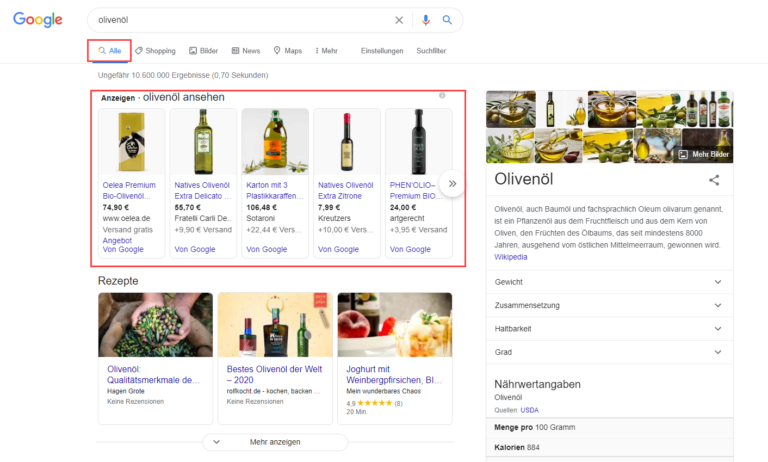
Google Shopping is a product search by Google. Some parts of Google Shopping are fee-based and linked to Google Ads. However, results that appear in the Shopping tab of the Google search can also be listed there free of charge. Everything marked “Ads” by Google is subject to a fee, but the mere listing below the results is free of charge. You can also read the basics about Google Shopping in our JTL-Blog:
Read blog post (German only): Successful with Google Shopping | Part 1
Read blog post (German only): Successful with Google Shopping | Part 2
Introduction
Before you read further in this tutorial, you should consider whether you want to invest money in Google Shopping campaigns or whether you just want to do the free listing. Unlike the platforms eBay and Amazon connected via JTL-eazyAuction, where fees are only charged when a purchase happens, fees for Google already apply when someone clicks on your Google Shopping ad. You can specify the fee yourself. The higher the fee is, the further up your Google Shopping ad is listed in the Google search, which means that more potential customers will see your offer.
Google calls this “Cost per Click (CpC)”. A click on your ad forwards the user to your online shop. Your task now is to convert this click into a purchase if possible, i.e. to achieve a high conversion rate.
Prerequisites
The following requirements are necessary to be able to list on Google Shopping:
Setting up the data feed in JTL-Shop
Set up the data feed in JTL-Shop.
Step 1: Purchase and setup of the Google Shopping plug-in
First you need to book the plug-in in the JTL-Extension Store. To do this, open the JTL-Extension Store.
- Under Lösungen & Erweiterungen (Solutions & Extensions), select the extension Export format Google Shopping JTL-Shop 5.
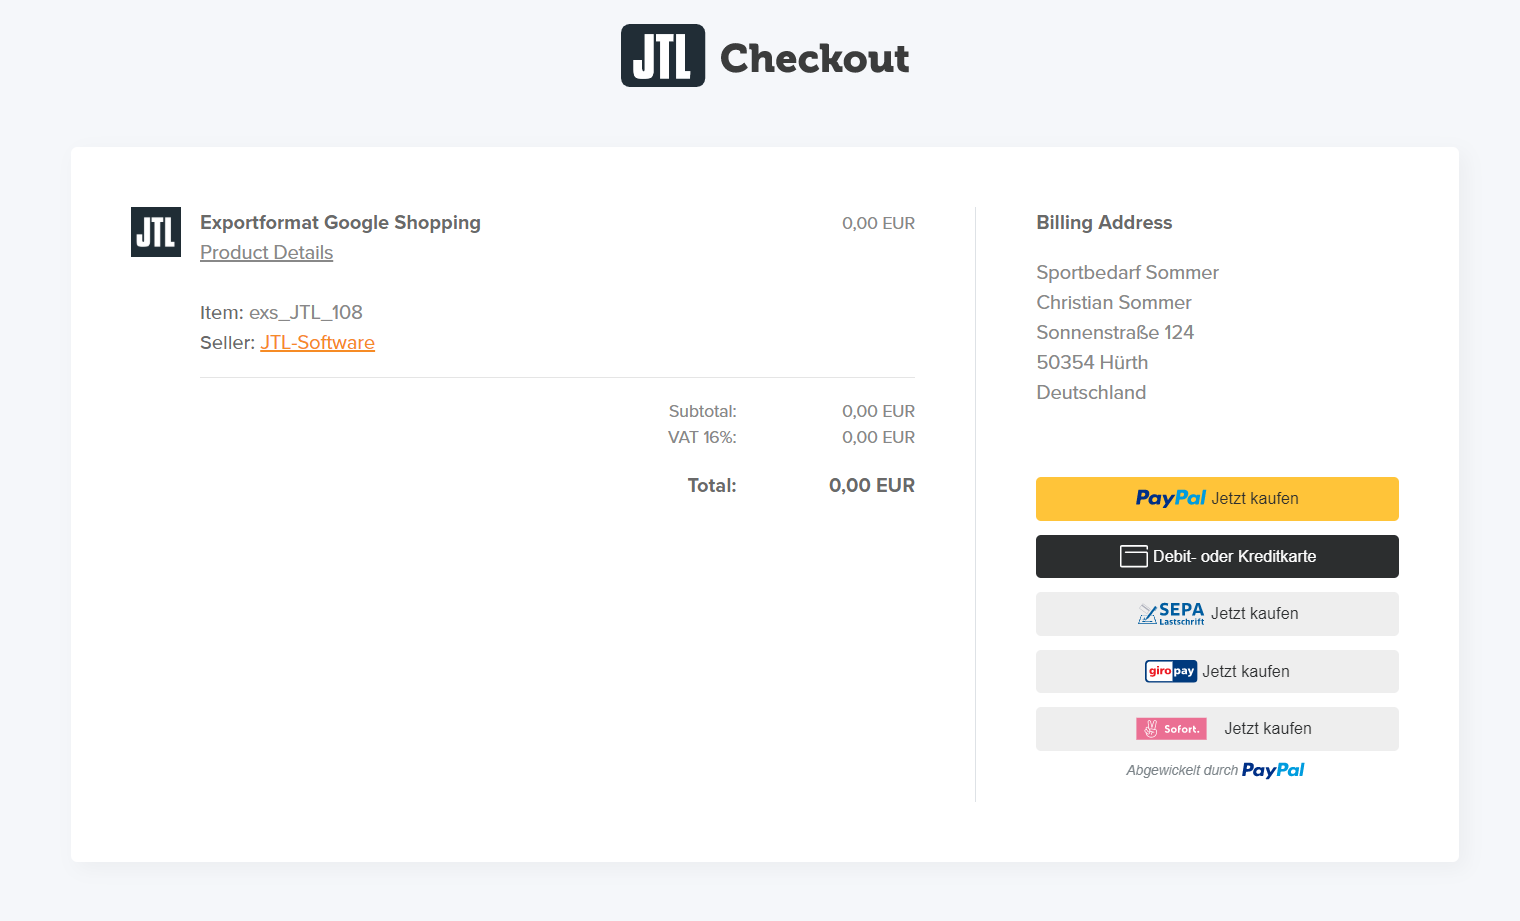
- Click on Jetzt auschecken (Check out now) and log in with your central login.
- Now select the desired payment method (Buy now) and proceed with the payment.
- Open the back end of JTL-Shop. Your can now find your licence here: Plug-ins > My purchases.
- Then click Install. The extension will then be added to your shop.
Step 2: Plug-in setup for Google Shopping
Once the plug-in is successfully installed, you can continue with the settings. To do this, open the plug-in settings under Plug-ins > Installed plug-ins > JTL Export format Google Shopping. A detailed description of the plug-in settings can be found here:
Step 3: Editing the export format
Now that the settings have been made, we can move on to exporting the data feed. But before we create the export manually for the first time, a few explanations are needed.
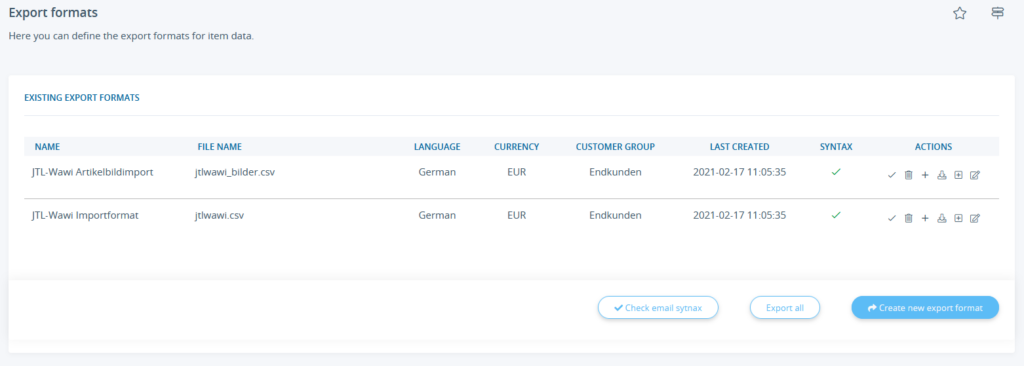
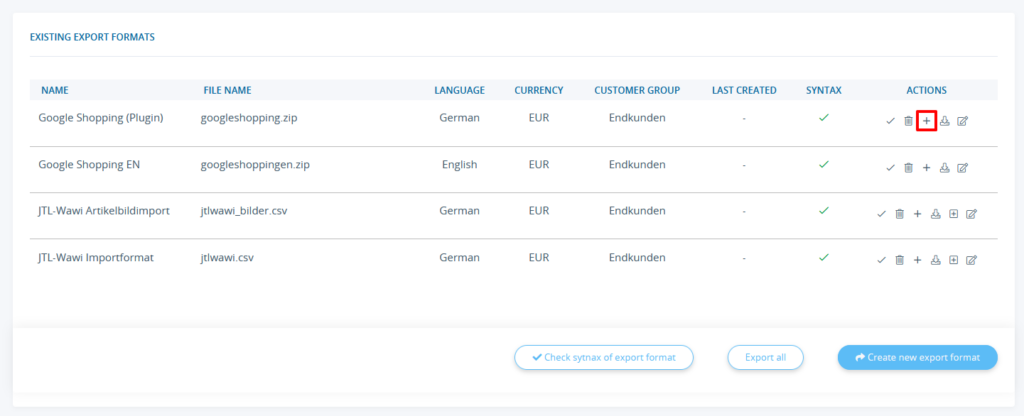
In JTL-Shop, go to Export > Other formats to open the Export formats. An export format has already been created during the plug-in installation. This export format is Google Shopping (Plugin). To make settings for this export format, select the edit icon in the corresponding line under Actions.
Most of the settings in the export format settings have already been made and explained. Let’s just look at the most important settings.
Campaigns: Since campaigns are very important with regard to Google Shopping, you will find a description of the campaign feature in JTL-Shop in the “Campaigns” section of this tutorial.
Export of child items: If you work with variations, this option specifies whether Parent and child items, Parent item only or Child item only are exported. The default setting is Export parent and child items.
File name: Specify what the file name of the exported file should be. Note that Google Shopping expects the file to be a ZIP file. The default is “googleshopping.zip”. Separate export formats must be created for different countries.
Only items with stock over 0: Set whether only items with stock over 0 are exported.
Only items with price over 0: Set whether only items whose price is not 0 are exported.
Only items with description: Set whether only items with a description are exported.
Character masking: Some characters cannot be exported correctly due to incorrect character encoding. In the export for Google Shopping, all characters can be exported. Therefore, no special settings are needed.
Step 4: Link to shop campaign
In order to monitor the results of your Google Shopping campaign, it makes sense to link the Google export to a campaign in JTL-Shop. How does a campaign work? Each link contained in the Google export attaches a parameter to JTL-Shop via the campaign feature. Each time this parameter is called up, it is added to the statistics.
To create a campaign, proceed as follows:
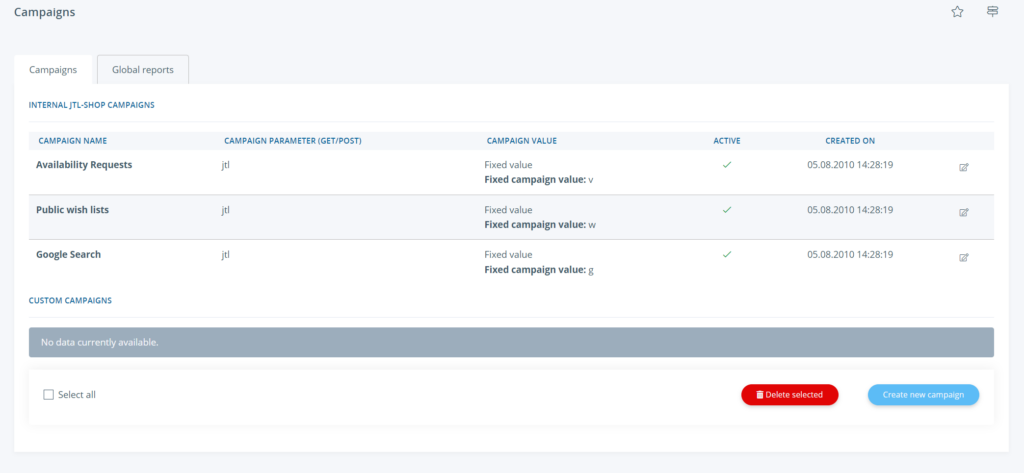
- In the back end of JTL-Shop, go to Marketing > Statistics > Campaigns.
- Click Create new campaign. Assign a campaign name (e.g. Google Shopping Germany). Enter the value to be tracked (e.g. “googleen”). For the campaign value type, we use the simplest setting Fixed value and assign any value (e.g. 1). Of course, the campaign should be activated.
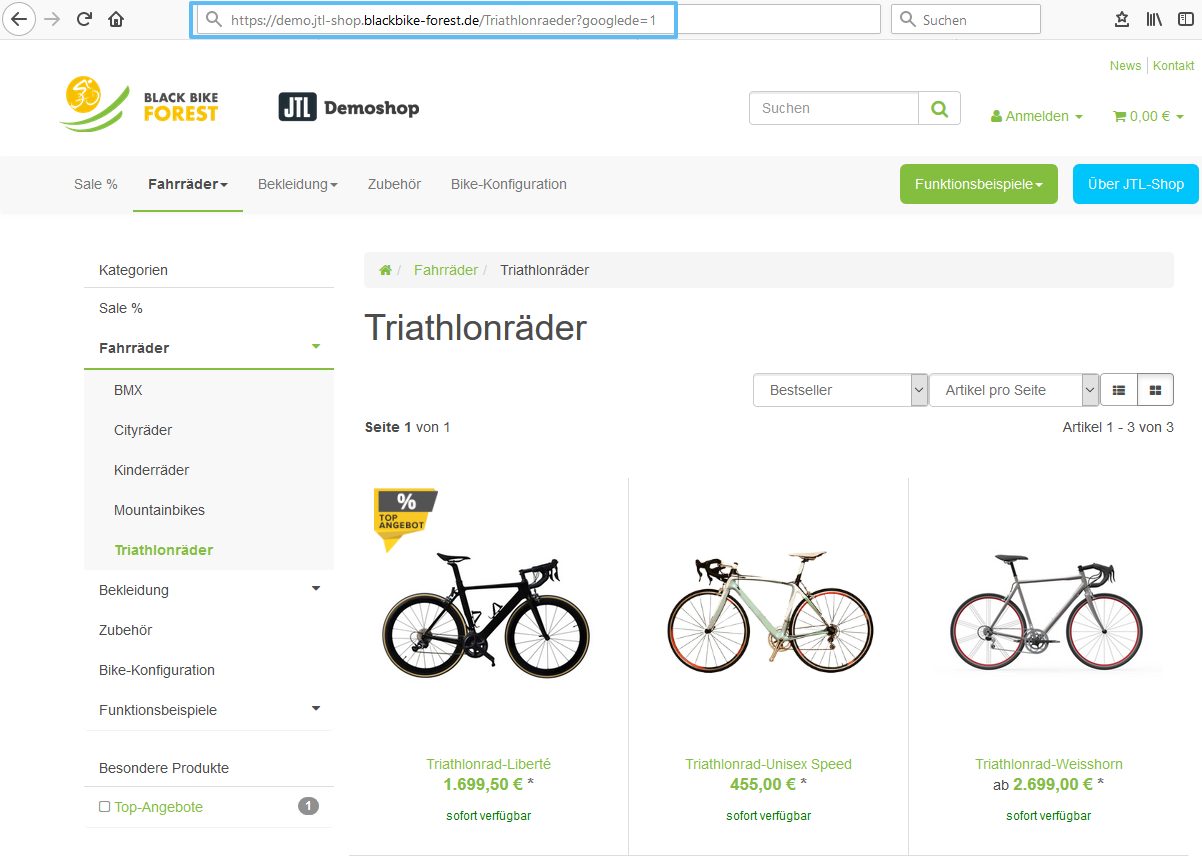
Every time your domain is called up in the browser with the campaign parameter http://www.YourShop.de/?googleen=1 or http://www.YourShop.de/your_item?googleen=1, the campaign records a call.
The call is recorded in the campaign statistics. To open the campaign statistics, click on the campaign.
Step 5: Daily exports
An export file can be exported manually or automatically via the Task scheduler can be exported.
Manual export
- To create an export manually in the back end of JTL-Shop, click on Create export file under Export > Other formats in the corresponding line under Actions. After the export you will receive a success message.
- A file called “googleshopping.zip” will be saved to the export folder of JTL-Shop. Click on the Download dile button to save this archive file on your computer.
Task scheduler
In order for the export to be created automatically on a daily basis, we use the task scheduler.
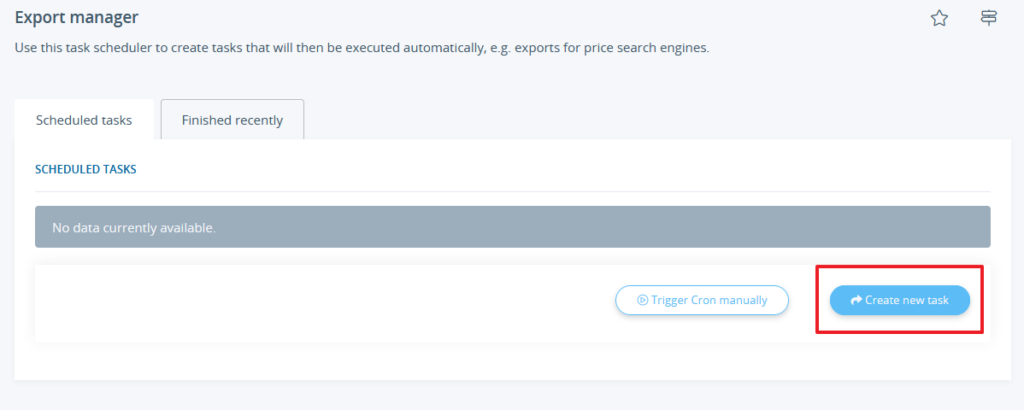
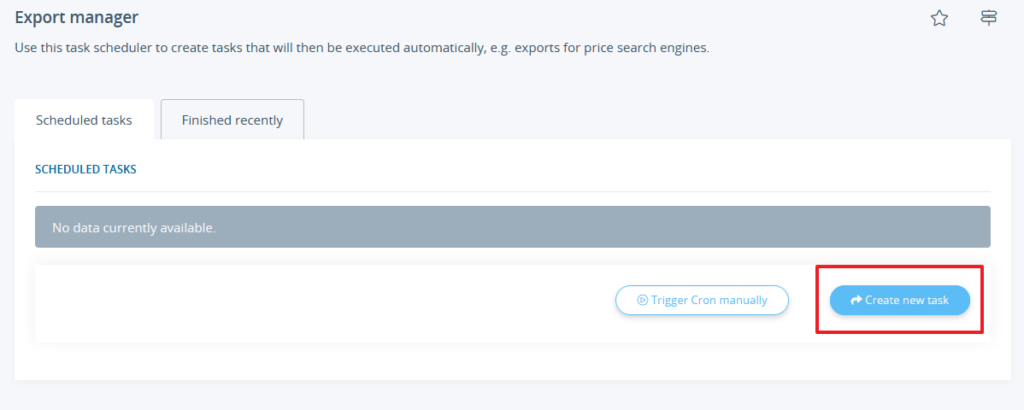
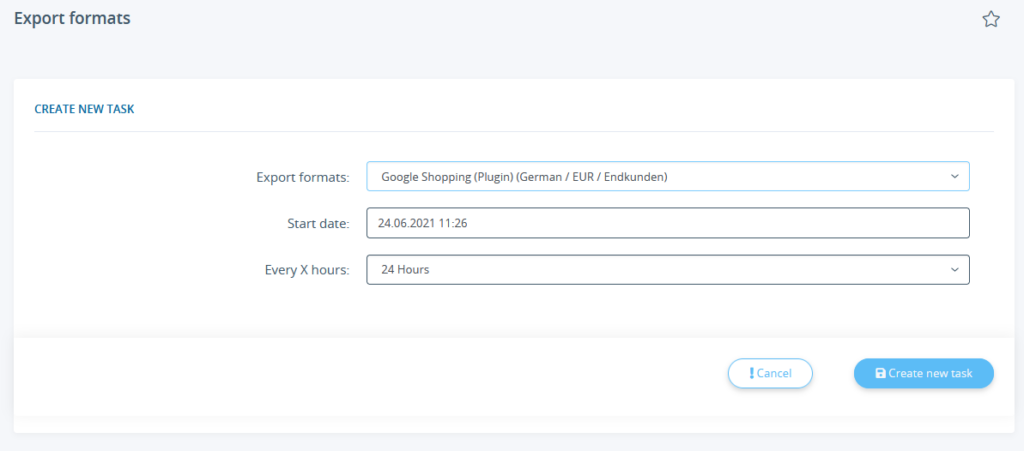
- Open the Task scheduler for exports in the back end of JTL-Shop under Export > Export manager.
- Create a new task by clicking on Create new task. Select the export format and determine the interval at which your Google Shopping feed export should take place. Every 24 hours is best. Note the time.
The export file is created every 24 hours at 8:00 a.m. using the sample settings.
Data feed quality
Before you hand over the export file to Google, we would like to give you a few tips. For your Google Shopping ads to be successful, the quality of the data you provide is very important. For example, if there is no description of your items or a status is incorrect, e.g. the delivery status of your items, Google may exclude you from the Google Shopping programme. Google also demands clear product labelling. You can usually achieve this by specifying an EAN in your products. If you have not entered an EAN or other unique identifier in your feed, the corresponding items will not be listed in Google Shopping.
You can find more information on this topic in the Google help e.g. under the following link: Google Best Practice
Publishing the data feed in GMC
To publish your data feed in the Google Merchant Center, you need several Google tools. Since we do not go into all the details of the respective Google tool, we recommend that you look into the mentioned Goolge tools in more detail outside of this tutorial.
Follow these instructions to upload your Google Shopping feed to the Merchant Center.
Step 1: Linking the Google Search Console with JTL-Shop
We assume that you already have a Google Account. If not, please create a Google Account under Google Search Console.
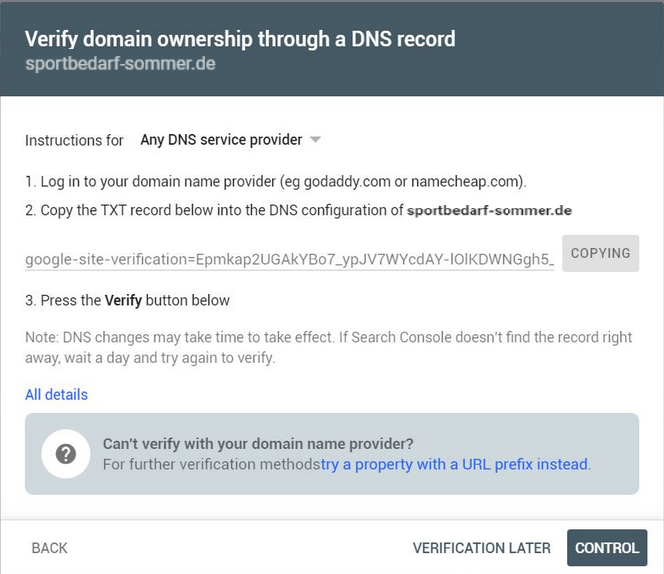
If you have not already done so, you must link JTL-Shop with the Google Search Console. This link verifies you as a shop owner and allows you to transfer your products to Google Shopping. Without this activation, no listing on Google Shopping is possible. Activation takes place in three simple steps.
- After you have logged in to the Google Search Console, you will be asked to link your domain to the Google Search Console account in the welcome screen. Enter your domain in the appropriate field and click Next.
- Follow the instructions on the page to confirm your URL. Then click Confirm.
Provided you have configured everything correctly, the verification is complete.
Step 2: Setting up GMC
After you have linked your online shop to the Google Search Console, directly go to Google Merchant Center (GMC for short).
As already mentioned, we recommend that you take a closer look at the respective Google tools.
- Open the Google Merchant Center homepage at: https://www.google.com/retail/solutions/merchant-center/
- Log in via the Log in button > Log in to Google Merchant Center and fill in the registration form if you have not already done so. Please read the following terms and conditions and accept them to continue.
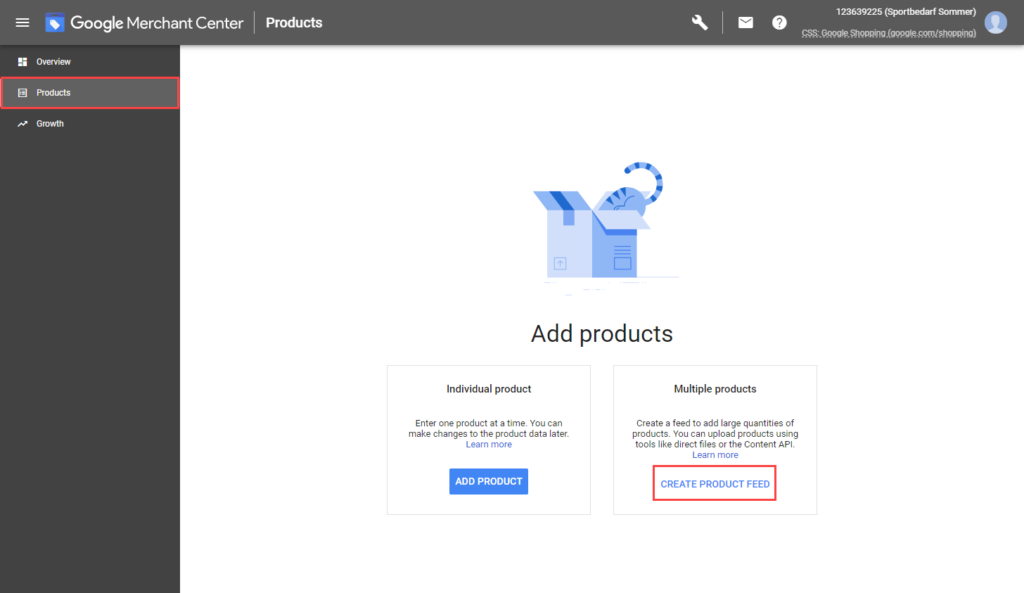
- In the Google Merchant Center, switch to the Products category and create a new data feed by clicking on Create Product Feed.
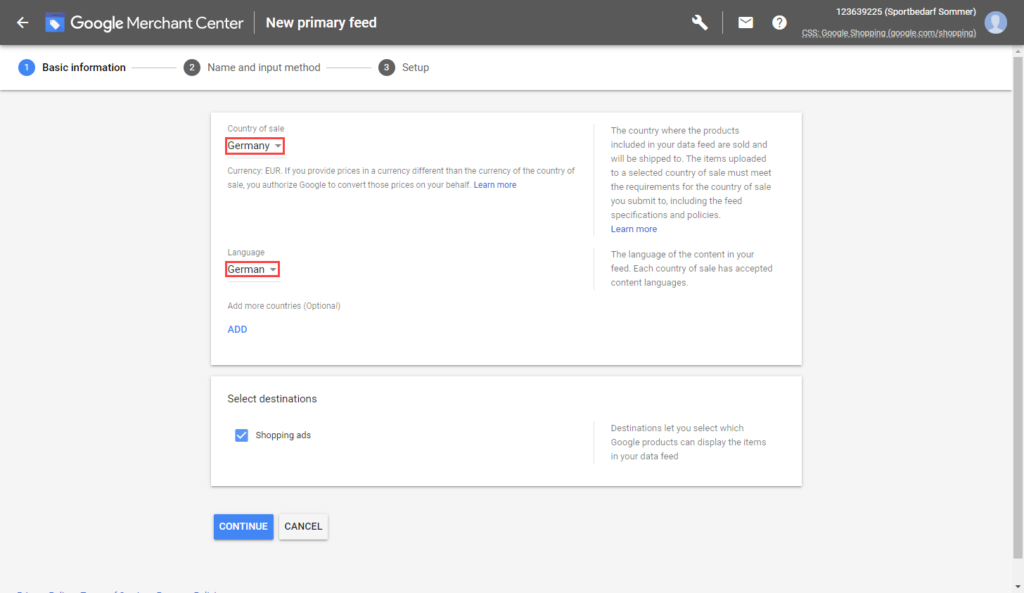
- Specify a destination country and language for the feed and click Continue.
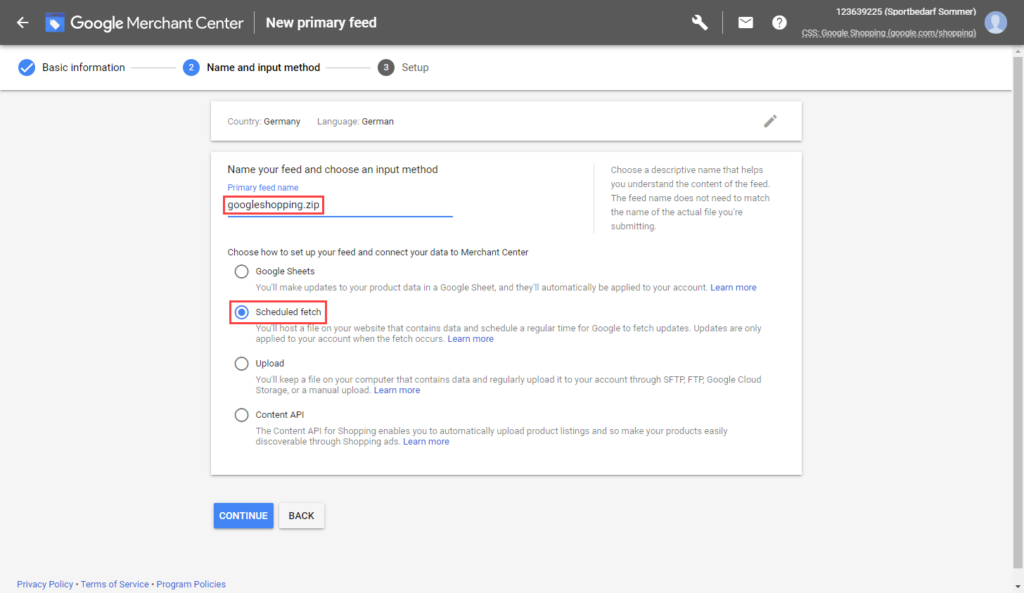
- Give the feed a name and select Scheduled Fetch as the transmission method.
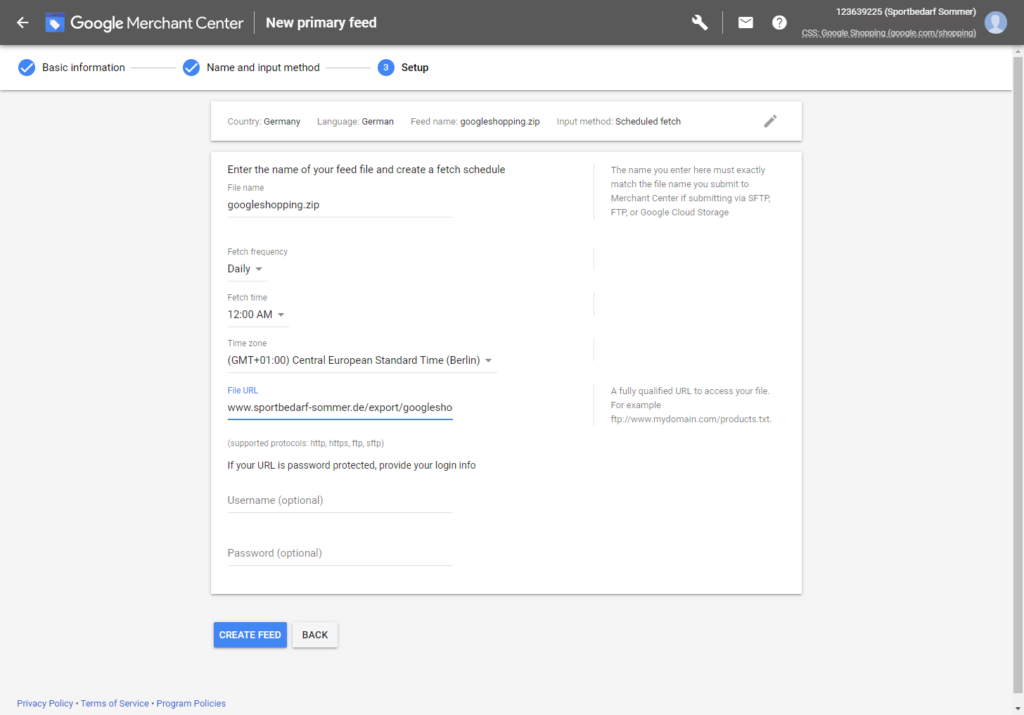
- Now create a schedule. Select Daily. Change the time to the time immediately after the automatic creation of your export file using the task scheduler in JTL-Shop. Select the correct time zone (e.g. GMT +1 Berlin for Germany) and indicate where the export file can be downloaded(http://www.YourDomain.de/export/googleshopping.zip). Click on Create Feed. Your feed will now be retrieved.
Creating a Google Ads campaign
You now need to create a Google Ads campaign. After the creation, remember to log in to your Google Ads account to enter your payment details. Google will only list your Google Shopping ads after you have made your payment settings. To finally complete the setup the Google Shopping campaign, proceed as follows.
- Switch to Google Ads: https://ads.google.com/
- Follow the Google Ads setup wizard.
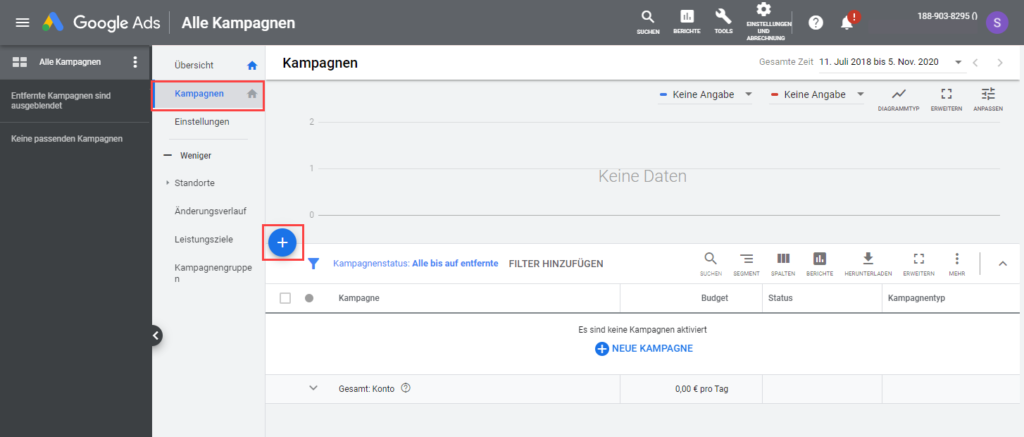
- Now click on All Campaigns > Campaigns and click on the plus symbol to create a new campaign. Select Shopping as the campaign type.
- Configure the campaign according to your ideas. The Google Ads Assistant helps you make the appropriate settings.
Frequently asked questions
Shipping costs are always exported with € 0
When calculating shipping costs, only shipping methods that do not allow cash payments are taken into account. Therefore, for shipping methods that really work with shipping (and not collection), this payment method should be removed.
