We are currently still building up the English documentation; not all sections have been translated yet. Please note that there may still be German screenshots or links to German pages even on pages that have already been translated. This guide mostly addresses English speaking users in Germany.
Setting up the search
Your task/initial situation
Configuring the search function
You can configure the search function in JTL-Shop in two different ways: using item filters or via the search settings of JTL-Shop.
Setting up item filters
With the help of the item filters, you are able to define how your customers can filter the search results themselves in item overviews.
- Log in to the back end of JTL-Shop with your admin access data.
- Navigate to the menu item View > Standard views > Item overview.
- For example, specify whether customers can filter their search results by specific manufacturers. To do this, scroll to the Manufacturer filter and select Yes, in content area and in navigation box or No. In addition, under Multiple selection for manufacturer filters, you can set whether customers can combine several filters with each other or only use individual filters to narrow down the results. Finally, under Display manufacturers as, select whether the manufacturer is to be displayed as an image (logo), text, or image and text.
- Configure all other item filters according to your requirements. For detailed description of Item overview and filters.
- Then save the settings.
Making search settings
In the search settings, you define how the search function is displayed to the customer.
- Log in to the back end of JTL-Shop with your admin access data.
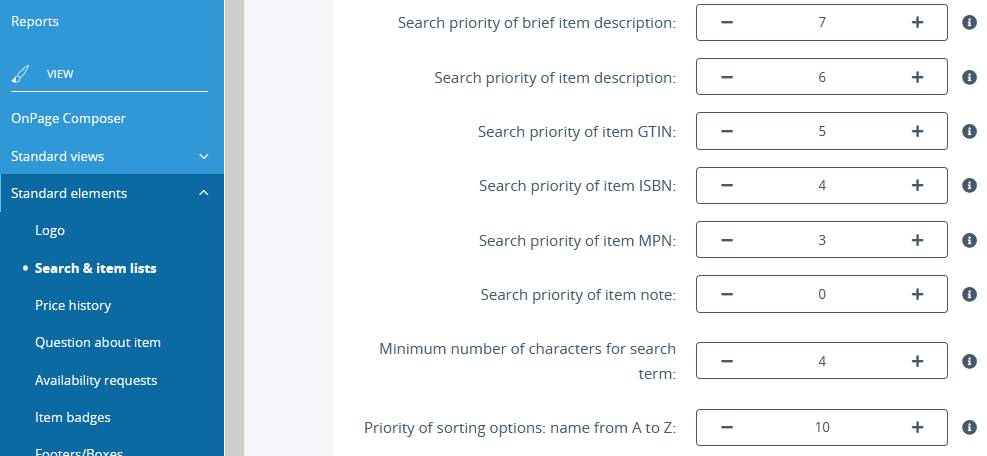
- Navigate to the menu item View > Standard elements > Search & item lists. The Search settings page opens.
- Under Search priority, define the order in which the corresponding fields are to be searched. The smaller the number entered, the earlier the field is searched. Enter 0 if the field is not to be considered at all.
- Also determine the order in which the sorting options are to be displayed to the customers. To do this, assign a number to the respective options that reflects the priority of the sorting options. The larger the number entered, the higher up in the list of sorting options the selection appears.
- Configure all other settings according to your requirements. Go to detailed description of all options: Search settings.
- Click on Save to apply the changes.
Search queries
You can see at any time which terms your customers have searched for. You can display the terms for which your customers did not receive a hit and, if necessary, map these terms onto others. Furthermore, you can maintain a blacklist and display search queries to other customers.
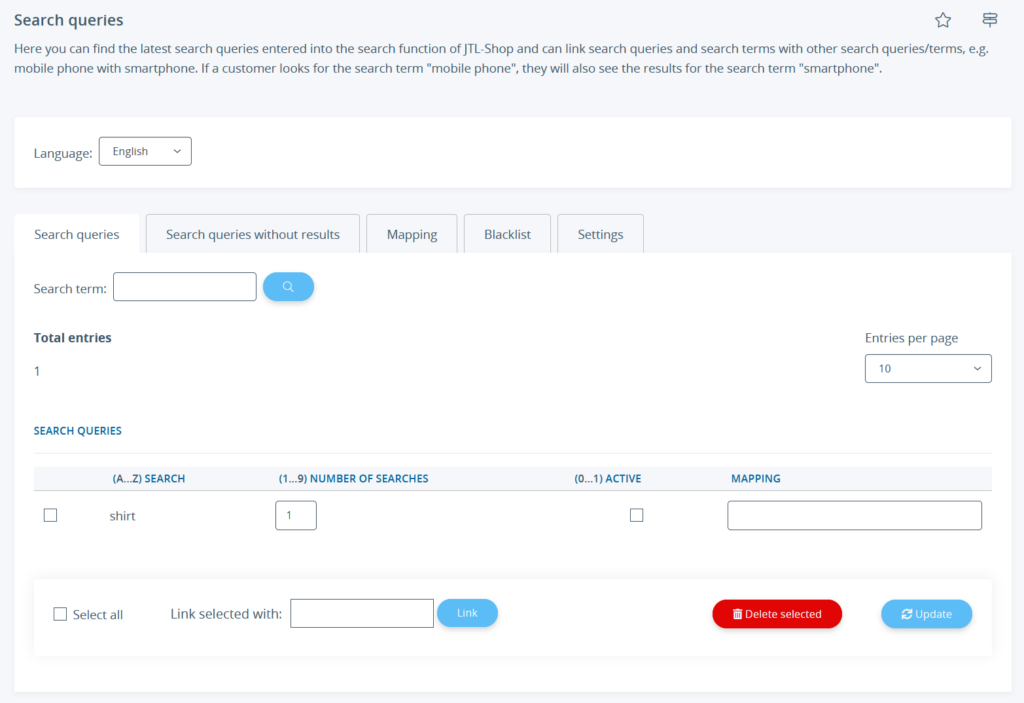
You open the search queries in the back end of JTL-Shop via the menu Marketing > Statistics > Search queries.
Enable/Disable search queries
In the Search queries tab, you will find all the search terms entered into the search function by visitors.
You can edit these search queries. By selecting individual search queries, you can remove them with the Delete selected button or activate them in the Active column. When activated, this search query appears in the search suggestion list. Use the Update button to apply your changes.
Changing the number of search queries
The table overview of the search queries contains the column Number of searches. This tells you how often the term was searched for. You can edit this column.
The higher the value, the higher up the term appears as a suggestion in the search suggestion list if there are several matching suggestions.
To prevent manipulation of the search queries, you can define how many search queries are saved per user and hour. Enter the desired number in the Settings tab under Maximum entries per visitor and hour.
Mapping
Through mapping, search terms are assigned to other search terms to achieve the greatest possible search effect.
In the overview of search queries, you will find all the search terms that visitors to your online shop have entered in the search function.
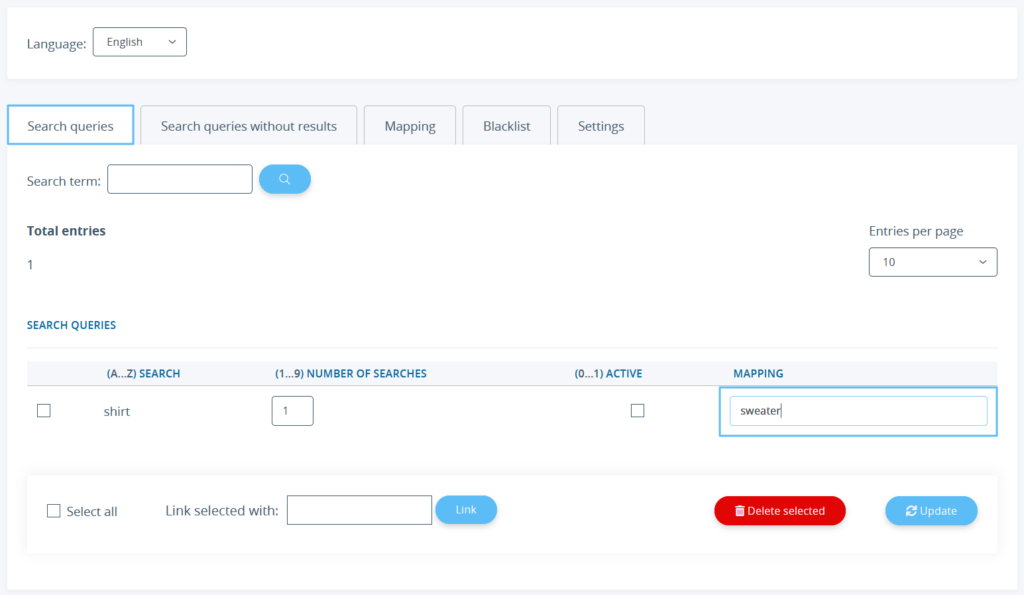
- In the Mapping column, click into the empty field and enter the term you wish to link to a different term.
- Enter the different search term. The search term must exist in the Search queries section. If the search term of the mapping is not listed in the section, you cannot connect it to another term.
- Then click Update to apply the settings.
After updating, the line in which you added the mapping term is moved to the Mapping tab. In addition, the value is added to the Number of searches. When a visitor searches for the term from the Search column now, their search is redirected and the search function searches for the term from the Mapping section.
Mapping for searches with 0 hits
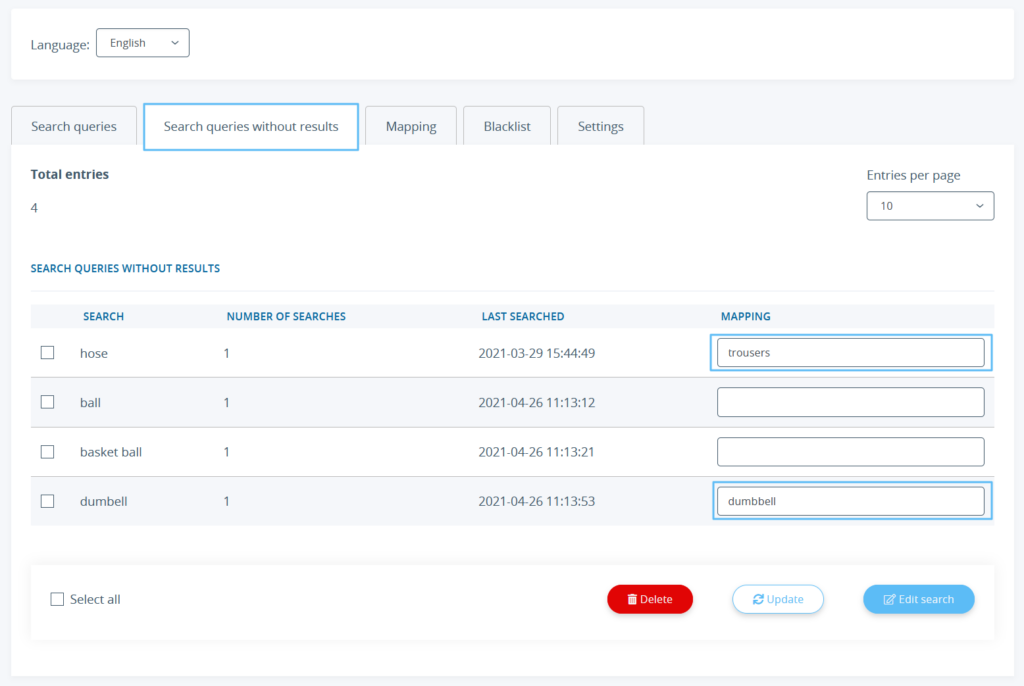
Under the menu item Search queries in the section Search queries without results, you will find all search terms that visitors to your online shop entered into the search and for which they did not received any results.
If you think the search terms listed here are important, you can link the terms.
- To do this, enter the term with which the term not found is to be linked under Mapping. In the example, the search for “fruit drink” was unsuccessful. This search term should refer to “smoothie” in the future.
- Then click Update to apply the settings. The link is then listed in the Mapping tab.
Deleting mappings
In the Mapping section, the linked pairs are listed. You can delete mapping pairs by selecting them and then selecting Remove selected links. Deleted mapping pairs cannot be restored.
Editing the blacklist
In the Blacklist area, you can store search terms that you do not want to be included in the search. Deleted search queries are automatically added to the blacklist. The terms in the blacklist appear neither in the Search queries section nor in the Search queries without results after an online shop visitor has searched for them. The visitor is redirected to a page with the message that no result was found for this search term.
Important: Always enter the search terms into the blacklist followed by a semicolon. You can also add several search terms at once.


