We are currently still building up the English documentation; not all sections have been translated yet. Please note that there may still be German screenshots or links to German pages even on pages that have already been translated. This guide mostly addresses English speaking users in Germany.
Videos
Getting started "Customers"
In this video we explain the customer management in JTL-Wawi.
Customer management
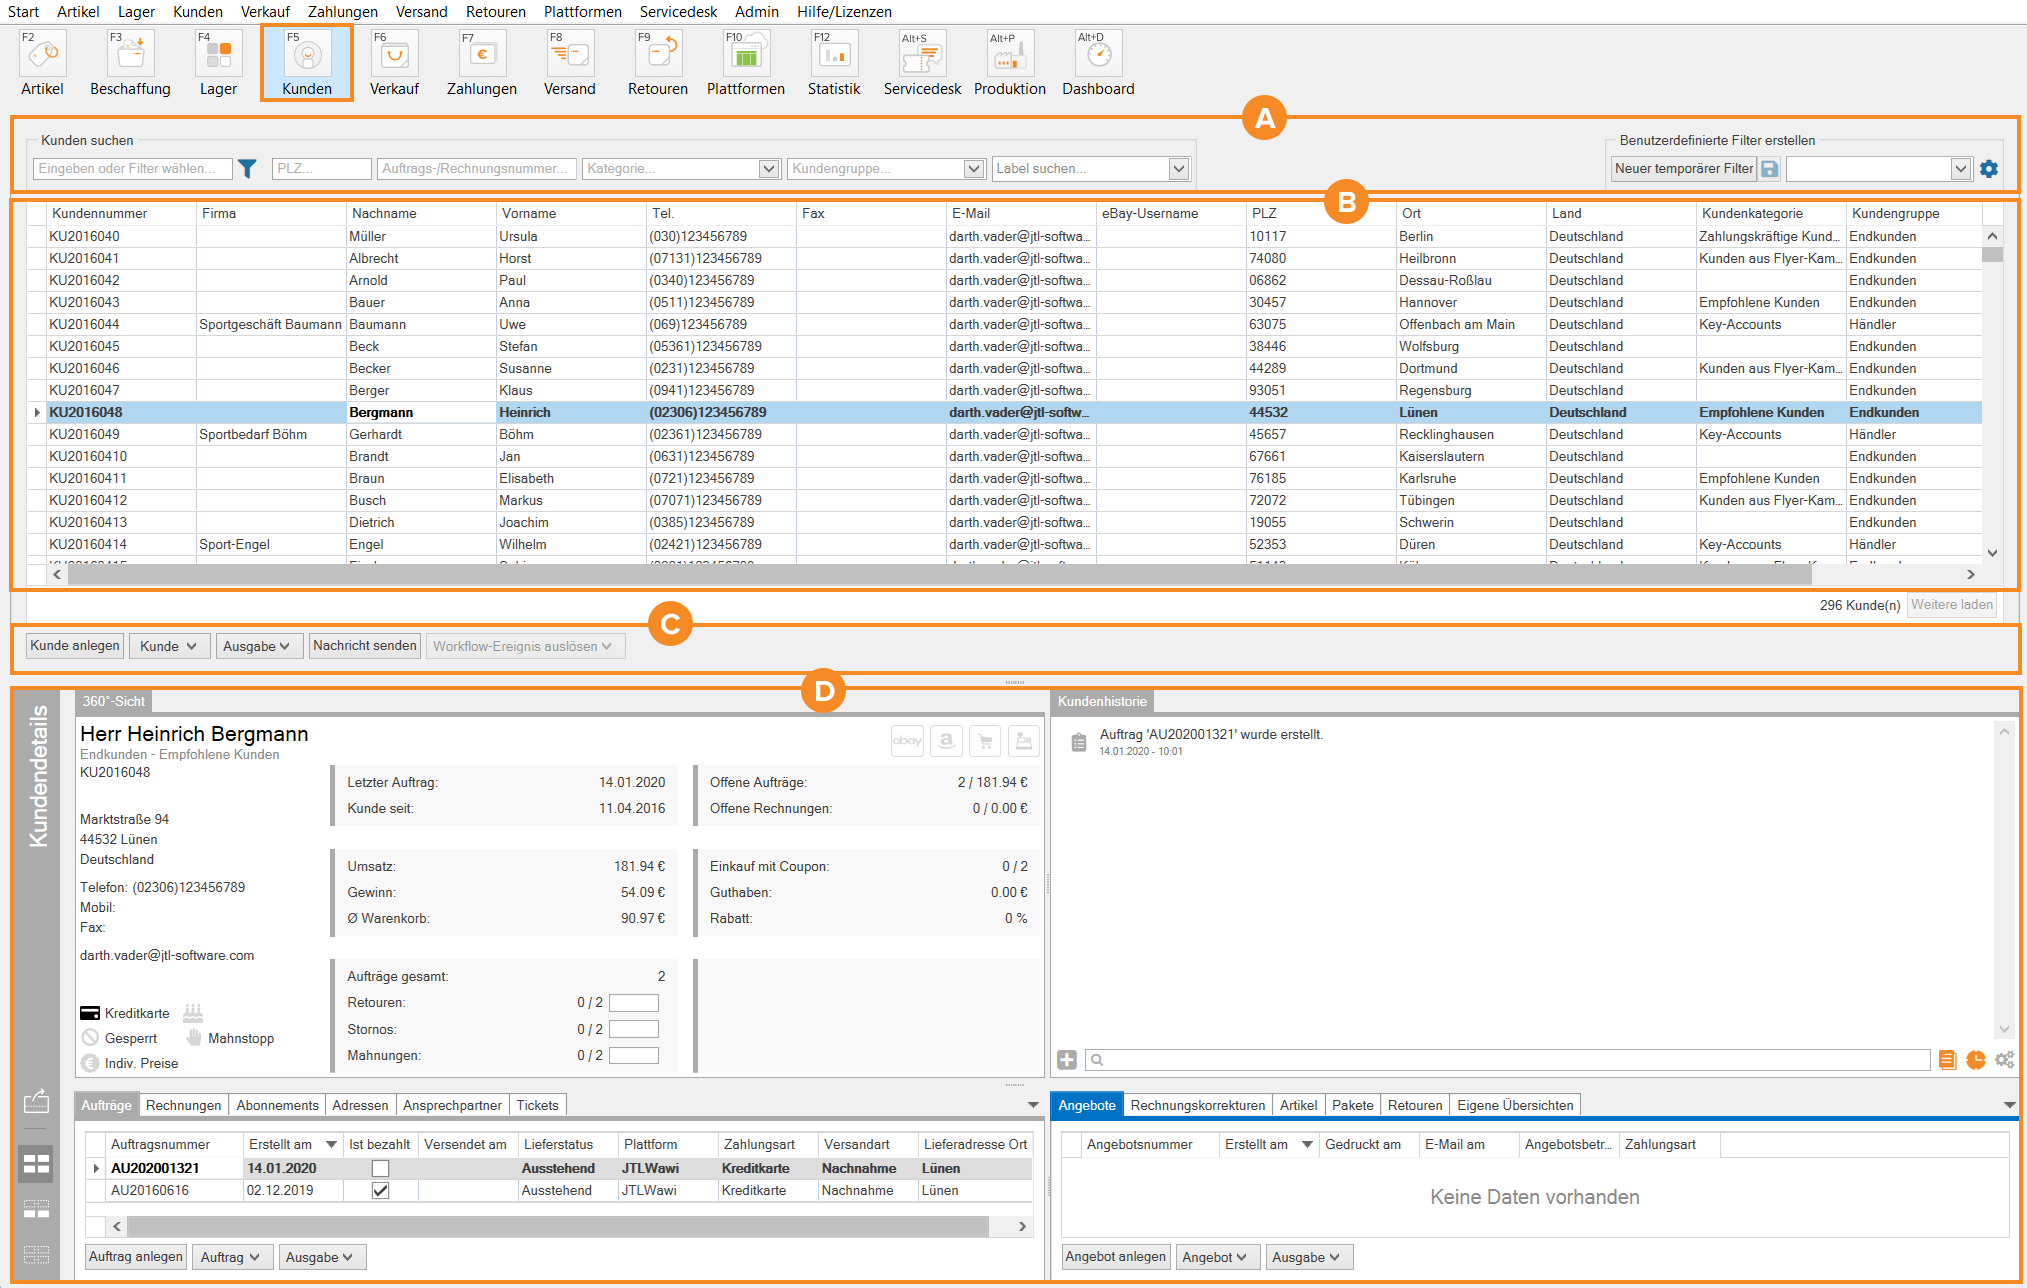
On this page, you will find a detailed description of the functions in the customer management. You can reach customer management by clicking on the Customers button.
Pane A: Filters and search functions
Search for customer
Enter data or select filter: You can search for a customer in this search field, for example with the name or customer ID. When you click on the filter icon, you can see the fields from the customer master data that you can search by. By default, all fields are enabled. You can also activate individual fields to narrow the search and speed up the search process.
Postal code: In this search field, you can filter the customer overview by postal code.
Sales order ID/Invoice ID: In this search field, you can search for a sales order ID or an invoice ID.
Category: In this drop-down menu, you can select one of your customer categories and filter the overview.
Customer group: In this drop-down menu, you can select one of your customer groups and filter the overview.
Find label: In this drop-down menu, you can select a label that you have assigned to the customer in advance and filter the overview.
Create user-defined filters
New temporary filter: Opens the Creating a temporary filter dialogue box. In this dialogue box, you can create custom and complex filters. In addition, you can export and import filters in this dialogue box. Once you have created and applied the filter, you can use the disk icon next to the button to save it.
Drop-down menu: In this drop-down menu, you can see all saved filters. If you select a saved filter, it will be applied directly.
Gear icon: Opens a dialogue box in which you can search for a created filter, create a new filter or edit existing filters.
Pane B: Customer overview
In the customer overview, you can see all customer data sets that are in your database as a list. Double-click on a customer to open the corresponding customer master data. You can define which customer master data is to be displayed in the overview. For more information on this topic click here: Adjusting the customer master data view.
Context menu: Customer
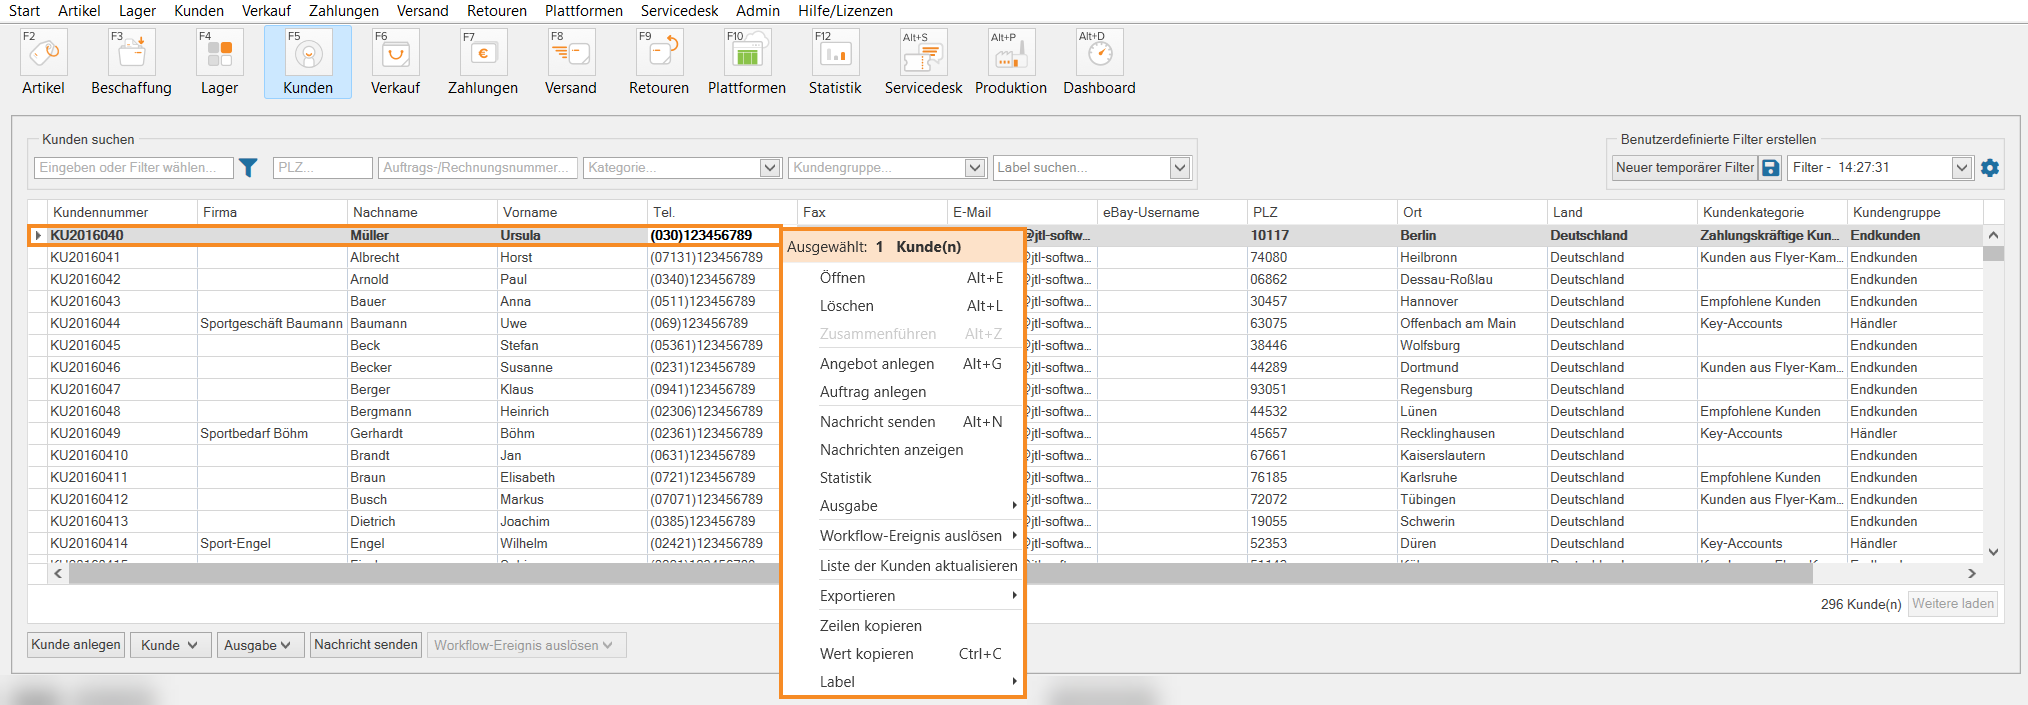
Right-click on one or more customers to open the Customer context menu.
Selected: X customers: Shows the number of customers you have selected in the overview.
Open: Opens the master data of the customer that you have selected in the overview. This option is not available if you have selected more than one customer.
Delete: Deletes the master data of the selected customer(s) from JTL-Wawi and the database.
Merge: This option is only available if you have selected two customers. This option opens the Merging customers dialogue box, which allows you to combine the two selected data sets into one customer or customer data set.
Create sales quotation: Opens a new sales quotation, in which the data of the selected customer is already filled in.
Create sales order: Opens a new sales order, in which the data of the selected customer is already filled in.
Send message: Opens the Sending messages dialogue box, in which you can write a message to the customer. You can send the message as an email to the email address stored in the customer master data as well as print it or send it by fax.
View messages: Opens the Viewing messages to customer dialogue box, in which you can view the messages that have already been sent to the customer.
Statistics: Opens the Statistics for customer dialogue box [XYZ], in which you can statistically evaluate the data of your customer.
Output: Allows you to print (print, save and export) customer master data and address labels.
Trigger workflow event: This function is only available if you have defined workflow events that can be triggered manually under Admin > Workflows > Customers. If you have stored these, the events are displayed in the context menu and you can trigger one of the events to trigger workflows.
Update customer list: Updates the customer overview. This feature is especially relevant if you are working with multiple users in JTL-Wawi or have transferred new customers from your online shop.
Export: Exports the table settings as a CSV file.
Copy rows: Copies the value of the entire selected row to the clipboard. For example, you can copy this data to external word processing programmes.
Copy value: Copies the value of the selected cell to the clipboard. This data can be copied, for example, into search fields or external word processing programmes.
Context menu: Table settings
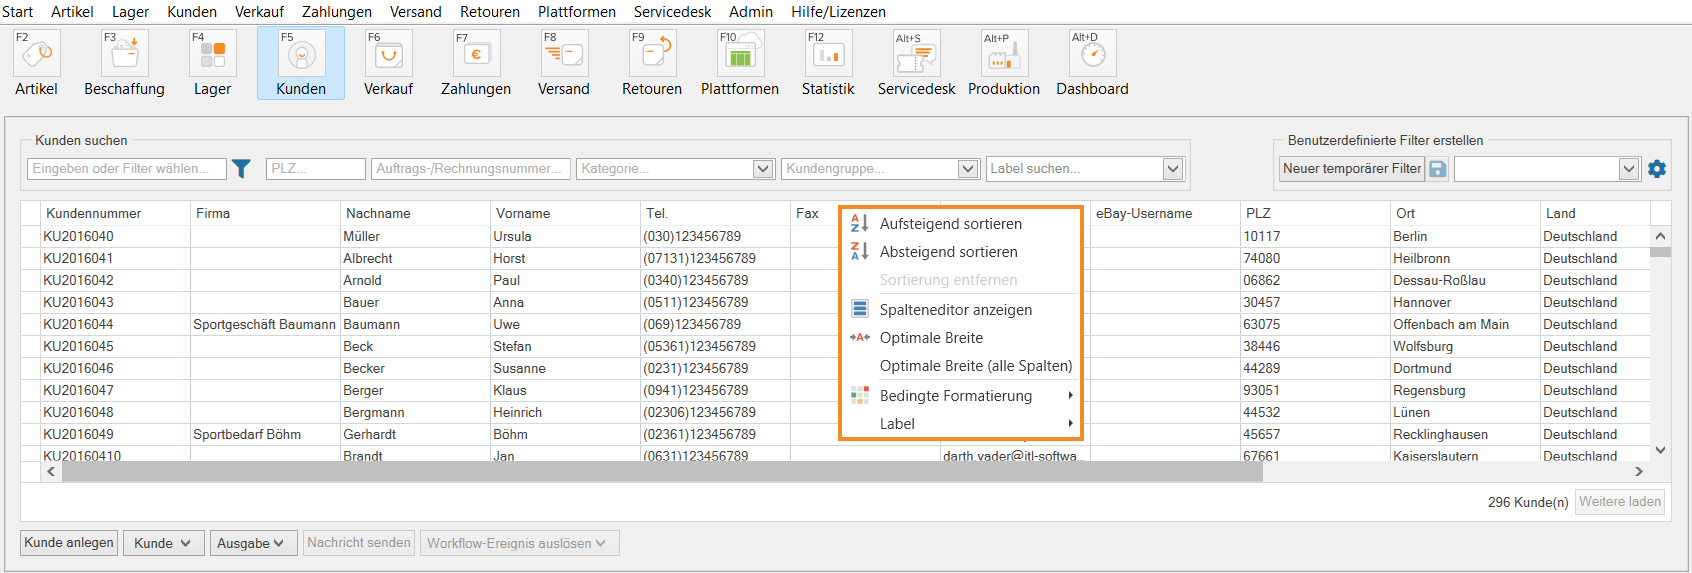
If you right-click on the column header of the overview table, a context menu opens in which you can set settings for the table.
Sort Ascending: The data sets in the customer overview are sorted alphabetically from A-Z or numerically from 0-X using the data in the column.
Sort Descending: The data sets in the customer overview are sorted alphabetically by Z-A or numerically by X-0 using the data in the column.
Clear Sorting: Resets the selected sorting.
Show Column Chooser: Opens the Adjusting the display options for the customer list dialogue box, which allows you to specify which data from the customer master data is to be displayed in the customer overview.
Best Fit: Optimally adjusts the size of the column to the size of the longest content.
Best Fit (all columns): Optimally adjusts the size of all columns to the size of the longest content.
Conditional Formatting: Using the black arrow, you have several options for individually formatting the overview table. For more information on this topic click here: Setting individual formatting in tables, such as colours and symbols.
Labels: If you have created labels in JTL-Wawi, you can use the black arrow to add or remove labels.
Pane C: Toolbar
Create customer: Opens an empty customer data set in which you can store the master data of a new customer.
Customer: Opens the Customer context menu, which you can also open by right-clicking on a customer in the customer master data table. The description of the functions of this context menu can be found in the Context menu: Customer section.
Output: Opens the advanced output settings, where you can make settings for printing, saving and exporting data and output customer-related data in the desired format.
Sending messages: Opens the Sending messages dialogue box, in which you can write a message to the customer. You can send the message as an email to the email address stored in the customer master data as well as print it or send it by fax.
Trigger workflow event: The function is only active if you have defined workflow events that can be triggered manually under Admin > Workflows > Customers. If this is the case, the events are displayed in the context menu and you can trigger one of the events to trigger workflows.
Customer master data
Function icons
Depending on whether the customer master data is attached to the customer management or opened in a separate window, you will find different function symbols that can be used to influence the view of the customer master data.
Attached
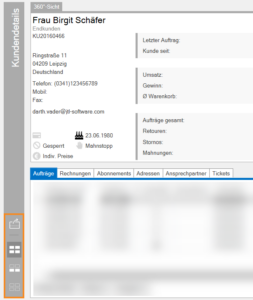
If the customer master data is attached to the customer management, you will see the function icons on the left in the grey area.
Detached: Opens the customer master data in a separate dialogue box. For example, you can drag this dialogue box to an additional monitor and leave it open there while continuing to work on the first monitor as usual.
All panes visible: If you select this display, you will see all areas of the customer master data. This is the default setting.
Hide quick access: Hides the lower Quick access area.
All panes invisible: Completely hides the Customer master data area. You can display the customer master data again by selecting All panes visible.
Detached condition
If the customer master data is detached and open in a separate dialogue box, you can select a vertical or horizontal view via the function icons.
360° view
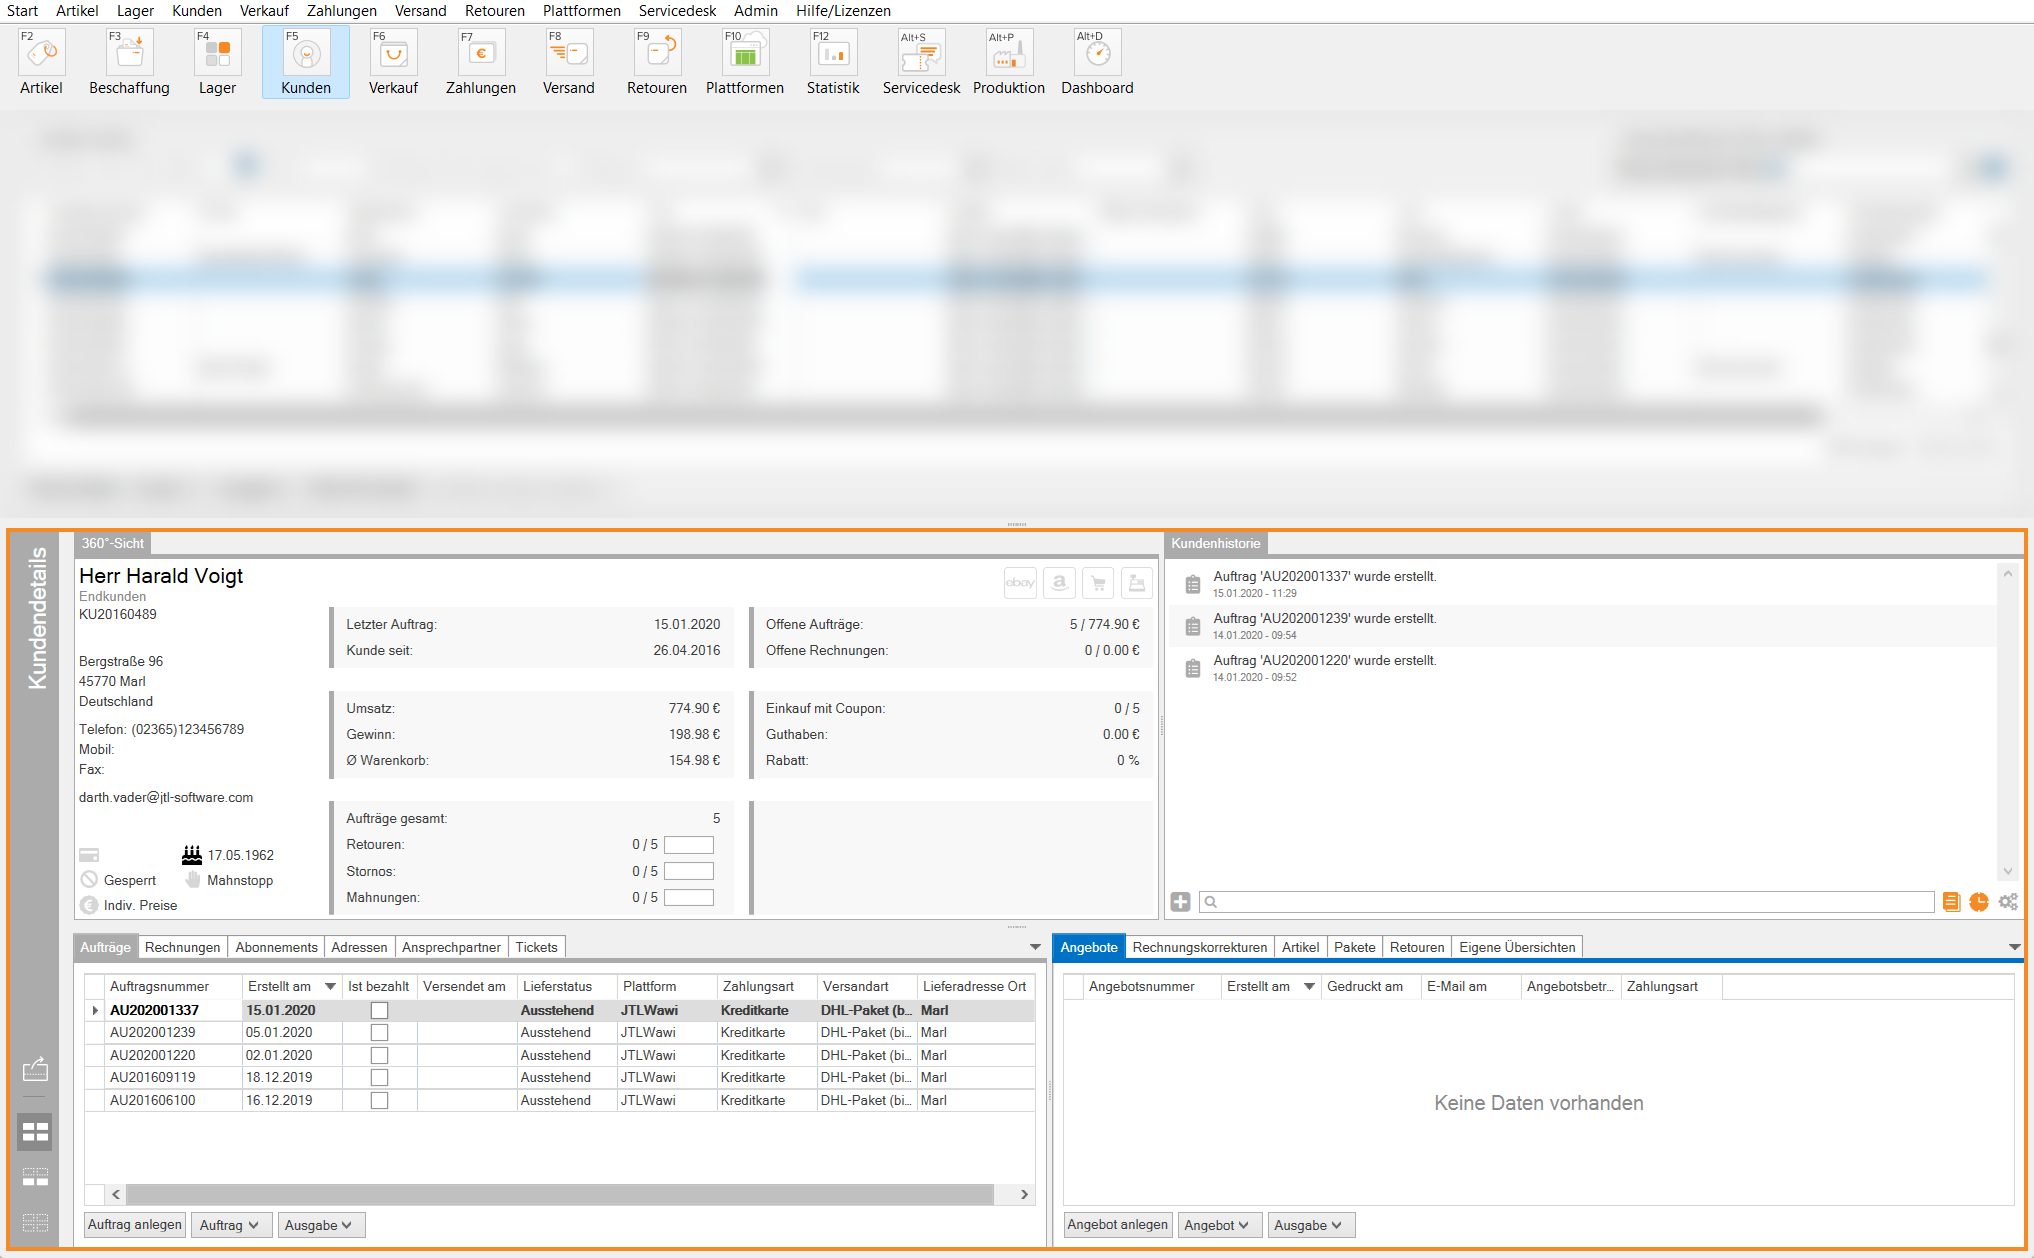
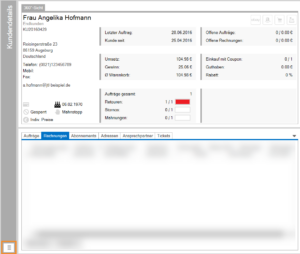
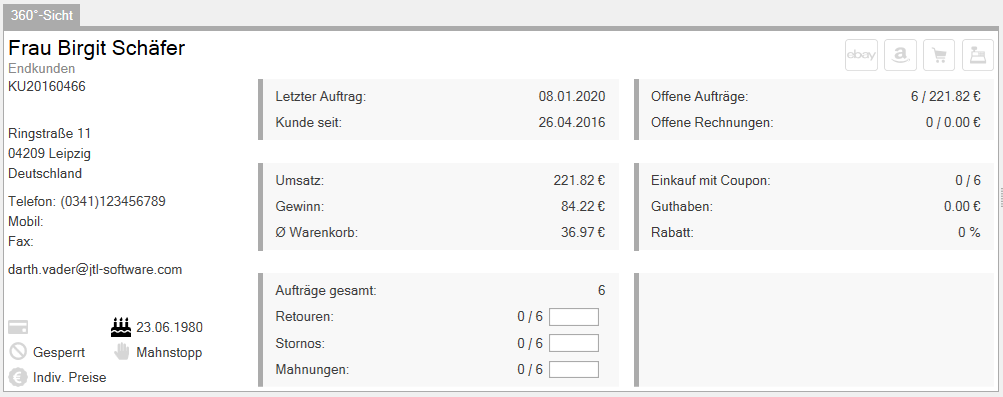
The 360°view offers you important customer information at a glance.
Address and contact information
The 360°view shows you the most important contact information of your customer. Street, house number, postal code, city and country, telephone number, mobile number, fax number and email address are also displayed. If you want to add or correct data, open the customer master data by clicking on the name of the customer.
Function icons
Bank card: Shows which payment method has been saved in the customer master data, e.g. bank transfer, direct debit or credit card.
Birthday cake: Is active and shows the date of birth of the customer if you have saved this in the customer master data.
Blocked: If the symbol is active, the customer is blocked. You cannot create any sales quotations and sales orders for this customer. In the customer master data, you can unblock the customer again.
Dunning block: A dunning block has been set up for the customer. You can undo this in the customer master data.
Individual prices: Shows whether individual prices were stored for the customer for specific items.
eBay, Amazon, shopping cart = online shop, checkout: Use these icons to see through which channel the customer made their first purchase and entered the database. The symbols thus indicate the origin of the customer data. Irrelevant symbols are greyed out.
Statistics
Last sales order: Shows the date of the last sales order.
Customer since: Displays the date on which the customer was created in the database.
Revenue: Displays the revenue (gross) that you have generated with this customer so far.
Profit: Displays the profit you made with this customer. You must have maintained your purchase prices in JTL-Wawi before you can do this.
Avg. sales order value: Displays the average sales order value (gross) of the customer.
Total sales orders: Displays the total number of sales orders created for this customer.
Returns: Displays the number of returns of the customer in relation to all orders of the customer. The bar shows the ratio again in colour:
Cancellations: Displays the number of cancellations in relation to all sales orders. The bar shows the ratio again in colour:
Dunning letters: Displays the number of dunning letters in relation to all sales orders. The bar shows the ratio again in colour:
Open sales orders: Displays the number of sales orders that have not yet been sent and their total value (gross).
Open invoices: Displays the number of unpaid invoices and their total value (gross).
Purchases with coupons: Displays the number of coupons used in relation to all orders.
Credit: Shows the total amount of the customer’s credit in your online shops.
Discount: Indicates the customer’s discount on your entire product range as a percentage if you have saved such a discount in the customer master data.
Custom fields
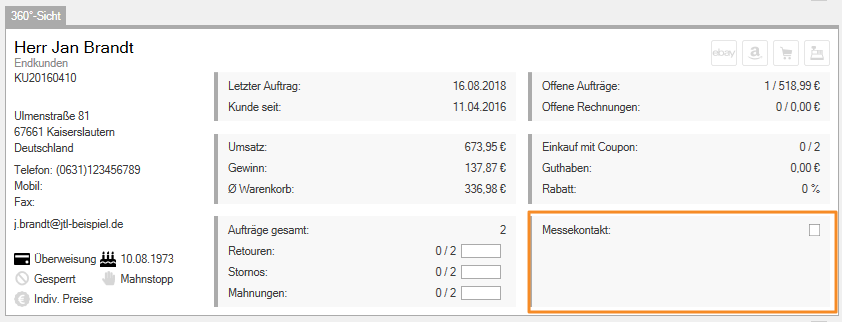
In this area you can see custom fields that you have created for the Customer area and for which you have defined the General display location. You can create and edit custom fields in the menu under Admin > Global: Custom fields.
Customer history
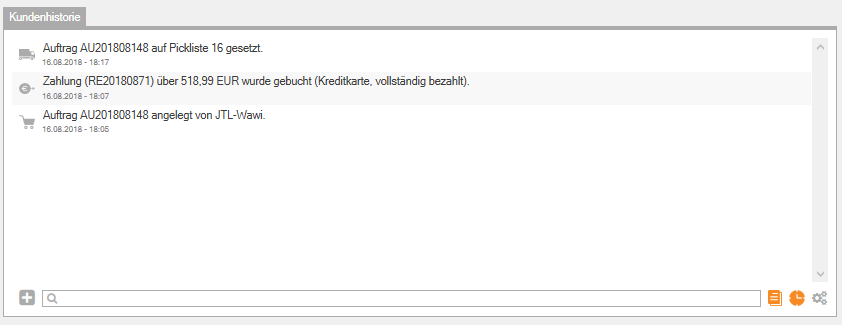
In the customer history, you can see all the transactions that have been performed in relation to the currently displayed customer. For example, you can see the last time a sales quotation, sales order, or invoice was created, as well as incoming payments, registered and incoming returns, and triggered workflows. Triggered workflows can only be added to the history using the Write history entry workflow action.
Function icons
Add note: Use this icon to add a new note to your overview.
Search history: In the field with the magnifying glass icon, you can enter a search term or text for which you want to search the entries in the overview.
Show notes: This icon allows you to show and hide notes in the history. If the icon is orange, notes are displayed in the overview. If it is grey, notes are hidden in the overview.
Show history: This icon allows you to show and hide the activated entries in the overview. If the icon is orange, notes are displayed in the overview. If it is grey, all notes in the overview are hidden.
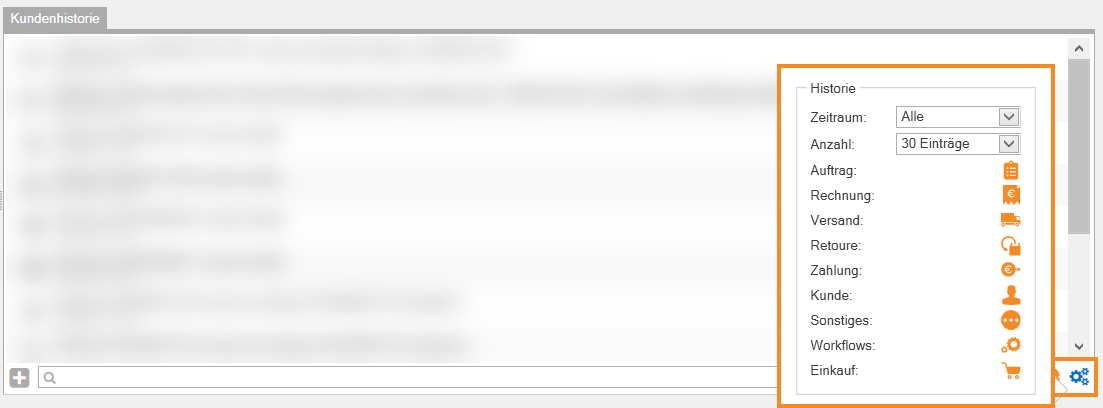
Adjusting filters: Clicking on the gear icon opens a context menu in which you can adjust the settings for displaying the history.
Quick access
In this area you can see all sales orders, invoices, subscriptions, addresses, contacts, tickets, sales quotations, invoice corrections, items, packages, returns and custom overviews in separate tabs.
If you double-click on a row of the table, you can access the corresponding sales quotations, sales orders, subscriptions, etc. In the context menu and via the menu button of the areas, you get the same functions that are available to you in the respective managements in JTL-Wawi.
Videos
Getting started "Customers"
In this video we explain the customer management in JTL-Wawi.

