We are currently still building up the English documentation; not all sections have been translated yet. Please note that there may still be German screenshots or links to German pages even on pages that have already been translated. This guide mostly addresses English speaking users in Germany.
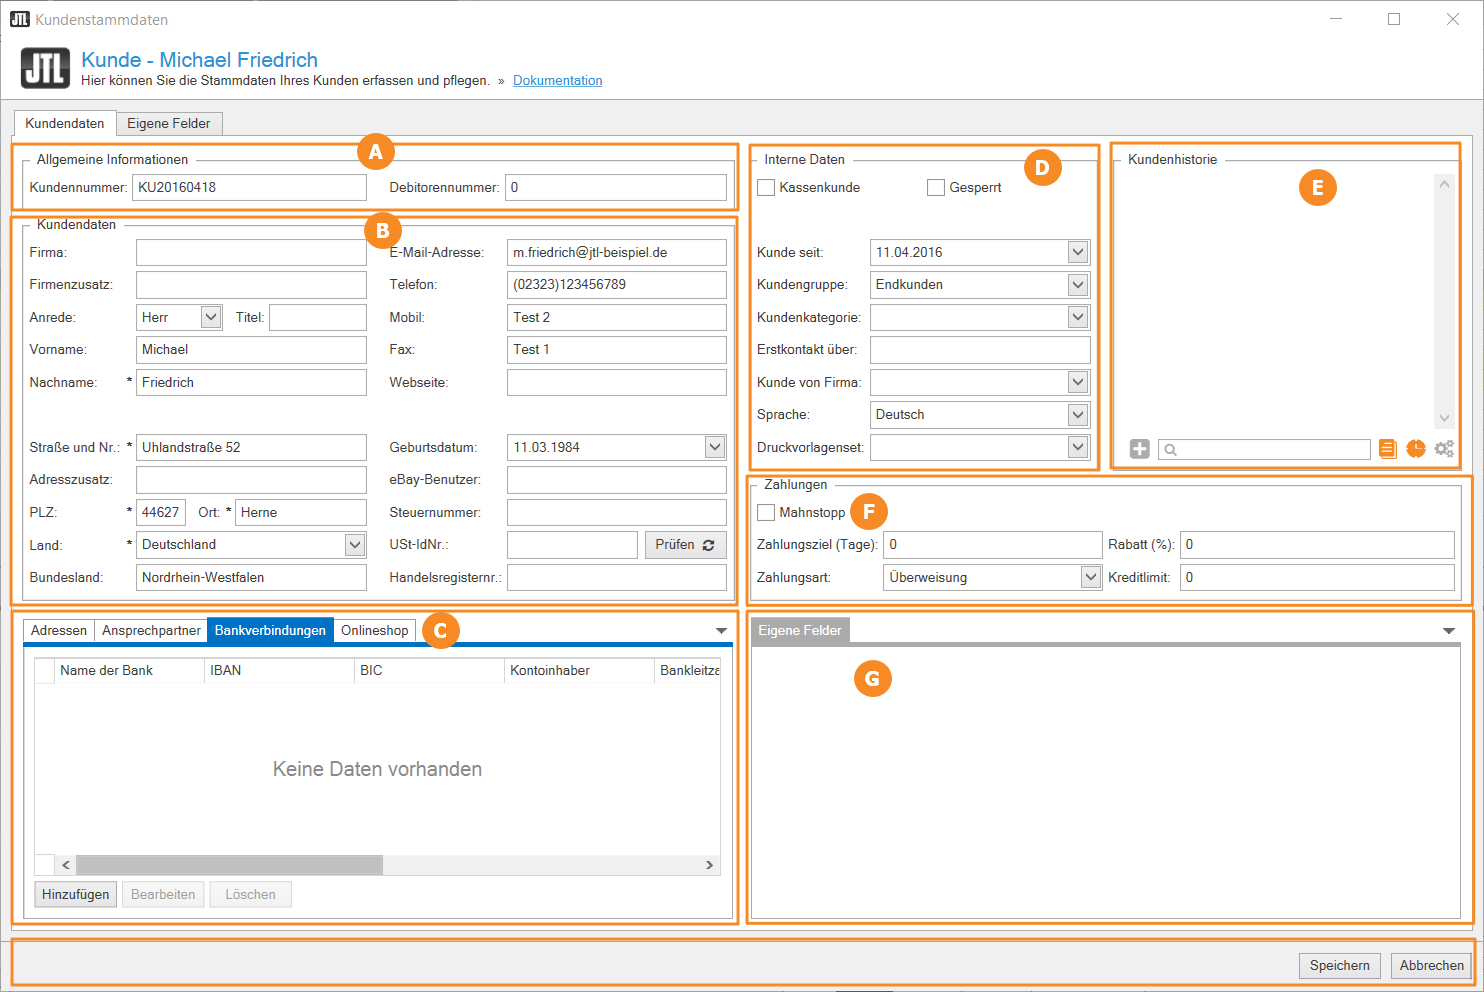
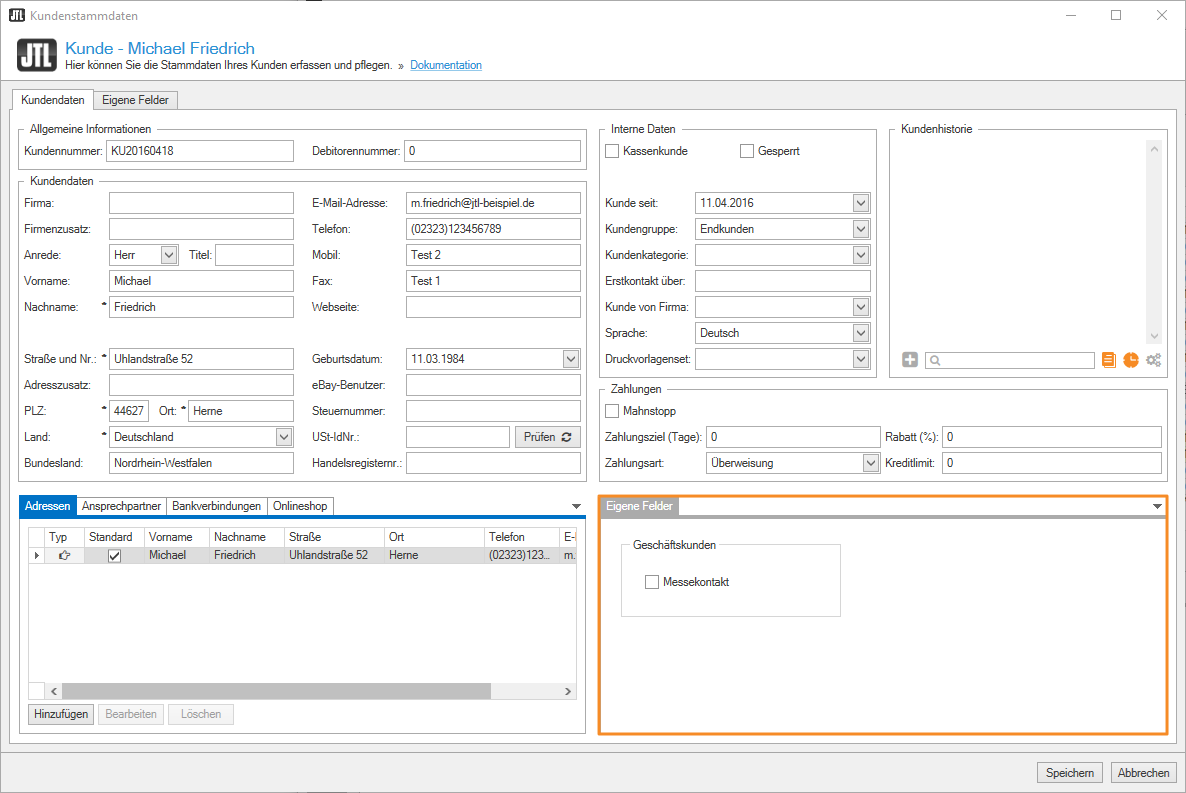
Dialogue box: Customer master data
Tab: Customer data
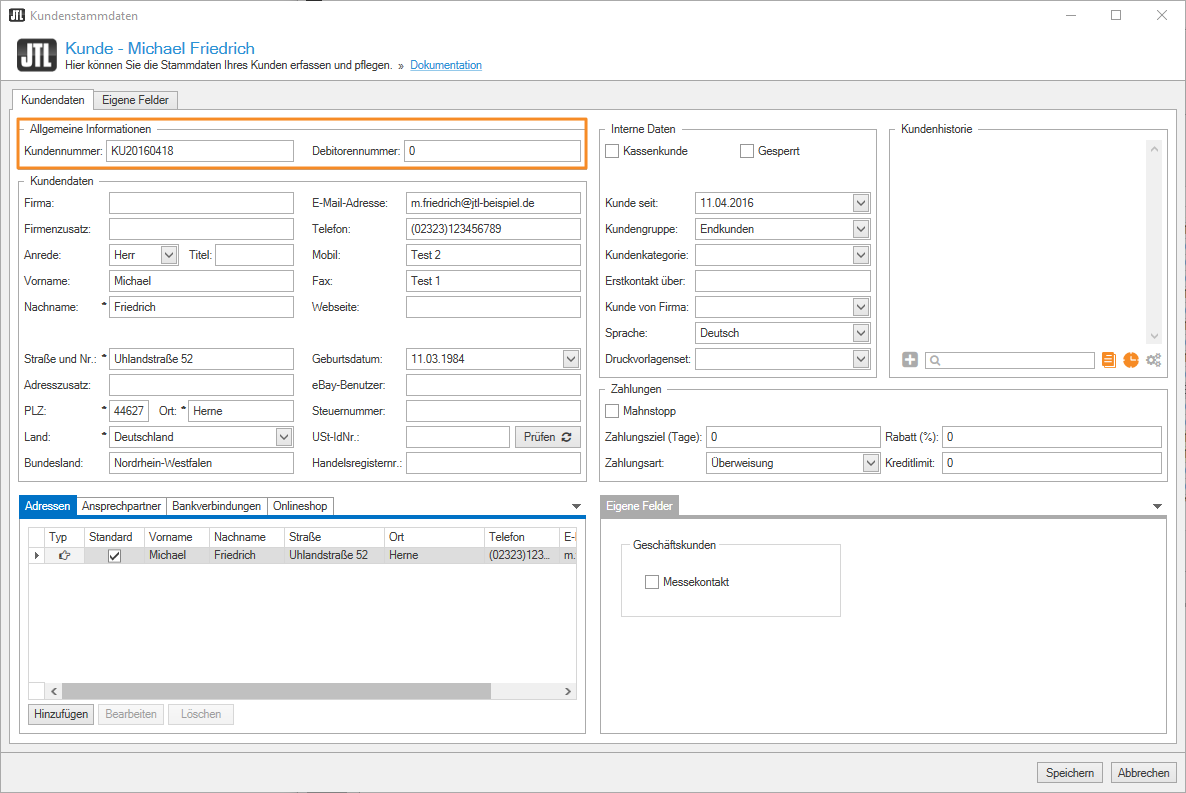
Pane A: General information
Customer ID: The customer ID is automatically assigned when a customer is created based on the rules stored under Admin > General settings > Number ranges. However, you can also select the customer ID manually.
Accounts receivable no.: The accounts receivable number is a number for unique identification in the company’s internal accounting, e.g. in DATEV. It can be identical to the customer ID but is not generated by JTL-Wawi.
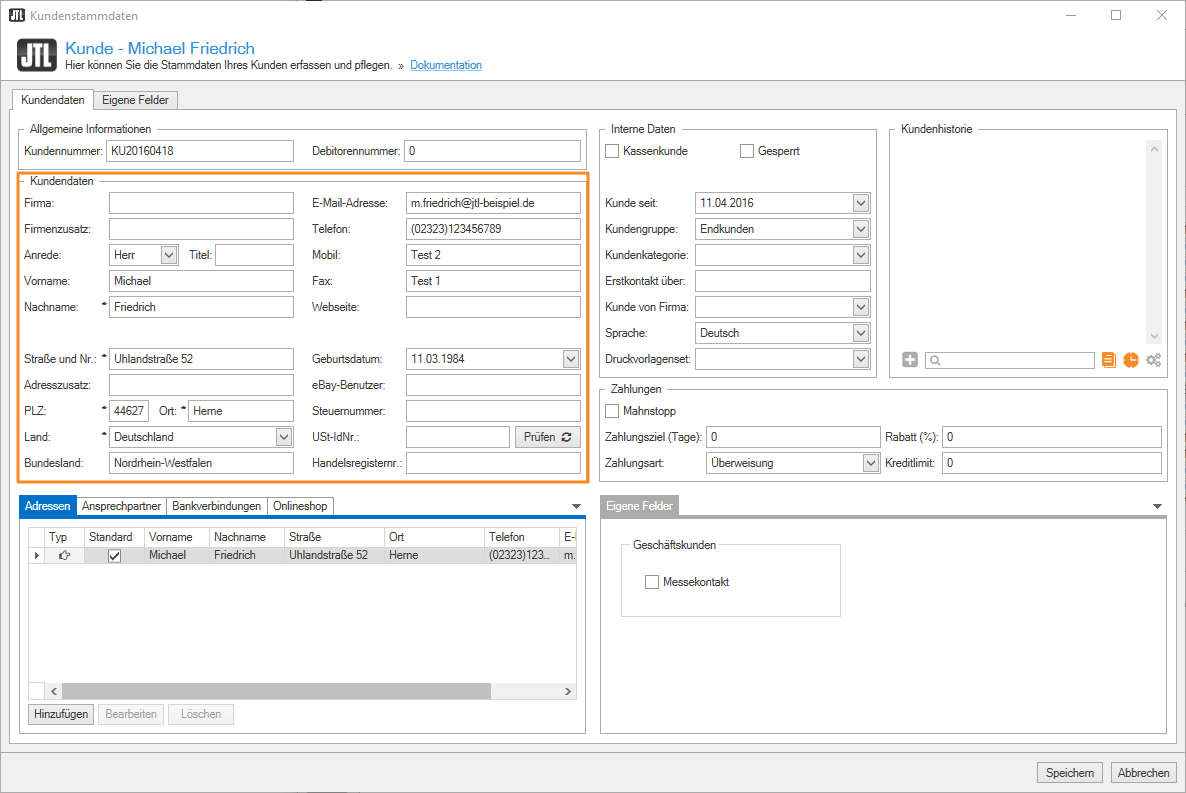
Pane B: Customer data
Here you enter the name and company data, as well as the main contact information, the eBay user and the tax information of the customer. Fields marked with an asterisk (*) are mandatory. The customer data set can only be saved if all mandatory fields are filled in.
If you have entered a VAT ID from a country other than Germany, you can have it checked via the portal evatr.bff-online.de by clicking on the Check button next to the VAT ID field.
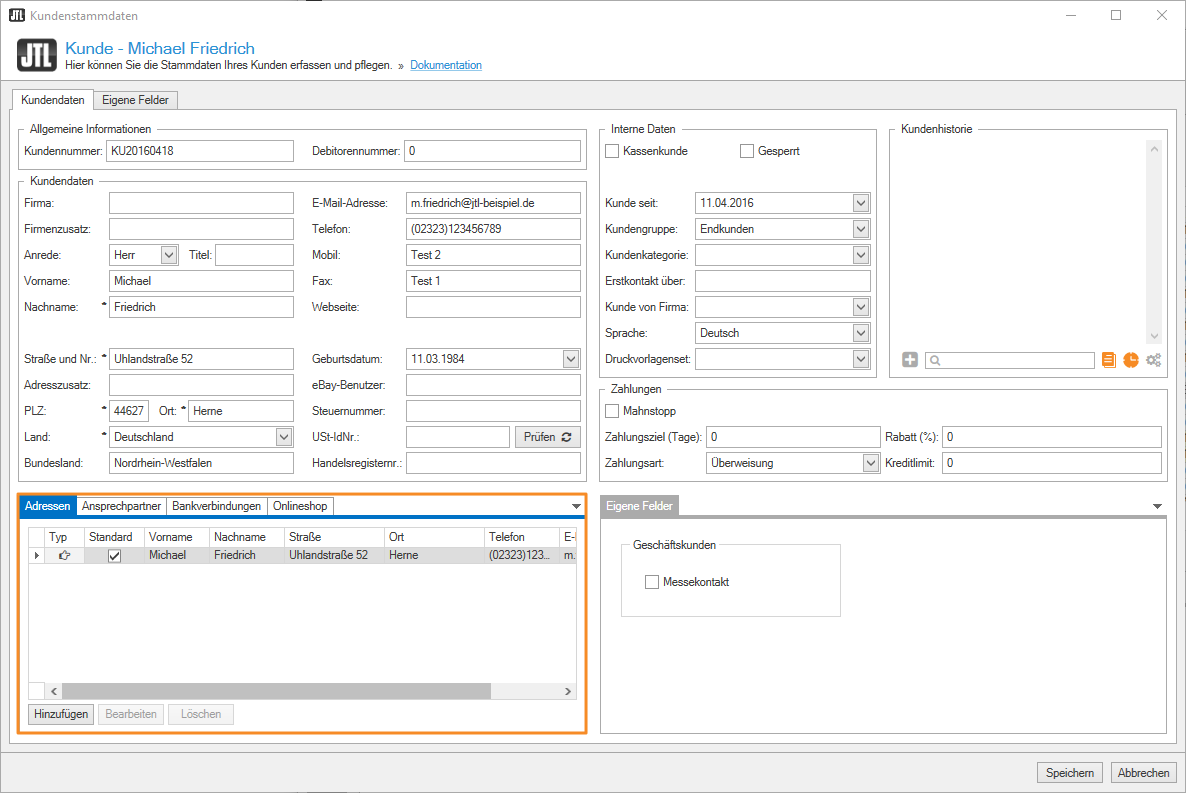
Pane C: Additional information
Here you can store various addresses, contacts and bank accounts of a customer as well as view and manage all online shop-related information about a customer.
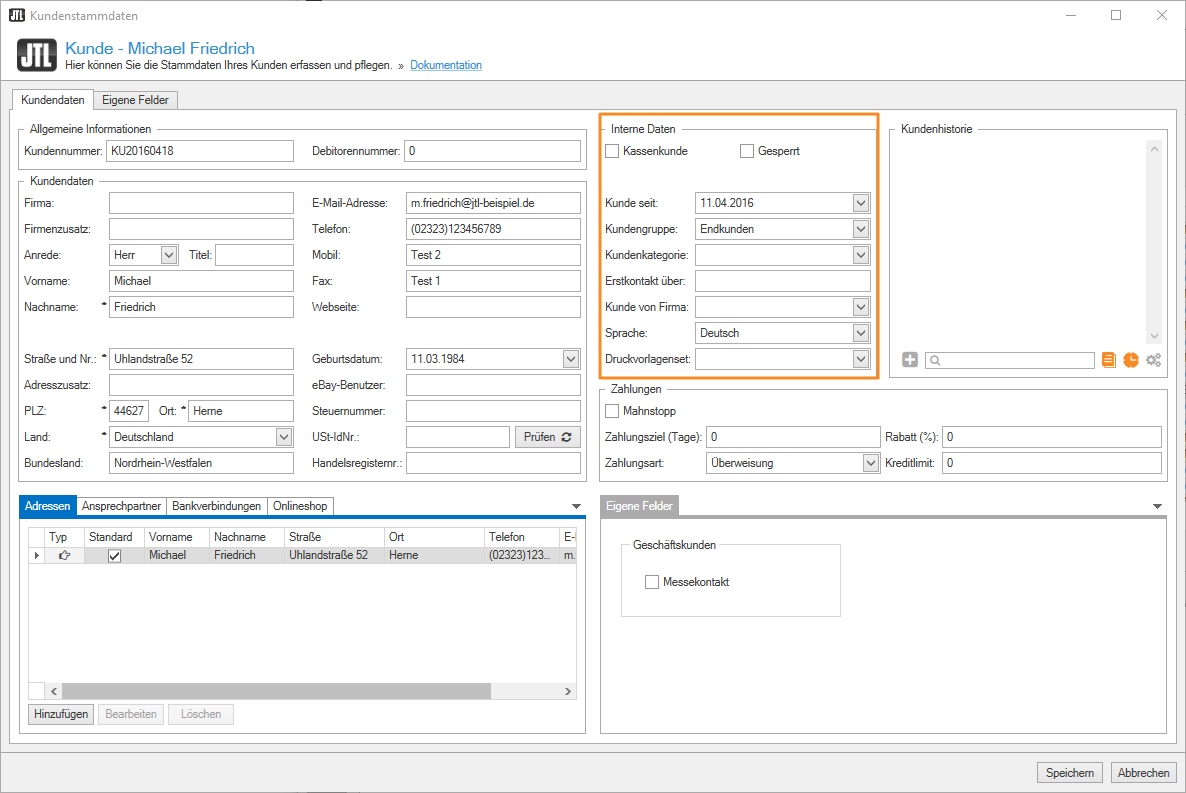
Pane D: Internal data
POS customer: If you use JTL-POS and your customer has paid via your cash register, the customer is automatically marked as a cash register customer. You can also manually activate this check box and use the information for search and filter purposes.
Blocked: If this option is activated, the customer is highlighted in red in the customer overview. When creating sales quotations and sales orders manually, the message appears that the customer is blocked.
Customer since: Displays when the customer was created in JTL-Wawi.
Customer group: Here you can define which customer group the customer should belong to. You can use customer groups to control discounts, for example.
Customer category: Here you can assign a customer to a specific customer category. Customer categories can be used, for example, in search queries and filters, as well as for creating statistics.
Initial contact: Here you can see the platform through which the customer data entered JTL-Wawi if it was not created manually (e.g. eBay, Amazon, name of the online shop).
Cust. of company: Here you can indicate from which of your companies stored in JTL-Wawi, the customer is ordering goods.
Language: Enables you to set which templates are to be used when creating documents and messages for the customer.
Print template set: Here you can select a print template set for the customer.
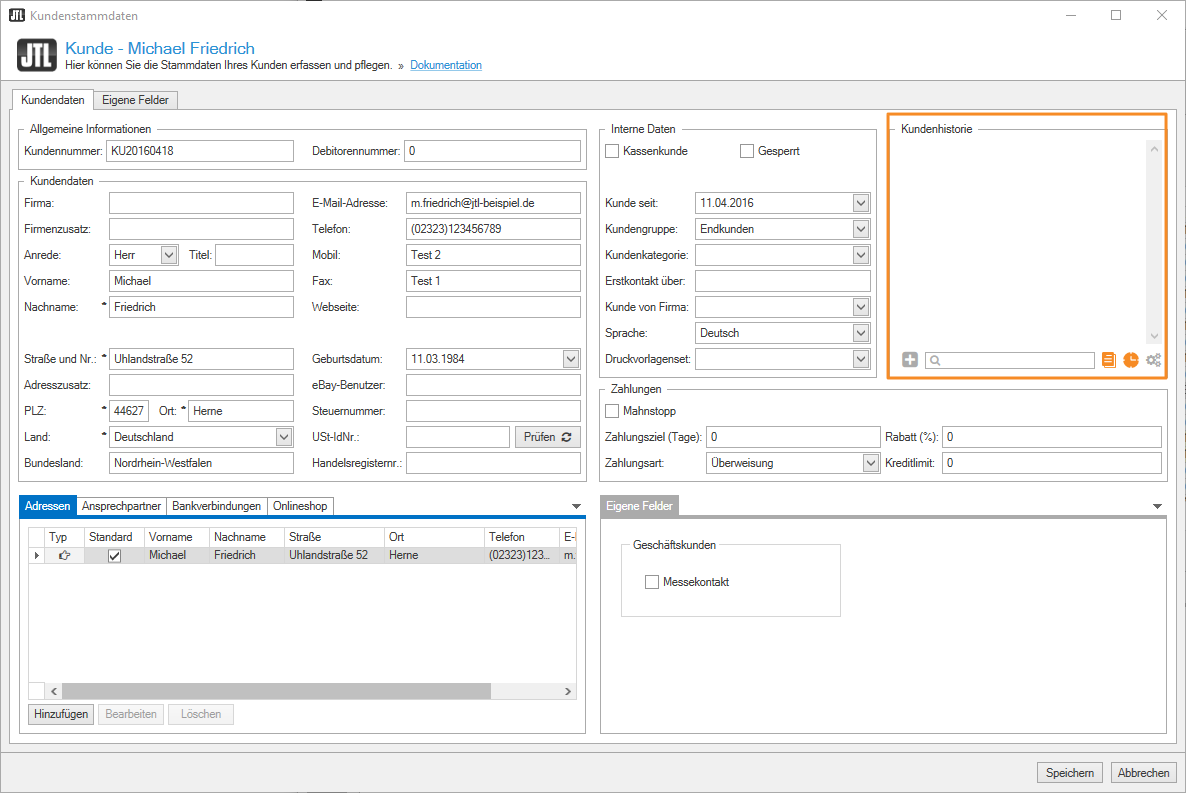
Pane E: Customer history
In the customer history, you can see all the actions that have been performed in relation to the currently displayed customer. For example, you can see the last time a sales quotation, sales order, or invoice was created, as well as incoming payments, registered and incoming returns, and triggered workflows.
Click on an entry in the customer history to open the relevant area.
Example: If a sales order has been created, you can access this sales order by clicking on the entry in the customer history.
Icon: Add a note
Use this icon to add a new note to your overview.
Icon: Search history
In the field with the magnifying glass icon, you can enter a search term or text for which you want to search the entries in the overview.
Icon: View notes
The Notes icon allows you to show and hide notes in the history. If the icon is orange, notes are displayed in the overview. If it is grey, notes are hidden in the overview.
Icon: View history
The History icon allows you to show and hide the activated entries in the overview. If the icon is orange, notes are displayed in the overview. If it is grey, all notes in the overview are hidden.
Icon: Adjusting filters
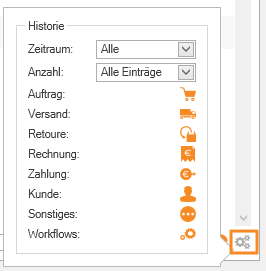
Clicking on the gear icon opens a context menu in which you can adjust the settings for displaying the history.
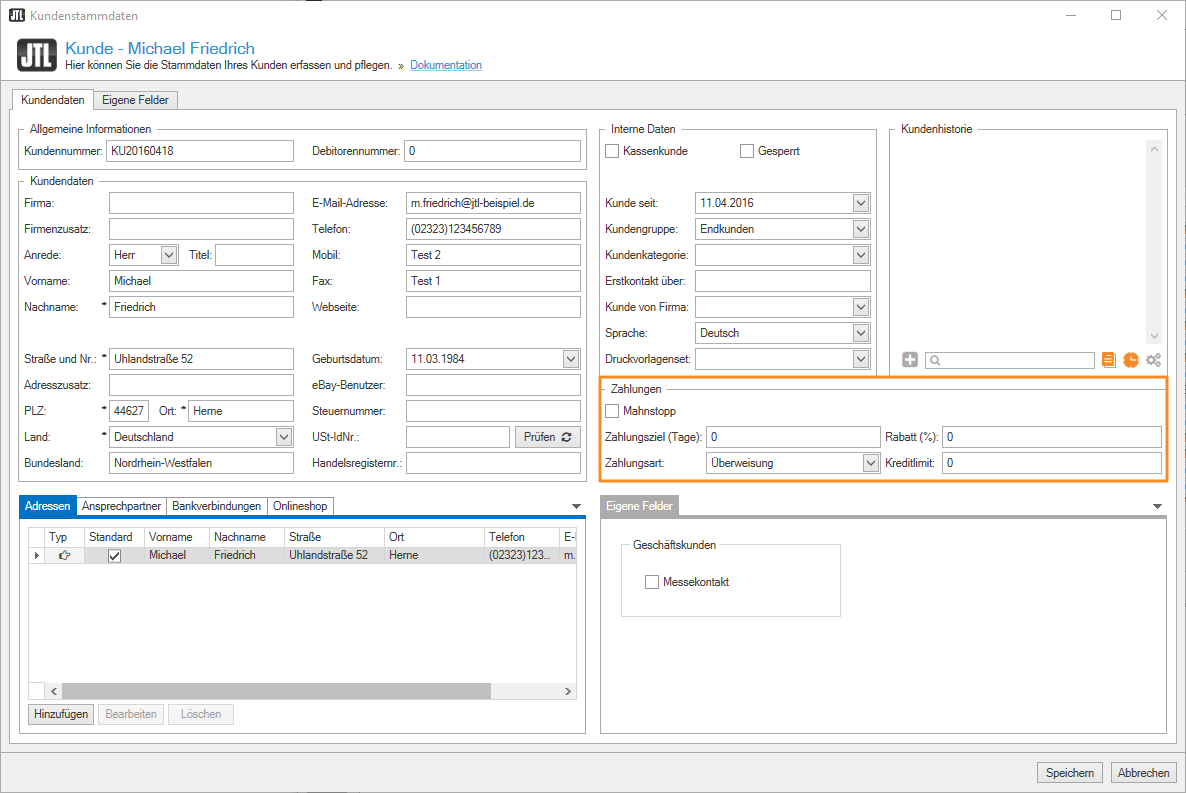
Pane F: Payments
Dunning block: If you activate this option, the customer will not receive a dunning letter in the event of a delayed payment.
Due date for payment (days): You can enter an individual due date for payment for a customer in this field. If you enter 0 (default) as the due date for payment, the time is taken from the first dunning level.
Discount (%): Gives the customer a discount on the entire product range in percent. This discount only applies if the customer does not already have a higher discount on the range or a single category due to them belonging to a customer group.
Payment method: You set a default payment method for a customer, which is automatically selected for sales orders and sales quotations.
Credit limit: Here you can set an upper limit for open sales order totals. If the customer exceeds this sum, no new sales orders can be delivered until a part of the sum has been paid by the customer.
Pane G: Custom fields
Custom fields for the Customer area for which the General display location has been defined are displayed here. You can create and edit custom fields under Admin > Global: Custom fields.
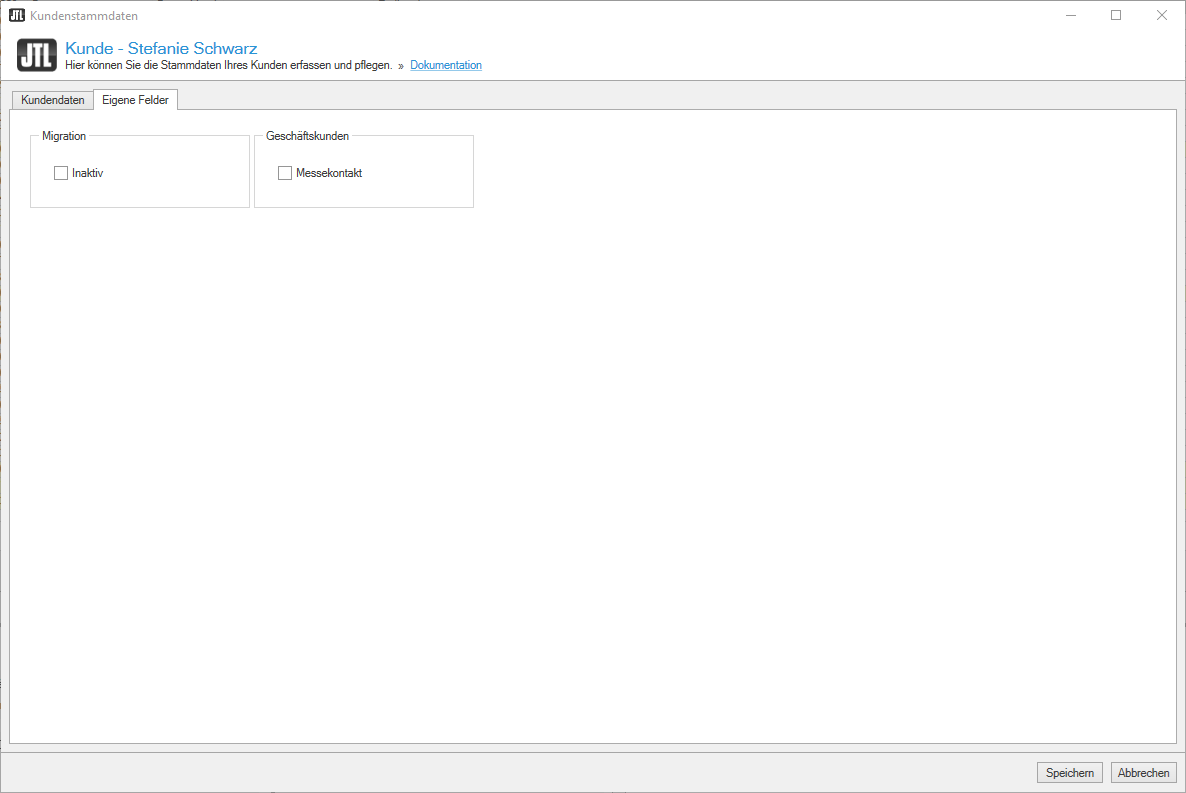
Tab: Custom fields
Here you can see the custom fields specified under Admin > Global: Custom fields in the Creating and editing custom fields dialogue box for the Customer area, provided you specified Custom fields as the display location.
