Thank you for using the English version of the JTL-Guide!
We are currently still building up the English documentation; not all sections have been translated yet. Please note that there may still be German screenshots or links to German pages even on pages that have already been translated. This guide mostly addresses English speaking users in Germany.
We are currently still building up the English documentation; not all sections have been translated yet. Please note that there may still be German screenshots or links to German pages even on pages that have already been translated. This guide mostly addresses English speaking users in Germany.
Creating and setting up WMS warehouses
Your task/initial situation
You have decided to use JTL-WMS and would like to transfer your warehouse layout to JTL-WMS.
Requirements
General information
Please note: JTL-WMS can only be used with warehouses of the “WMS warehouse” type. If goods receipt and goods issue take place via JTL-WMS, the goods receipt and shipping process of JTL-Wawi cannot be used at the same time within this warehouse.
Creating WMS warehouses
- Start JTL-Wawi.
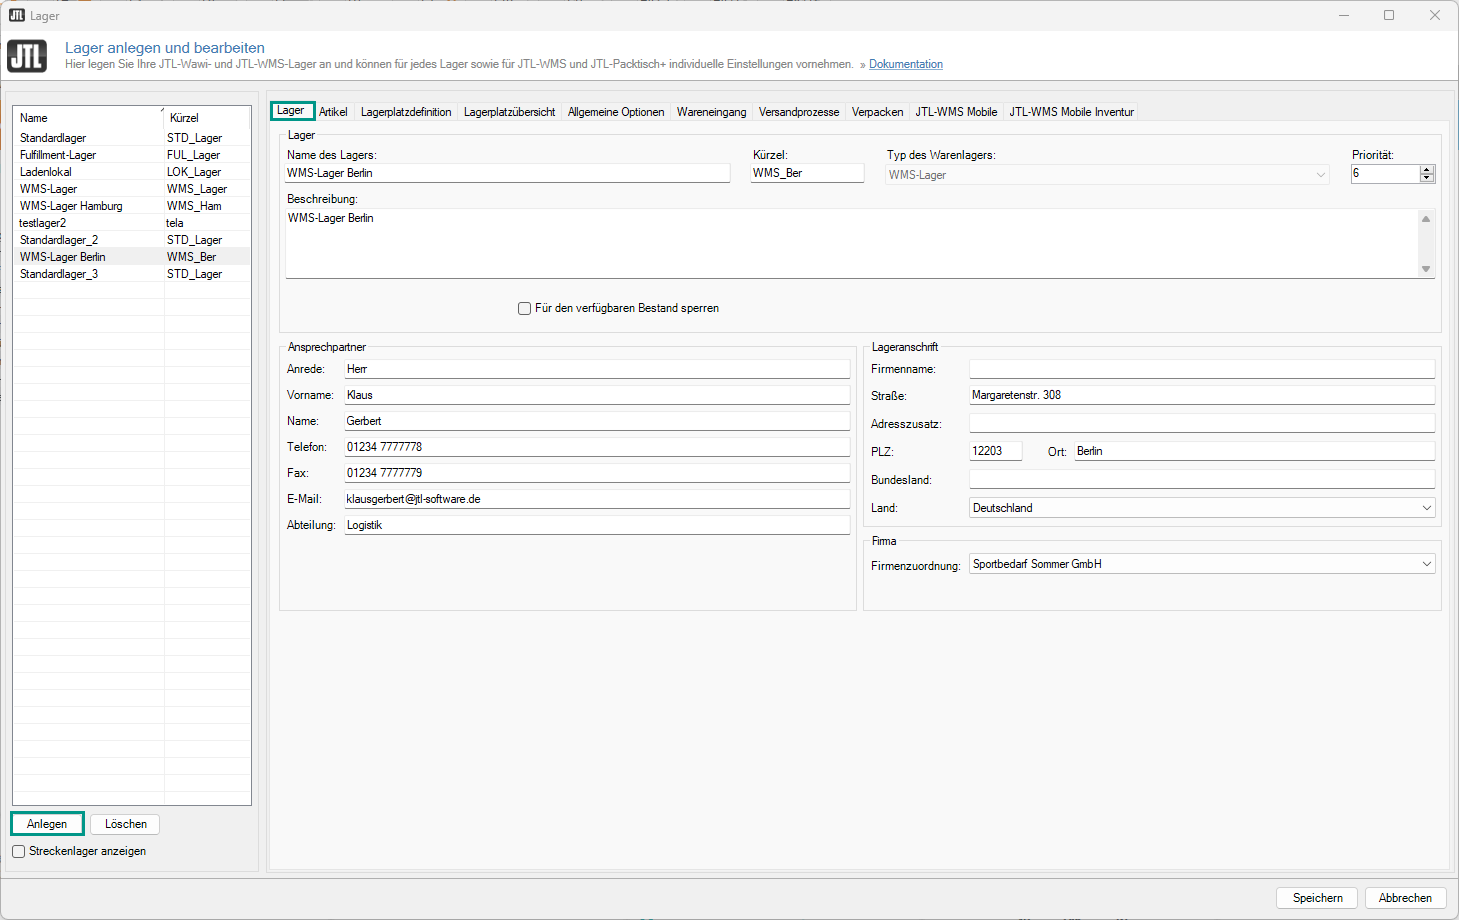
- Go to Menu: Warehouses > Warehouse to open the dialogue box Create and edit warehouses.
- Click New to create a new warehouse.
- Give your warehouse a name and, under Warehouse type, select WMS warehouse from the drop-down menu.
- Once you have selected WMS warehouse, you can start the Setup Wizard. Please note that the Setup Wizard cannot be accessed manually.
Please note: You can create storage locations manually or via the Setup Wizard. You can edit the warehouse manually at any time. Read more on how to create a JTL-WMS warehouse using the Setup Wizard.
- If you do not use the Setup Wizard, enter your address information in the Contact area and Warehouse address area.
Your WMS warehouse has now been created. Read below how to create storage locations for your WMS warehouse.
Creating storage locations manually
Creating storage locations in JTL-Wawi
If you do not use the Setup Wizard, create a warehouse layout and storage locations as follows:
- Go to Menu: Warehouses > Warehouse to open the dialogue box Create and edit warehouses.
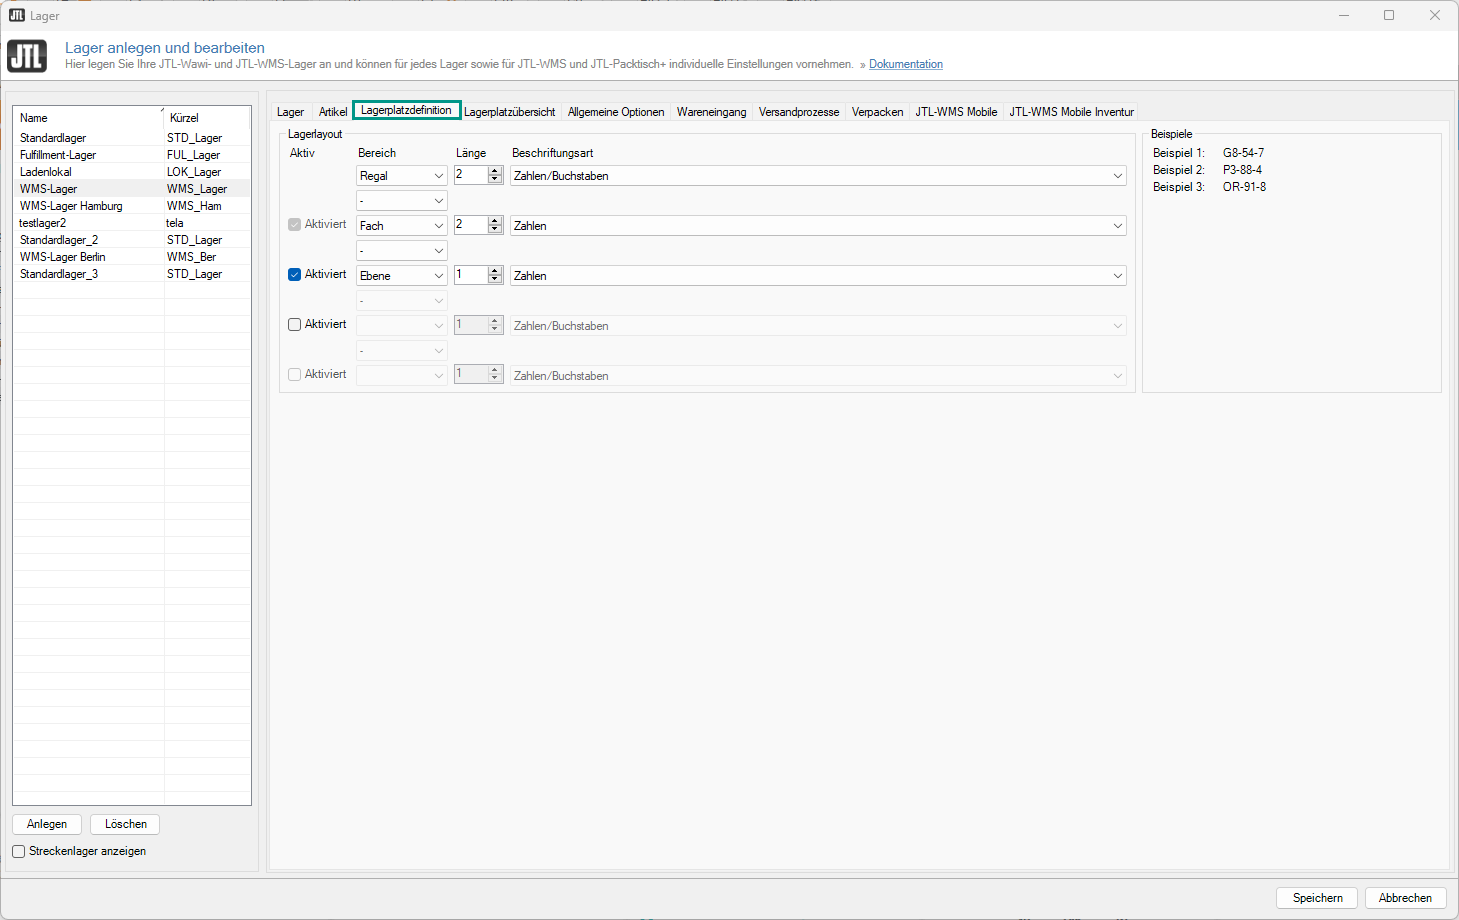
- Switch to the Storage location setup tab.
- In the Warehouse layout area, specify your warehouse.
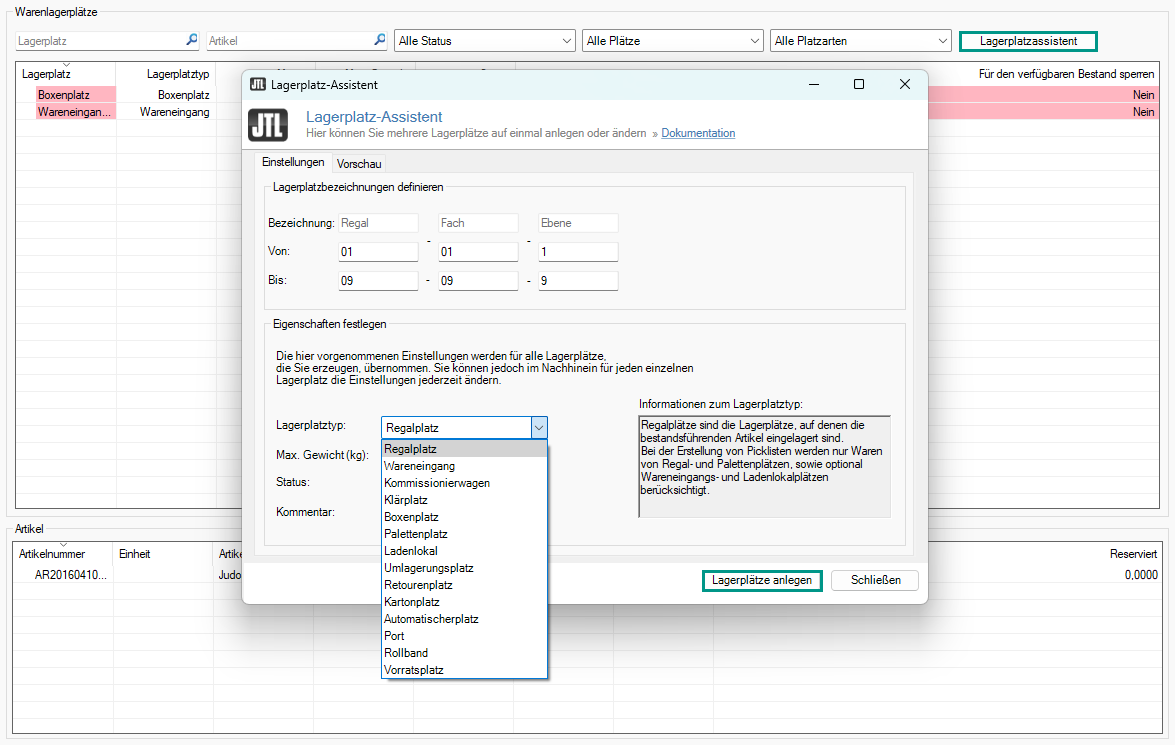
- Switch to the Storage location overview tab.
- Click Storage location wizard to open the Storage location wizard dialogue box.
- Now define your storage locations and click Create locations to complete the setup.
Your storage locations are now active in the system and can be used.
Creating a storage location in JTL-WMS
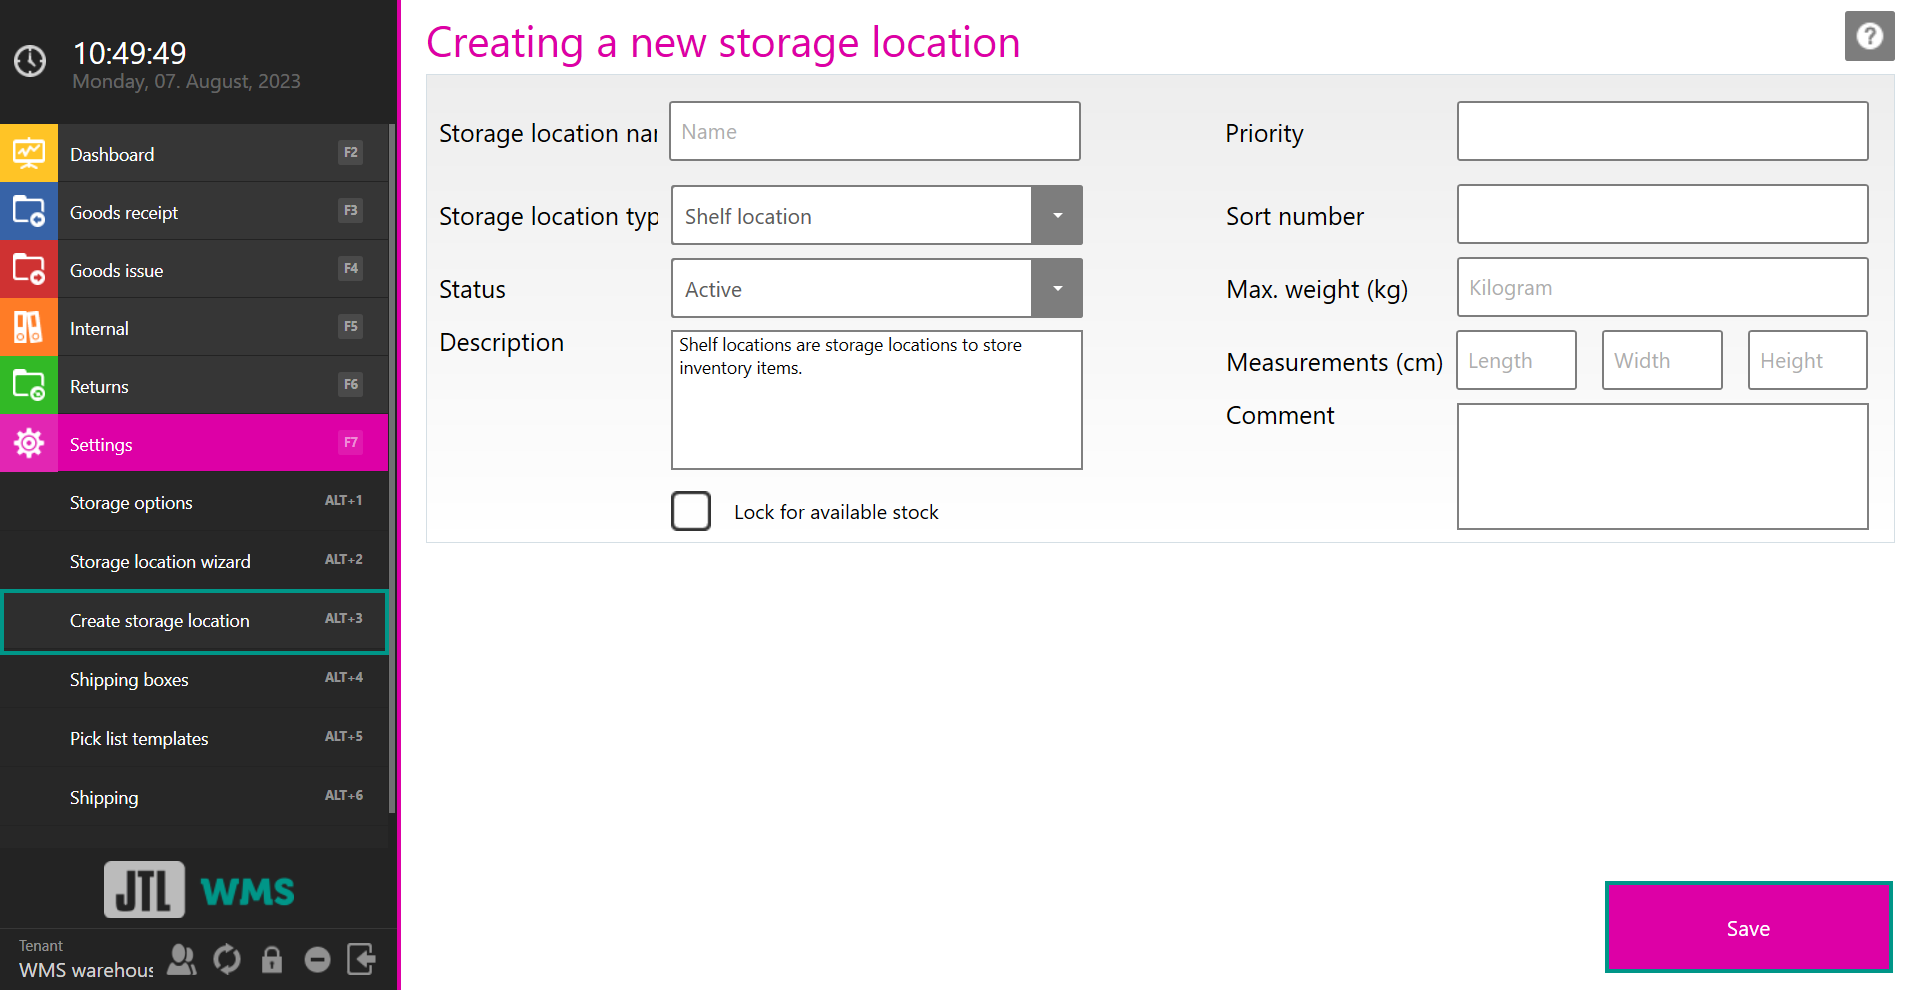
You can add individual storage locations to your warehouse in JTL-WMS.
- Start JTL-WMS.
- Open the menu and select Settings > Create storage location.
- Adjust the settings for the storage location.
- Click Save to create your storage location.
Your storage space is now active in the system and can be used.
Printing storage location labels
Print storage location labels to identify the storage locations. To do this, adjust the format in the print template if necessary.
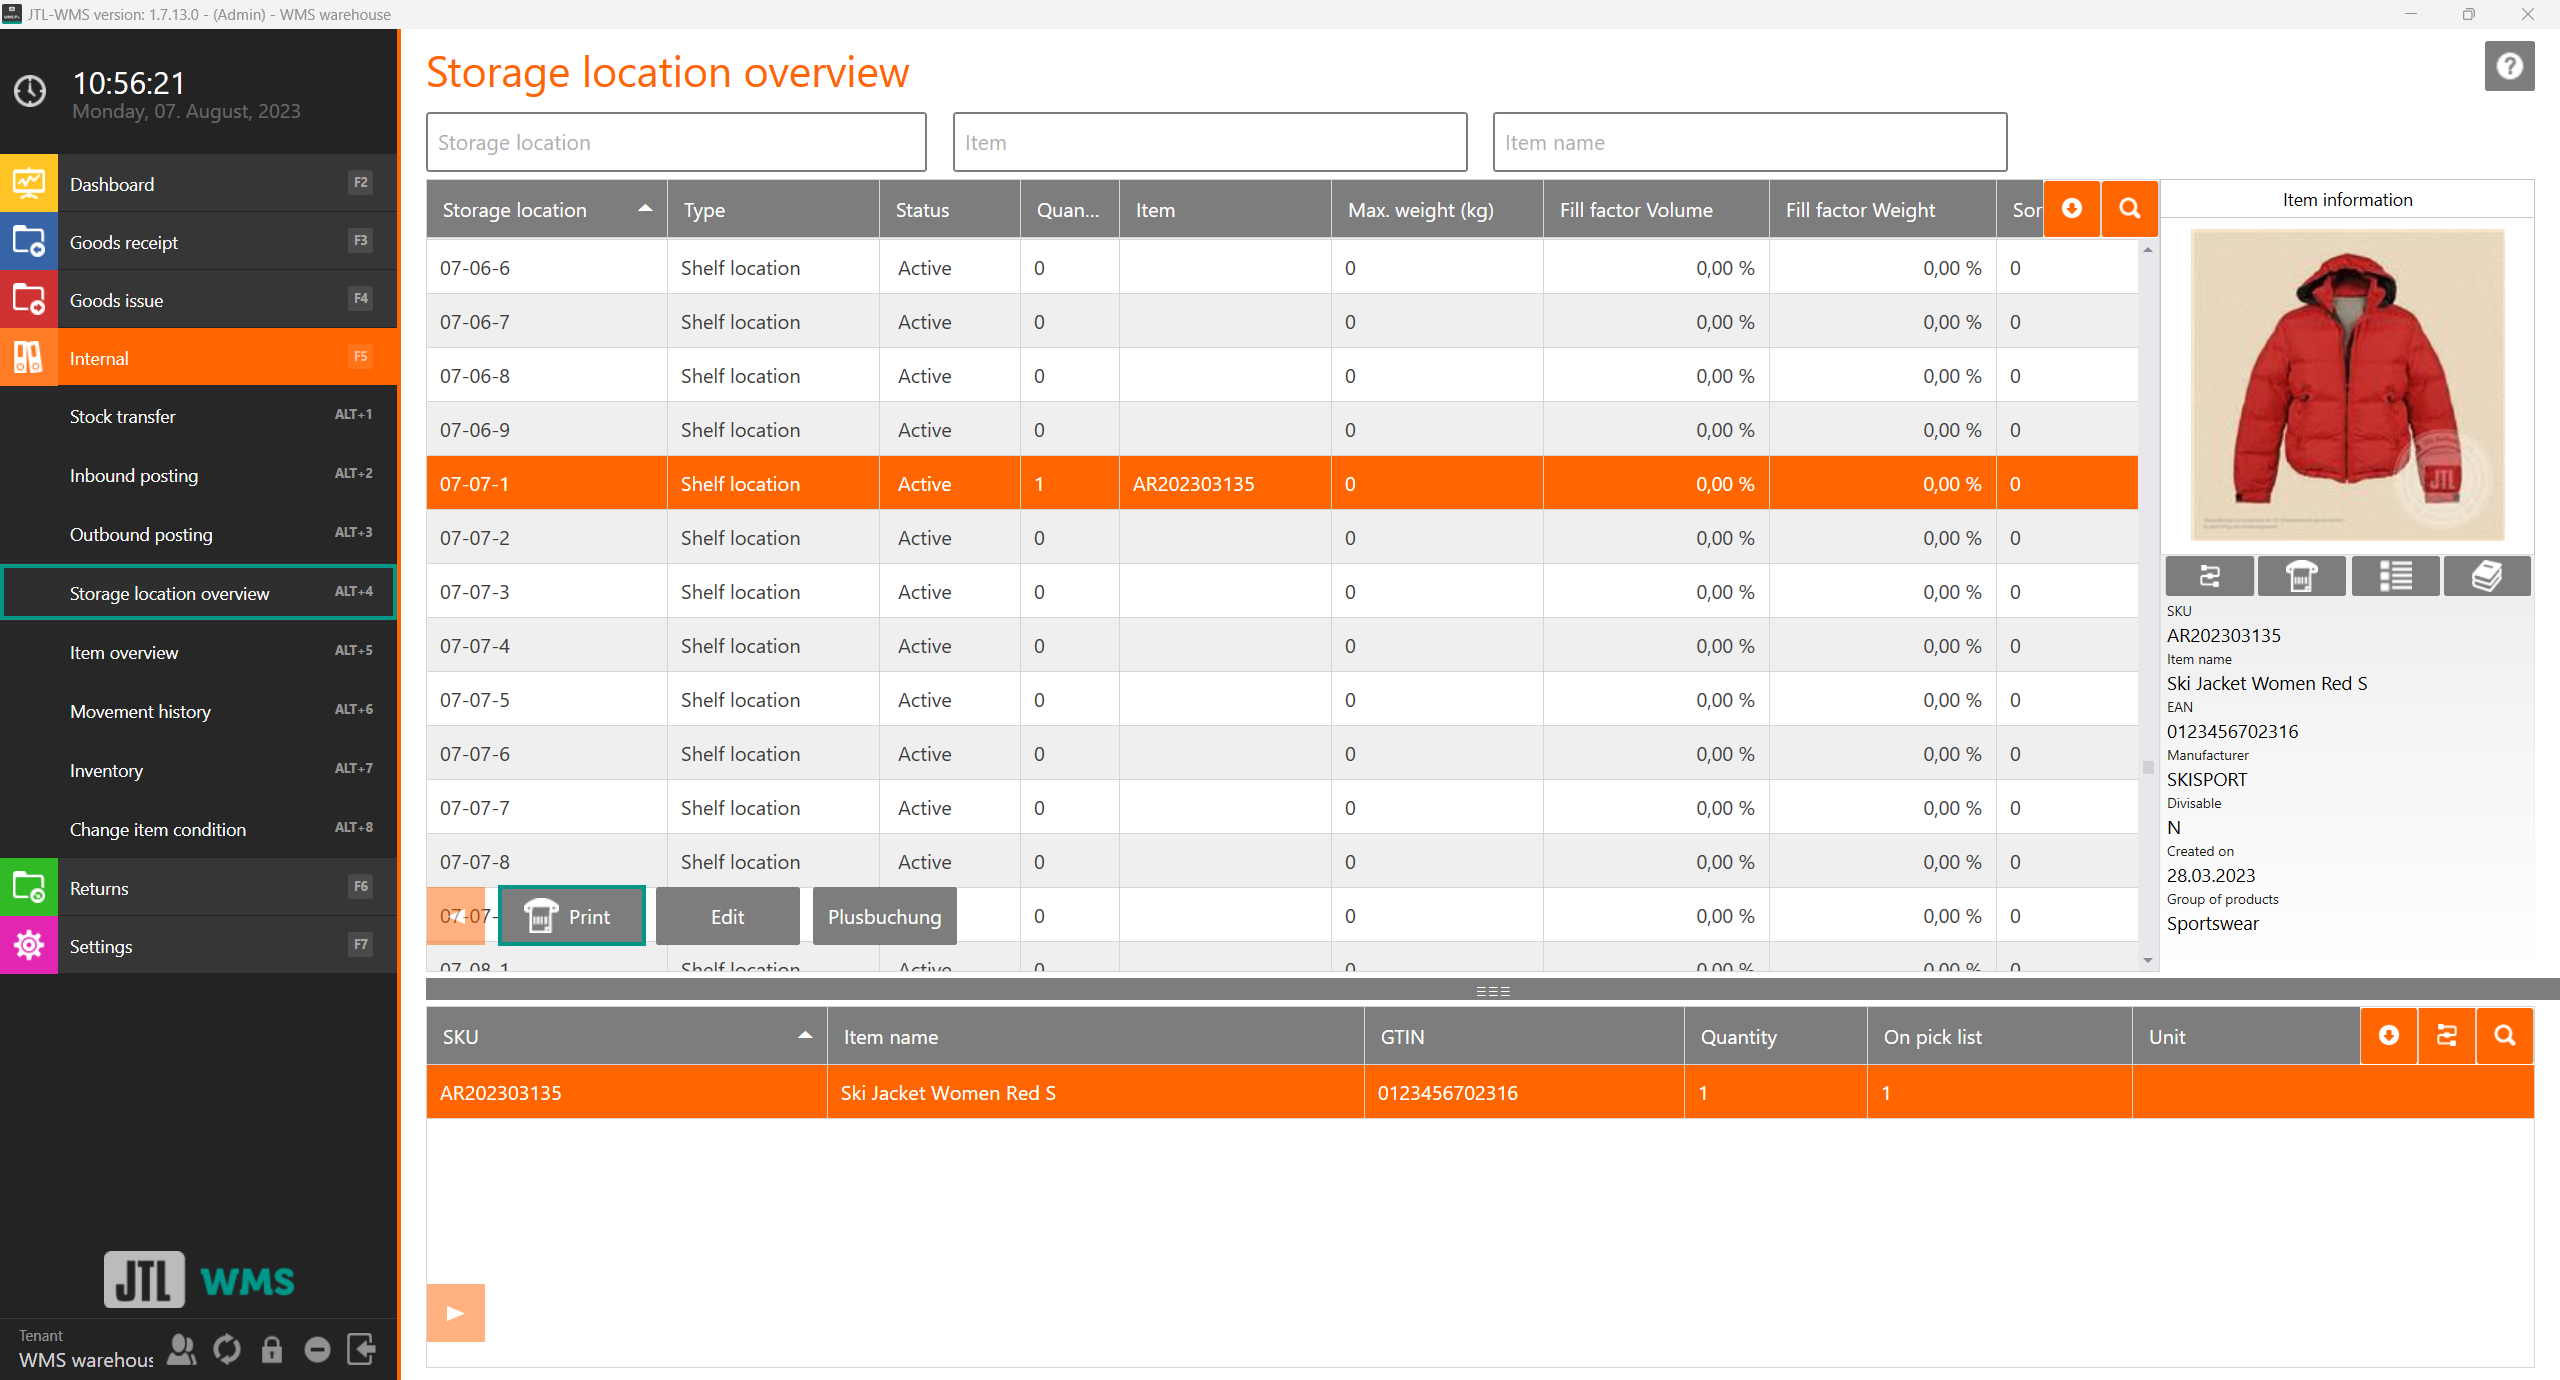
- In WMS, navigate to the item Internal > Storage location overview and select all desired storage locations. With the keyboard shortcut Ctrl+A you can select all locations.
- Click on the semi-transparent arrow and the Print icon to print the labels.
