Thank you for using the English version of the JTL-Guide!
We are currently still building up the English documentation; not all sections have been translated yet. Please note that there may still be German screenshots or links to German pages even on pages that have already been translated. This guide mostly addresses English speaking users in Germany.
We are currently still building up the English documentation; not all sections have been translated yet. Please note that there may still be German screenshots or links to German pages even on pages that have already been translated. This guide mostly addresses English speaking users in Germany.
Exporting data via CSV
Your task/initial situation
You have filled a database for JTL-POS. Now you want to export individual data, e.g. all items, to edit the whole batch at once or transfer them to a different database.
Please note: CSV exports always work the same in JTL-POS no matter which data is concerned. This page describes the general procedure that you only need to adjust according to the respective data category.
Exporting CSV data
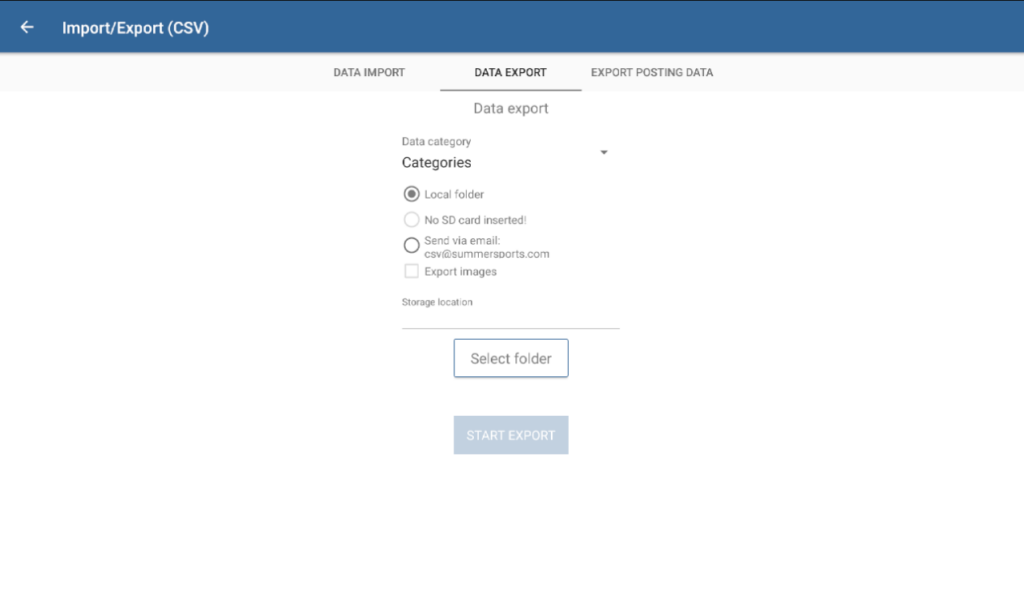
- In the menu of JTL-POS, go to the menu item Import/Export (CSV).
- Go to the tab Data export.
- Under Data category, select the type of data you want to export from JTL-POS. Depending on the selected category, the CSV structure differs.
- Select a storage location for the exported CSV files.
Local folder: Select this option to save the exported file to the internal storage of your device.
SD card: If your device has an SD card inserted, you can also save the file to the SD card.
Send via email: With this option enabled, the CSV file is sent to the email address selected for this kind of data. For this you must have set up an email account (see: Manage email server) and saved the recipient address (see: Manage recipients). You cannot export images when you send CSV files via email.
- Enable the option Export images to also export the respective images. They are saved to a separate folder in the CSV file folder. You can only export the images of items and categories.
- Select a storage location for the exported CSV files by tapping Select folder. This step is not needed if you send the file via email.
- Tap Start export. The CSV file will now be created and can then be edited by you.
Related topics
