Thank you for using the English version of the JTL-Guide!
We are currently still building up the English documentation; not all sections have been translated yet. Please note that there may still be German screenshots or links to German pages even on pages that have already been translated. This guide mostly addresses English speaking users in Germany.
We are currently still building up the English documentation; not all sections have been translated yet. Please note that there may still be German screenshots or links to German pages even on pages that have already been translated. This guide mostly addresses English speaking users in Germany.
Creating discounts
Your task/initial situation
You would like to create a discount in JTL-POS which you can then assign to an item, customer, or receipt.
Creating a discount
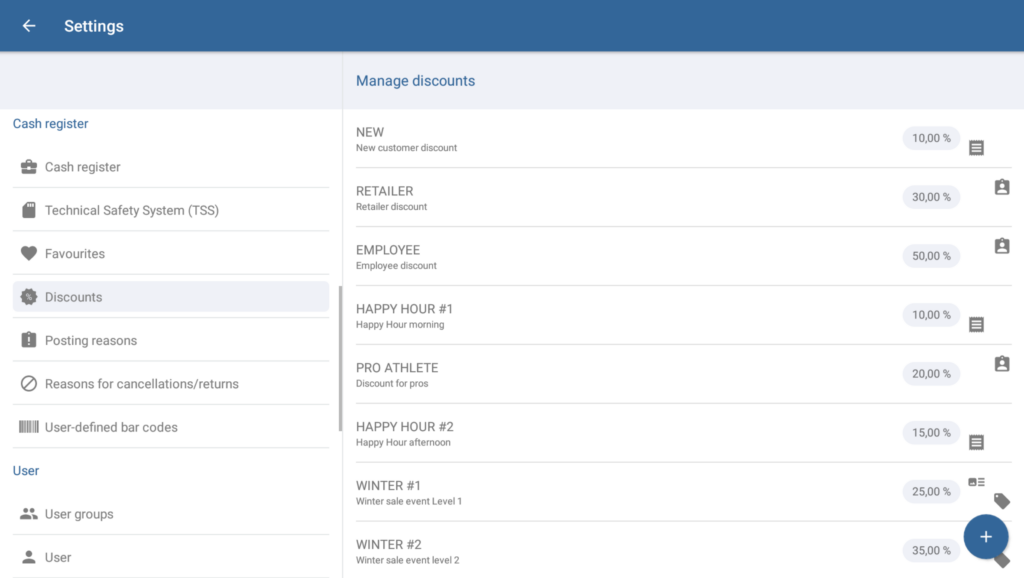
- Go to Settings > Discounts to reach the Manage discounts dialogue box.
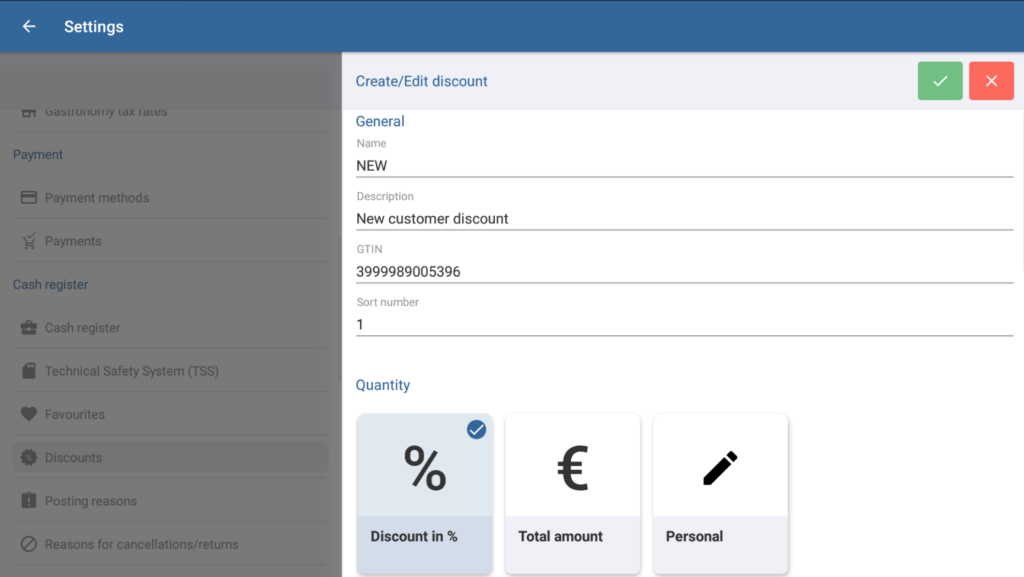
- Tap the plus icon to create a new discount. The Create/Edit discount dialogue box will open.
- Give the discount a name, such as Regular customer discount, and a description.
- Under Quantity, select whether the discount is to be granted as a Discount in % or as a Total amount to be deducted from the price. You can also select the option Personal to allow the cashier to define the amount at the checkout.
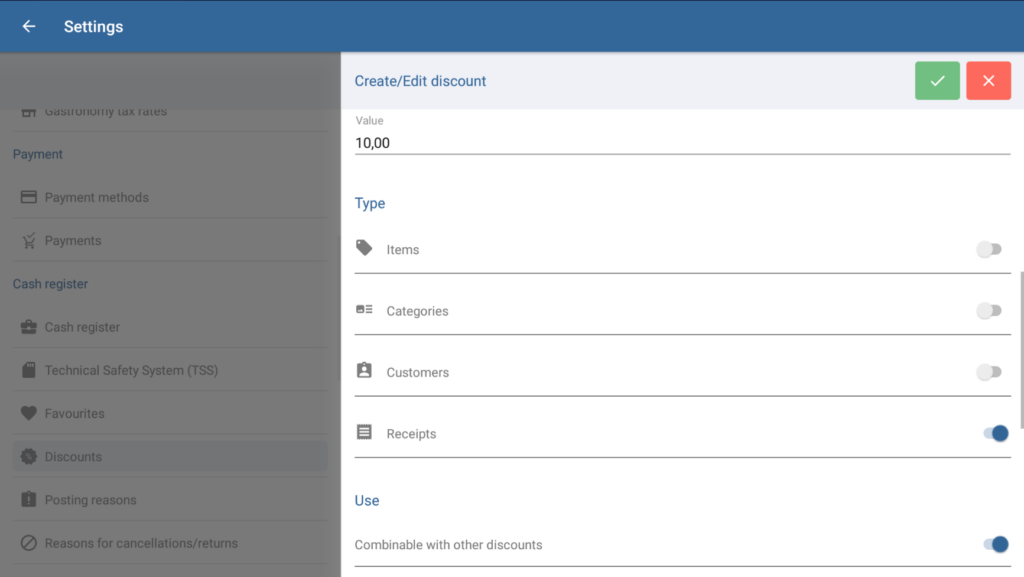
- Under Value, enter how high you want the discount to be.
Please note: For personal discounts, enter the maximum percentage that the cashier can grant as a discount during checkout.
- Under Type, select what the discount can be applied to.
Please note: For personal discounts, you can only select the Receipts type, since personal discounts can only be granted during checkout.
- Under Use, specify if the discount can be combined with other discounts and if it is to be displayed separately on receipts.
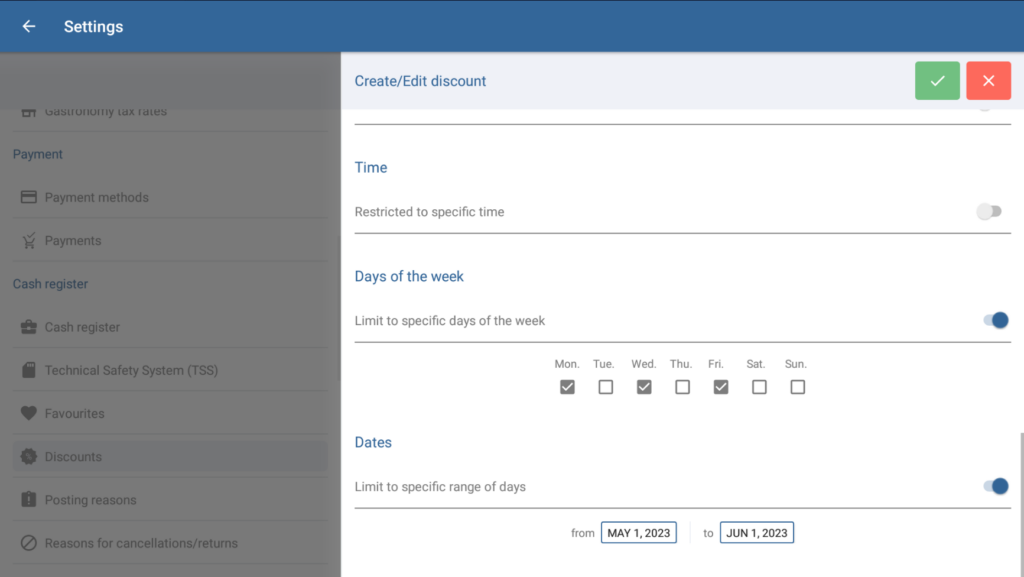
- Under Time, Days of the week, and Dates, specify the specific times at which the discount should apply. Outside this period, it will not be applied or taken into account. Enable the individual switches to configure the various options.
- Tap the ✓ icon to save the discount. You can now apply the discount to the selection you made under Type.
Please note: Read the description Granting discounts on receipts and line items to learn how to assign a discount to a receipt or item.
Related topics


