Thank you for using the English version of the JTL-Guide!
We are currently still building up the English documentation; not all sections have been translated yet. Please note that there may still be German screenshots or links to German pages even on pages that have already been translated. This guide mostly addresses English speaking users in Germany.
We are currently still building up the English documentation; not all sections have been translated yet. Please note that there may still be German screenshots or links to German pages even on pages that have already been translated. This guide mostly addresses English speaking users in Germany.
Processing requests
Your task/initial situation
You are a fulfilment service provider and have created a warehouse advert in the Fulfillment Portal. You have also prepared JTL-Wawi for data synchronisation with the JTL-Fulfillment Network. You have been informed by email that you have received an initial request from a merchant.
Viewing requests
- When a customer makes a request for your warehouse in the Fulfillment Portal, you will be notified by email. You can access the portal directly via a link in that email.
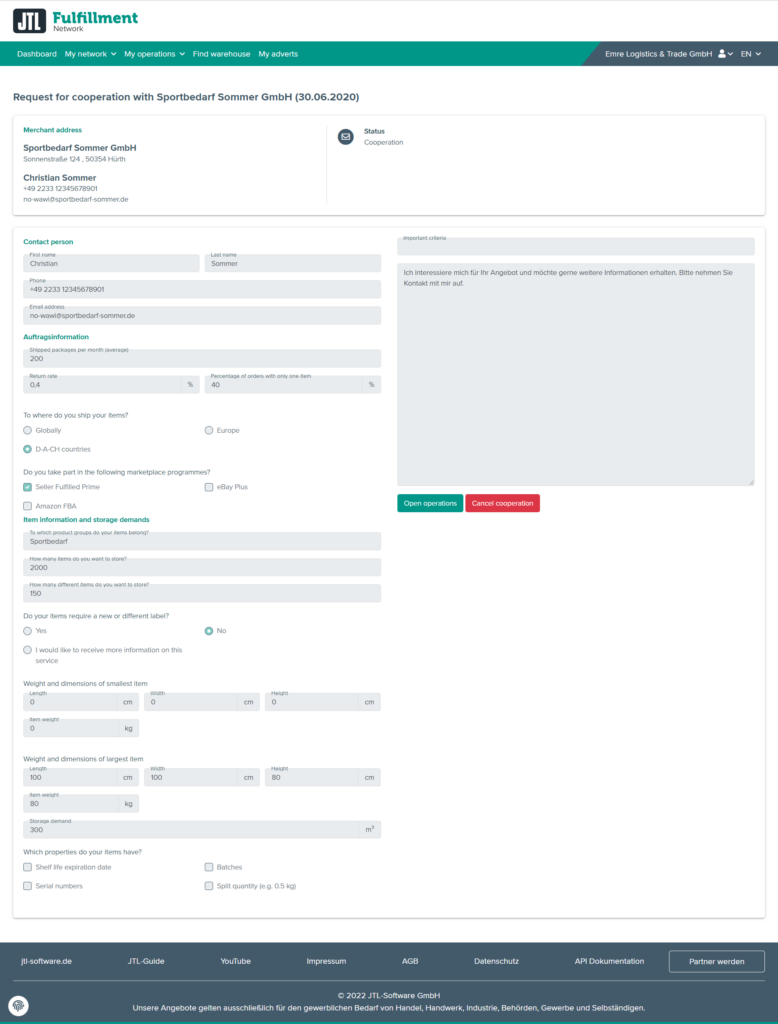
- Open your outstanding customer requests in the Fulfillment Portal via the menu My Network > My customer requests.
- Click on Details to receive further information on the customer's request.
Negotiating a contract: Before you confirm the business relationship, you should contact the seller outside of the Fulfillment Portal to negotiate a contract with them. How exactly each individual contract is negotiated is up to the fulfilment service provider and is not part of JTL's scope of services. JTL merely provides the software, allowing the establishment of the initial contact via the Fulfillment Portal and providing the technical basis for the following cooperation.
Authorising customers
- In the request details, select the option Initiate cooperation. Then click on Send reply. The request status changes to Confirmed.
- Now your customer needs to confirm the cooperation. Once this is done, you will see the customer under My Network > My Customers.
Synchronisation with JTL-Wawi
Once authorisation is complete, you and the merchant can exchange data. The customer’s data will be transferred to your JTL-Wawi. The merchant is created in JTL-Wawi as a supplier and as a customer.
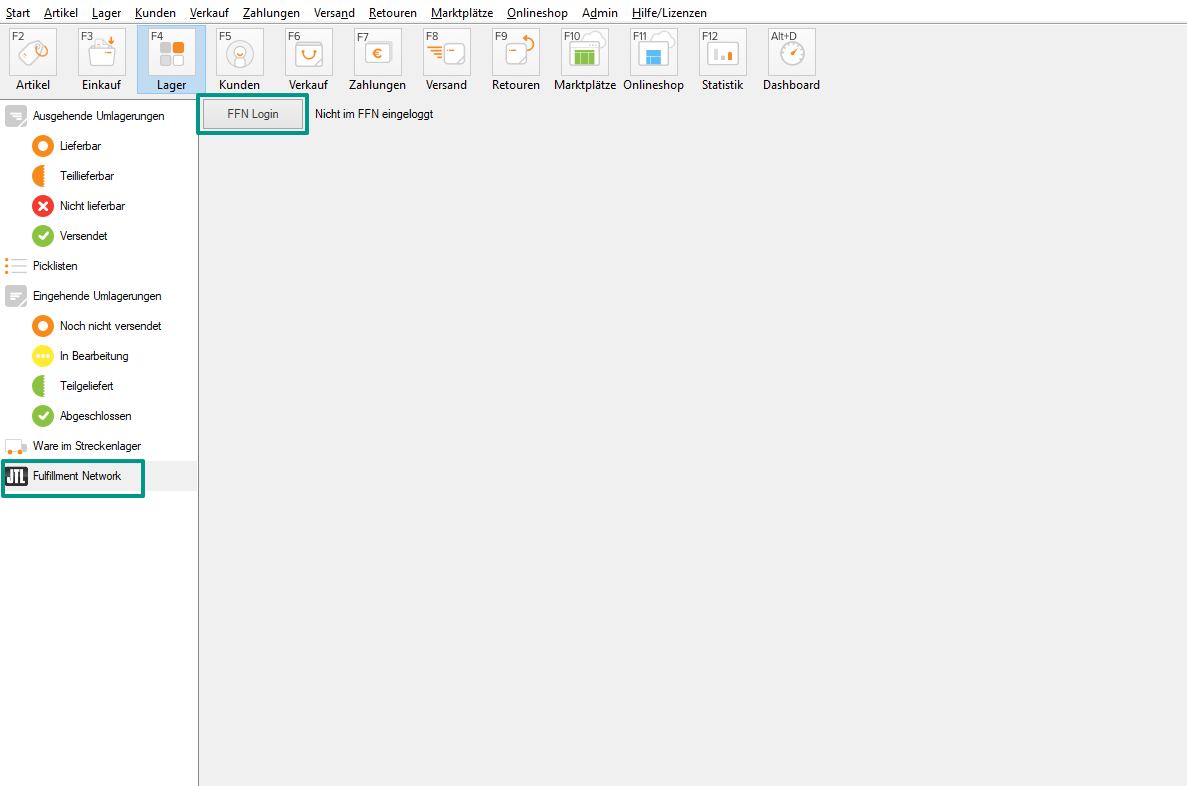
- Go to the area Lager (Warehouses) in JTL-Wawi and open the folder JTL-Fulfillment Network.
- Click on FFN Login. You will be forwarded to the central login of JTL. This step has to be performed only once and is not necessary for further fulfilment customers.
- Enter your access data for the JTL-Customer Centre. Then confirm all authorisation prompts.
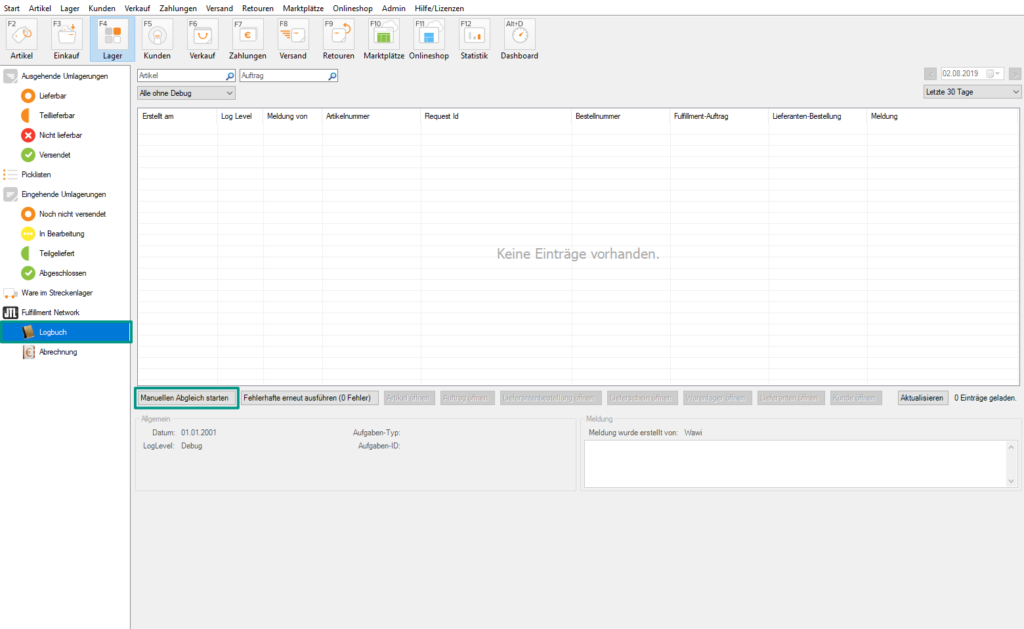
- Select the entry Logbuch (Log) and click on Manuellen Abgleich starten (Start manual synchronisation). The data of your new customer will now be imported from the JTL-Fulfillment Network.
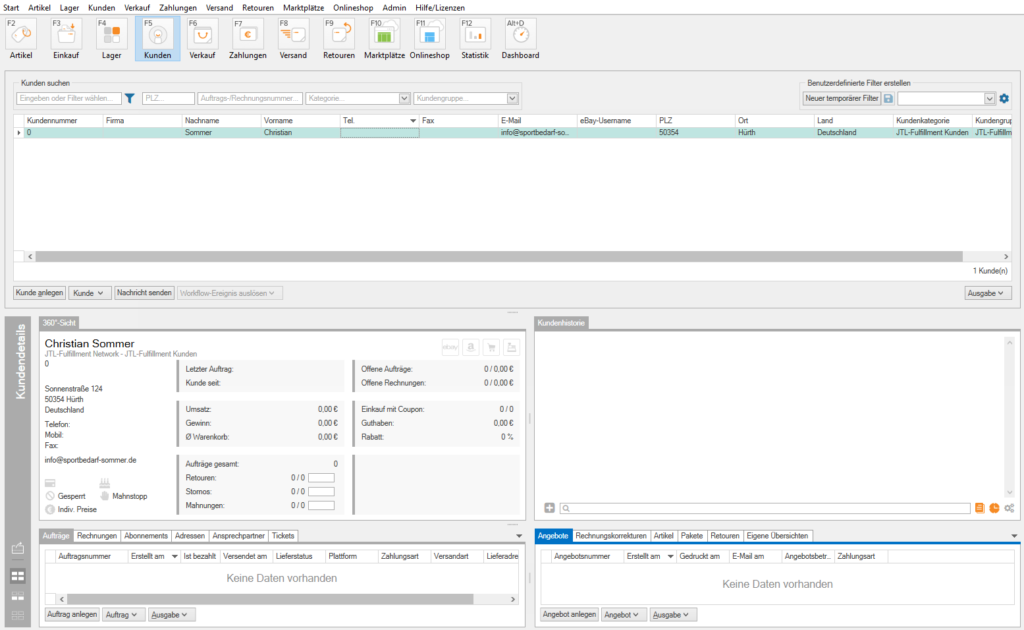
- Your fulfilment customer has been created in the Kunden (Customers) area and can be recognised by its turquoise colour.
- To enable merchants to send you goods, you must now assign a specific warehouse to each fulfilment customer. Read the following chapter to learn how this works. Go to: Assigning warehouses.
Inviting merchants to cooperate via direct link
You now want to send a direct request for cooperation to a specific merchant.
As a fulfilment service provider, you have the option to send a merchant a direct invitation for cooperation in the JTL-Fulfillment Network.
- First log in to the Fulfillment Network. Link to Fulfillment Network by JTL.
- Go to My Network > My customers.
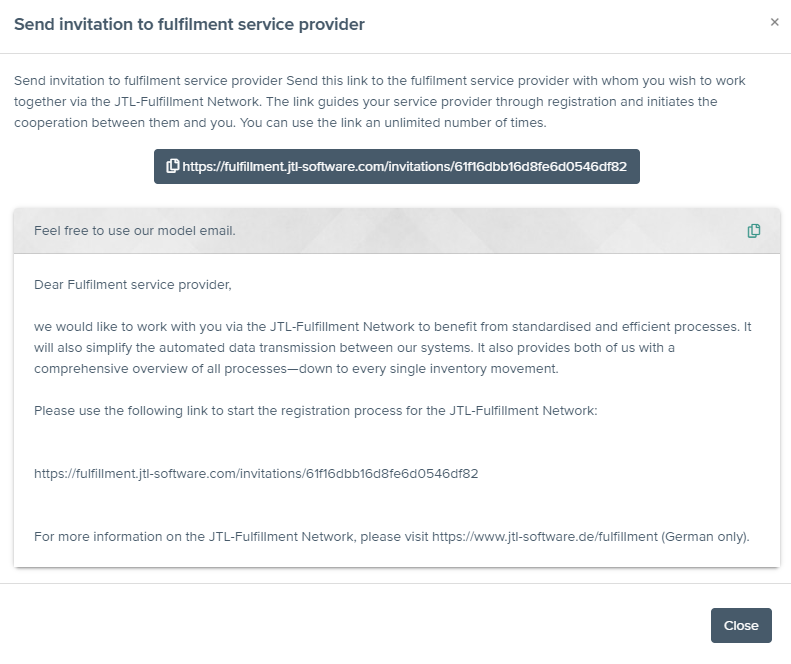
- Click Send invitation to customer. A pop-up window with a direct link opens.
- Copy the link and email it to the merchant of your choice. Alternatively, you can also use our ready-made email text, in which the link is already included, as a template.
I have received a direct link from a merchant
A merchant has sent you a direct link and invited you to cooperate in the JTL-Fulfillment Network.
- Click on the link and log in to the JTL-Fulfillment Network.
- Then click on Initiate cooperation.
- You are then linked to the merchant and only need to assign a warehouse to him. To do this, read Assigning a warehouse to a merchant.

