We are currently still building up the English documentation; not all sections have been translated yet. Please note that there may still be German screenshots or links to German pages even on pages that have already been translated. This guide mostly addresses English speaking users in Germany.
Dialogue box: Manage customers
You can access the Manage customers dialogue box via the Customers menu item.
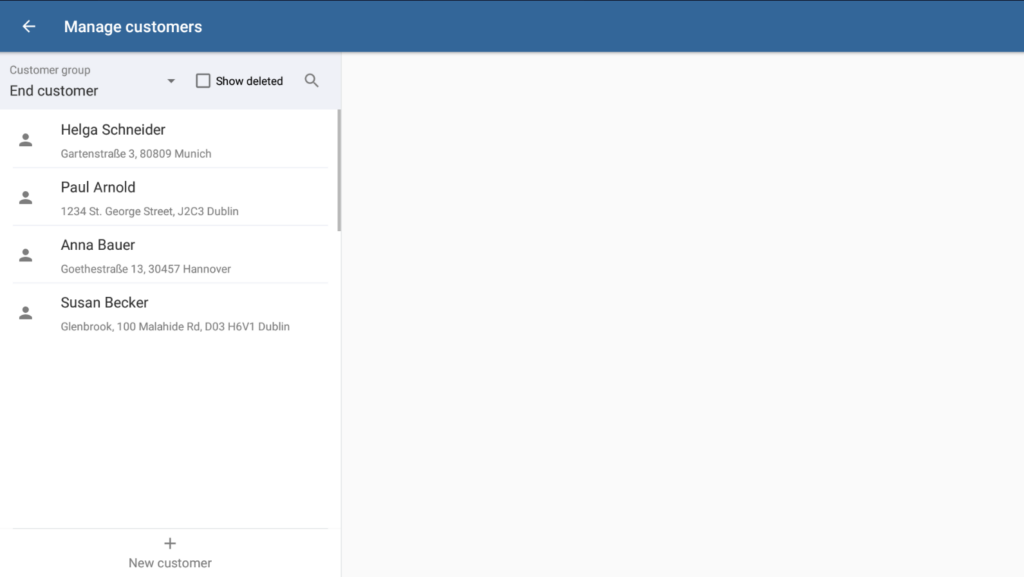
The Manage customers dialogue box lists all the customers you have created in JTL-POS. You can search for customers and filter by customer group as well as create new customers.
JTL-POS ERPConnected
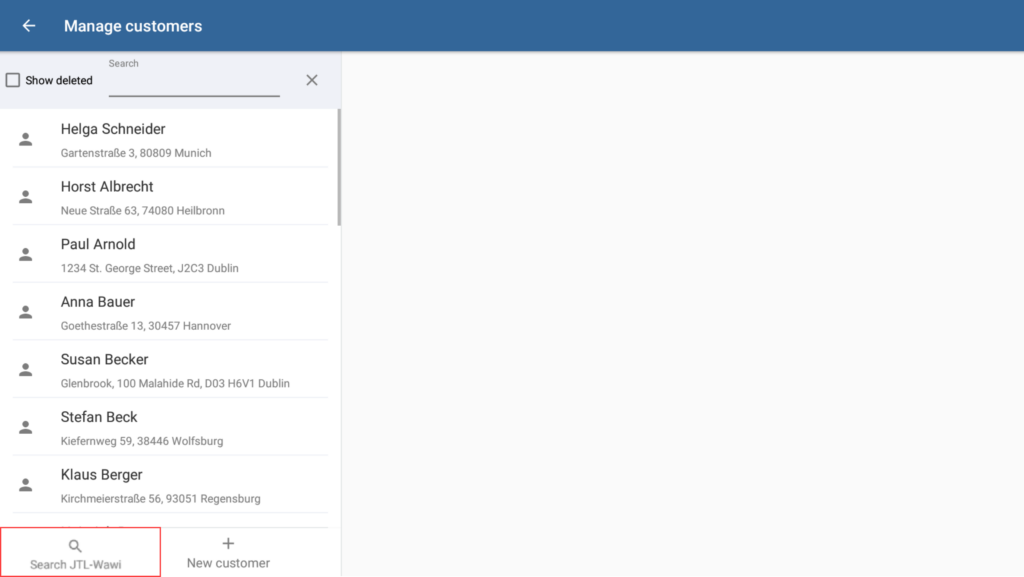
If you use JTL-POS ERPConnected, you can create customers in JTL-POS and have them transmitted to JTL-Wawi as well as search for customers from JTL-Wawi in JTL-POS and assign them to receipts.
Manage customers
Customer group: Use the drop-down menu to select one of your customer groups. All customers assigned to this customer group will then be displayed in the customer list.
Show deleted: Activate this option if you want to display customers that you have previously deleted (deactivated) from the system. This option is only visible for the Admin user.
Customer list: Here, you can see all the customers from the selected customer group that have been created in JTL-POS so far. Tap on one of the customers to open their customer master data.
New customer: Opens the New customer dialogue box. Here, you can enter the master data for a new customer.
Search JTL-Wawi: This option is only available in ERPConnected mode. This will open the Search JTL-Wawi dialogue box. Here, you can search for a customer by name or customer ID in the JTL-Wawi database. To do this, you need an active connection between JTL-Wawi and JTL-POS.
Dialogue box: Customer master data/New customer
Toolbar
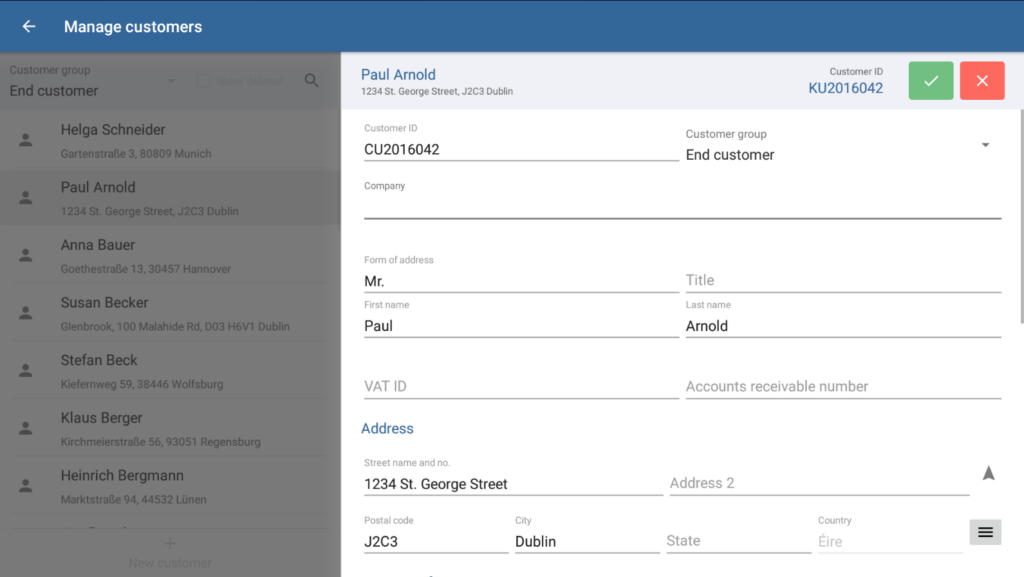
“Save” button: Saves all entered data/changes and exits Edit mode.
“Cancel” button: Discards the entered data or resets edited data to its original state and exits Edit mode.
General
Customer ID: Every customer in JTL-POS must have a unique customer ID. The customer ID is usually assigned using the number ranges you have defined. Please see: Setting up number ranges.
Customer group: Each customer is assigned to at least one customer group in JTL-POS. Please see Creating customer groups to learn how to create customer groups in JTL-POS.
Company name or title/first name/last name: You must at least enter either a company name or a title and a first and last name for a customer. For corporate customers, you can also enter the VAT ID and the Accounts receivable number.
Street name and no.
If necessary, enter the customer’s address here. This information is optional.
Contact information
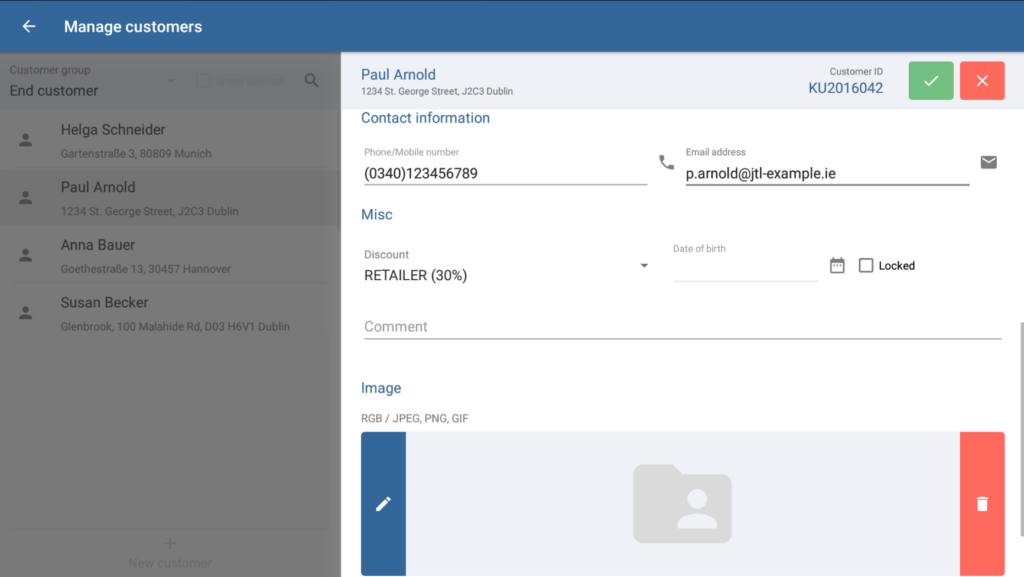
Phone/Mobile number: If necessary, enter a phone number at which your customer can be reached.
Email address: Enter your customer’s email address here. This information is optional, but you can only send a receipt to a customer by email if you have entered an email address in the customer’s master data.
Miscellaneous
Discount: Select the discount you would like to assign to your customer. To do this, you must have created at least one discount of the type Customer beforehand. For more information, go to: Managing discounts.
Locked: If you activate this check box, the customer can no longer be assigned to receipts.
Comment: Enter a comment about the customer here. This can only be viewed internally.
Image
Here, you can upload a photo of your customer. This makes it easier for your cashiers to identify a customer.
Related topics


