Thank you for using the English version of the JTL-Guide!
We are currently still building up the English documentation; not all sections have been translated yet. Please note that there may still be German screenshots or links to German pages even on pages that have already been translated. This guide mostly addresses English speaking users in Germany.
We are currently still building up the English documentation; not all sections have been translated yet. Please note that there may still be German screenshots or links to German pages even on pages that have already been translated. This guide mostly addresses English speaking users in Germany.
Accepting cash
Stand: JTL-POS Version 1.0.2.5
Your task/initial situation
You have added all the items that a customer wants to purchase to the receipt at the checkout and the customer would now like to pay with cash.
Note for users of JTL-POS ERPConnected: If you want to also create an invoice for the customer during checkout, read the help pages on: Printing or sending invoices.
Checkout
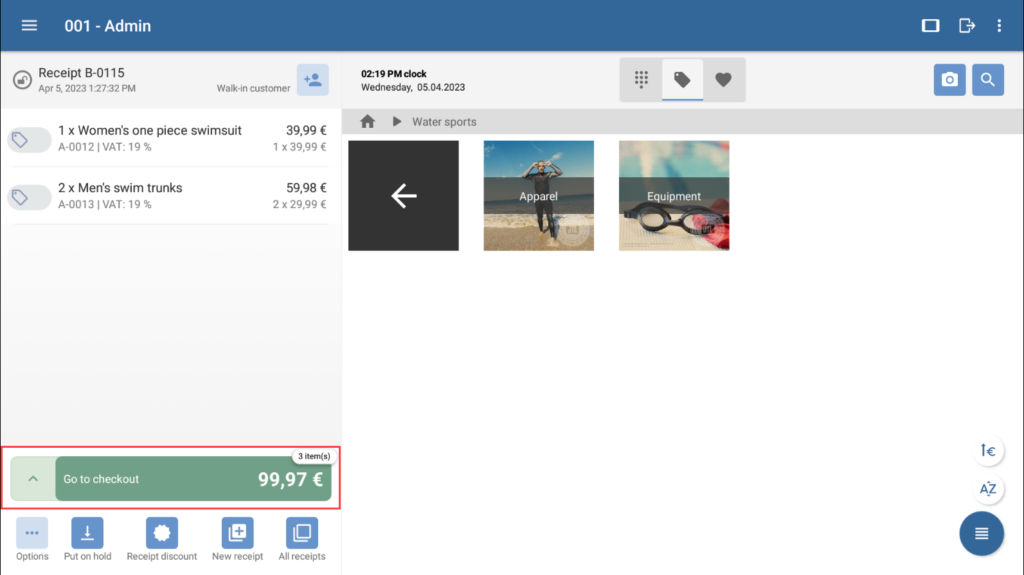
Once all items have been added to the receipt, you can move on to the payment.
- Tap on Go to checkout at the bottom of the receipt. The Payment view will open.
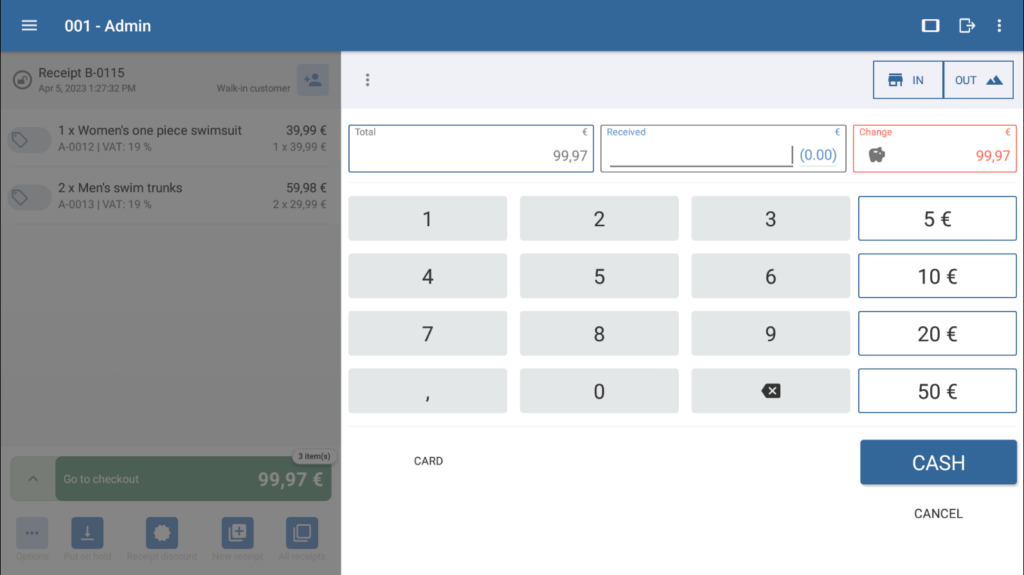
- Use the number block or the cash buttons to enter the amount of money that the customer gives you. The amount will be displayed in the Received field. The Change field will then show how much change the customer will receive.
Alternative: If the customer hands you a matching amount, tap CASH directly without entering the amount.
You can adjust the amounts displayed on the cash buttons in the Payments dialogue box, which you can access via the menu Settings > Payments.
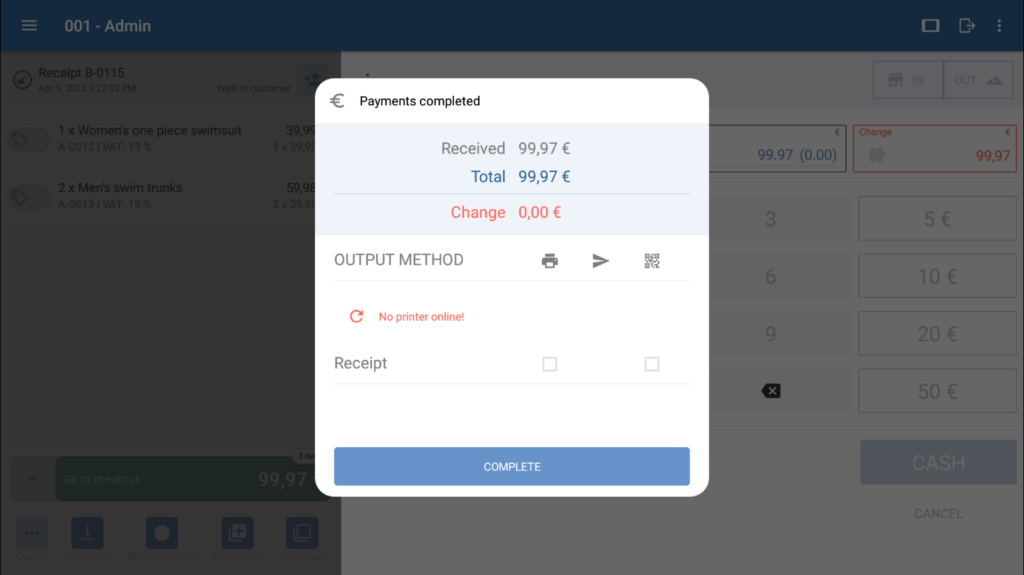
- Tap CASH. The payment will be posted and the Payments completed dialogue box will open to display the key data of this payment. The data includes the amount of change that your customer is to receive in cash.
- Use the check boxes to select which receipt is to be issued along with the output method.
Info: You may only print receipts if a printer has been set up and is currently online (see: Connecting printers to JTL-POS). You can only send receipts via email if an email account has already been set up in JTL-POS (see: Configuring the email server). If you have assigned a customer to the receipt, the email will be sent to the email address stored in the customer’s master data. If no customer has been assigned to the receipt, you can enter the email address after selecting the send option.
- Tap Close. The receipt is closed and you can now start a new receipt.
Note for users of JTL-POS ERPConnected: If you use JTL-POS ERPConnected, paid receipts are sent to JTL-Wawi with the next synchronisation and an order is created. To view the receipt, the Also show POS processes in JTL-Wawi function must be enabled in JTL-Wawi under the menu Admin > Global settings > Processes. If you have assigned a customer to the receipt, the customer data is saved in the order. If no customer has been assigned, the cash register name is entered into the Customer ID field in the order and the Walk-in customer identifier is entered into the Last name field.
Related topics


