We are currently still building up the English documentation; not all sections have been translated yet. Please note that there may still be German screenshots or links to German pages even on pages that have already been translated. This guide mostly addresses English speaking users in Germany.
Creating image sliders with the OnPage Composer
Your task/initial situation
Creating a slider
- Log in to the back end of JTL-Shop and switch to the front end of JTL-Shop.
- Open the page you want to edit and click the OnPage Composer icon at the top left of the page to open the OnPage Composer for that page.
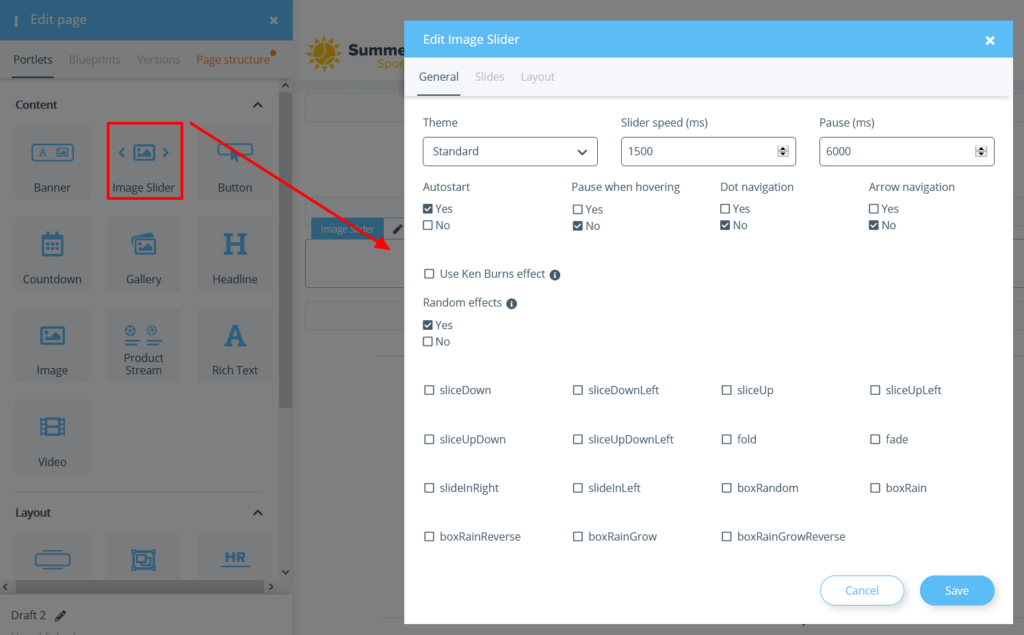
- Drag the Image Slider portlet in the OnPage Composer to the desired position. The Edit Image Slider window opens.
- Configure the settings on the General tab (see below).
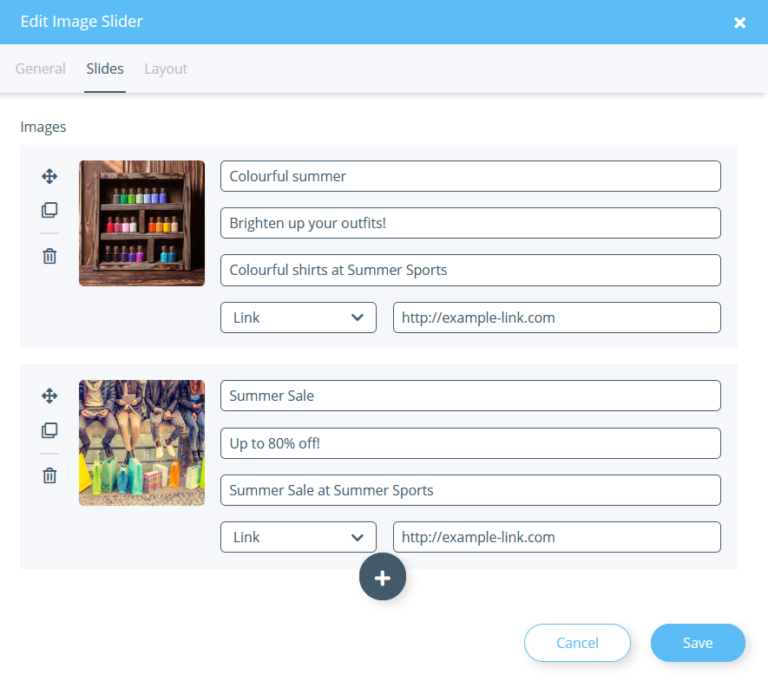
- Switch to the Slides tab.
- Click on Click to upload. A dialogue opens in which you will find all media files uploaded for the OPC so far.
- Drag and drop the image file for your slider into the window or right-click in the window and select Upload file, navigate to the file, and select it.
- Then double-click on your graphic file to apply it to your slider.
- Enter a title and description. Both are displayed when you move the cursor over the image. The alternative text is mainly relevant for search engines and should describe the image as well as possible.
- Under No action, select whether a link should be added to the image. You can enter it under Link.
- Click on the plus icon to add more slides. Then save the slider.
- Follow the further steps to preview and publish an edited page at Editing pages with the OnPage Composer.
General info tab
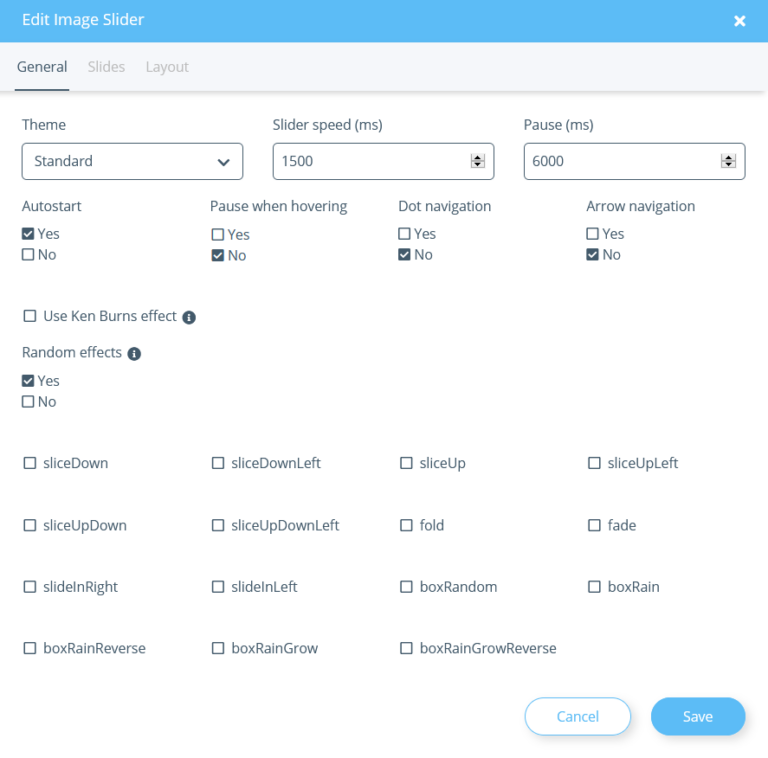
In this tab, you make the settings for the slider.
Theme: Here you can select a theme to be used for the slider.
Slider speed (ms): Here you can define how long an animation should last between two slides (in milliseconds).
Pause (ms): Here you can define how long a slide is to be displayed before changing to the next slide.
Autostart: Here you can specify whether the slider should start automatically when the page is called up.
Pause when hovering: Here you can determine whether the slider stops as soon as a customer moves the cursor over it.
Dot navigation: Displays a navigation in the form of dots at the bottom edge of the slider.
Arrow navigation: Displays navigation in the form of directional arrows on the left and right sides of the slider.
Use Ken Burns effect: Activates the so-called Ken Burns effect. This automatically generates slight zooms and image movements in the slider. If you activate this option, the options Autostart, Pause when hovering, Dot navigation, Arrow navigation, and Effects are overwritten.
Effects: Here you can set which effects are to be used for the transitions between the slides. Random effects selects randomly from the effects listed below.
To activate specific effects, highlight it. You can deactivate selected effects by unchecking them.
Layout tab
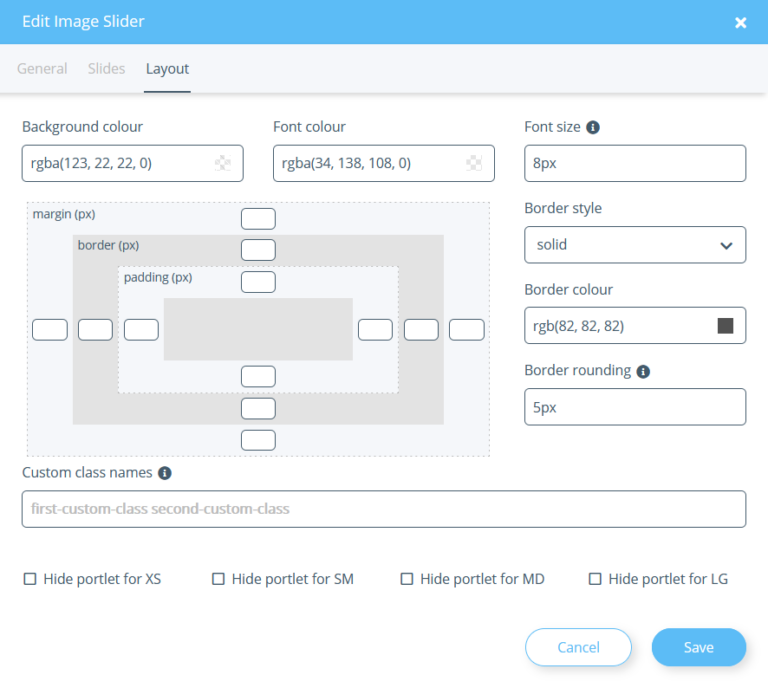
In this tab you can set the layout of the slider.
Background colour: Here you can set a colour to be displayed in the background of the slider. The colour is only visible if you set a padding (see below).
Font colour: Here you set the colour of the font that is displayed below the slides.
Font size: Here you set the size of the font. Enter a CSS value, e.g 5px, 0.5em, etc.
Border style/Border colour: Here you can specify whether the slider should have a border and what colour it should be.
Border rounding: Here you can specify whether the border should be rounded. You can specify the distance from the corner at which the rounding will start. You must specify a border style before you can do this. Enter a CSS value, e.g 5px, 0.5em, etc.
Custom class names: Enter here the class names to be appended to the class attribute of the portlet. The names you assign here can be, for example, CSS classes that are defined in the theme of the template. For more information, please see the developer documentation.
Hide portlet: Select here whether the portlet should be hidden when viewed on certain end devices. XS stands for mobile phones, SM for tablets, MD for desktop computers and LG for large desktop computers.
Margin: Here you can set for each page how much space in pixels should be between the element and the (imaginary) edge. The element is reduced/moved accordingly.
Border: Here you can set the size of the frame in pixels for each page.
Padding: Here you can set for each page how much space in pixels should be between the element and the (imaginary) edge.
Related topics


