We are currently still building up the English documentation; not all sections have been translated yet. Please note that there may still be German screenshots or links to German pages even on pages that have already been translated. This guide mostly addresses English speaking users in Germany.
Activating and deactivating categories and items
Your task/initial situation
Activating categories
In JTL-Wawi, you can activate and deactivate individual categories including their subcategories and items for individual branch offices for JTL-POS.
- Open the Items area.
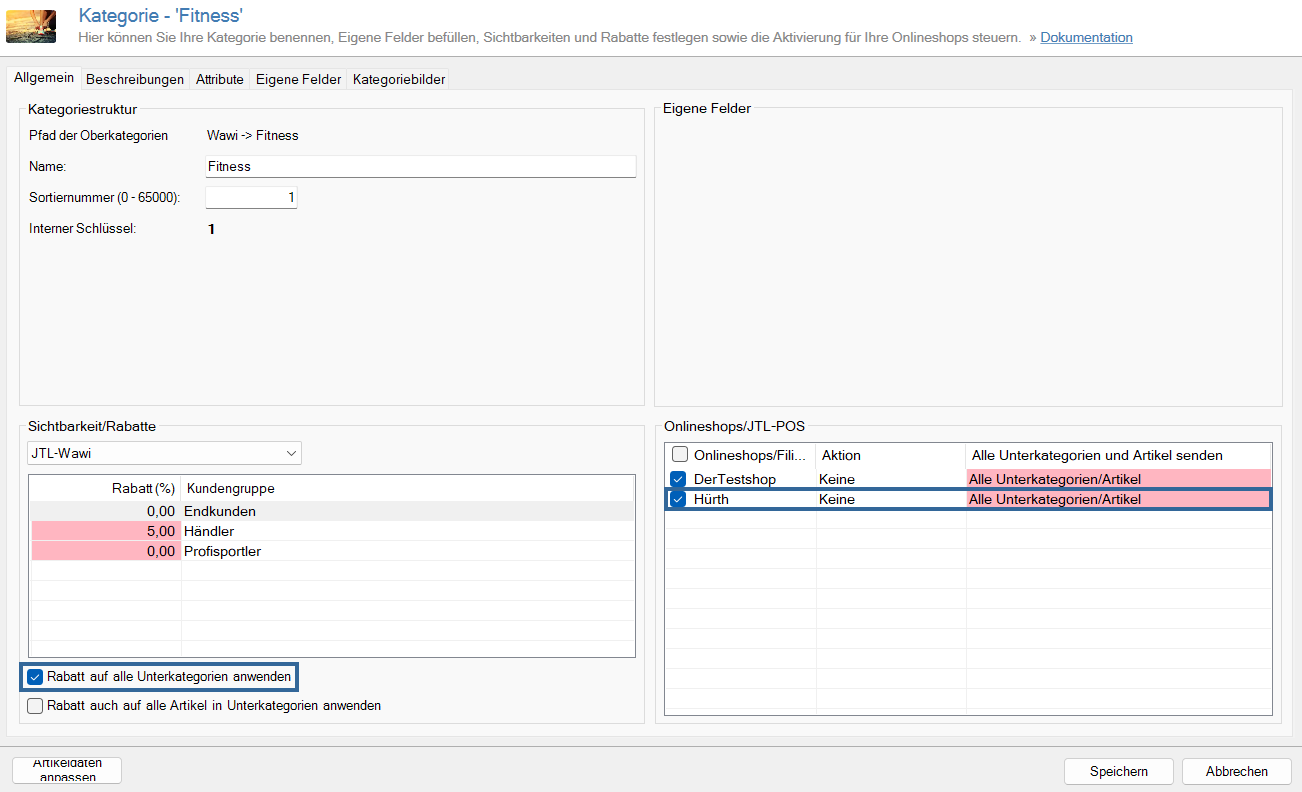
- Double-click on the category you want to activate for JTL-POS. The Category master data opens.
- In the Online shops/JTL-POS section, the branch offices specified for JTL-POS are displayed. Activate the branch offices to which the categories and items are to be transferred.
- If, aside from the open category, you want to activate all associated subcategories including their items for JTL-POS, go to the Visibility/Discounts area and enable the option Apply visibility to all child categories.
- Click Save. With the next synchronisation, the categories and items are transferred to the branch offices in JTL-POS.
- Repeat the steps for all categories you want to activate for JTL-POS.
Deactivating categories
To deactivate a category along with its subcategories and items for individual branch offices, remove the check mark next to the branch office in question. With the next manual or automatic synchronisation, the corresponding categories and items will be removed from JTL-POS.
Activating individual items
If you want to activate a single item for a branch office, the category in which the item is located must also be activated.
- Open the Items area.
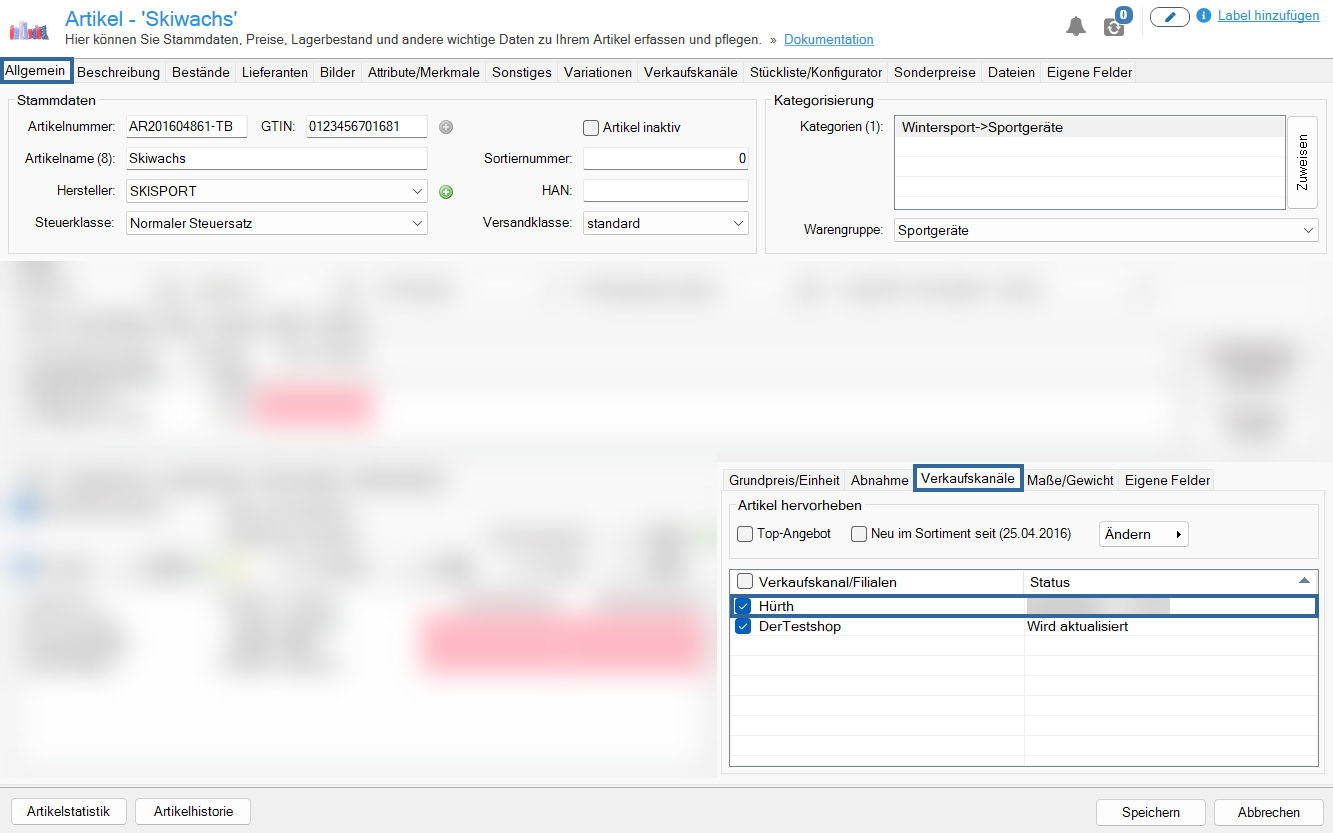
- Go to the item you want to activate for JTL-POS and double-click to open the Item master data.
- In the General tab, click on the Sales channels tab.
- In the Sales channel/Branches column, activate the branches for which you would like to activate the item.
- Click Save.
With the next synchronisation, the item is transferred to the corresponding branch offices in JTL-POS.
Deactivating individual items
To deactivate an item for individual branch offices, deselect the check box next to the branch office. With the next manual or automatic synchronisation, the item is removed from JTL-POS.
Related topics

